The Roofing Plan Mistake That Ruins Nigerian Buildings and How to Draw It Right
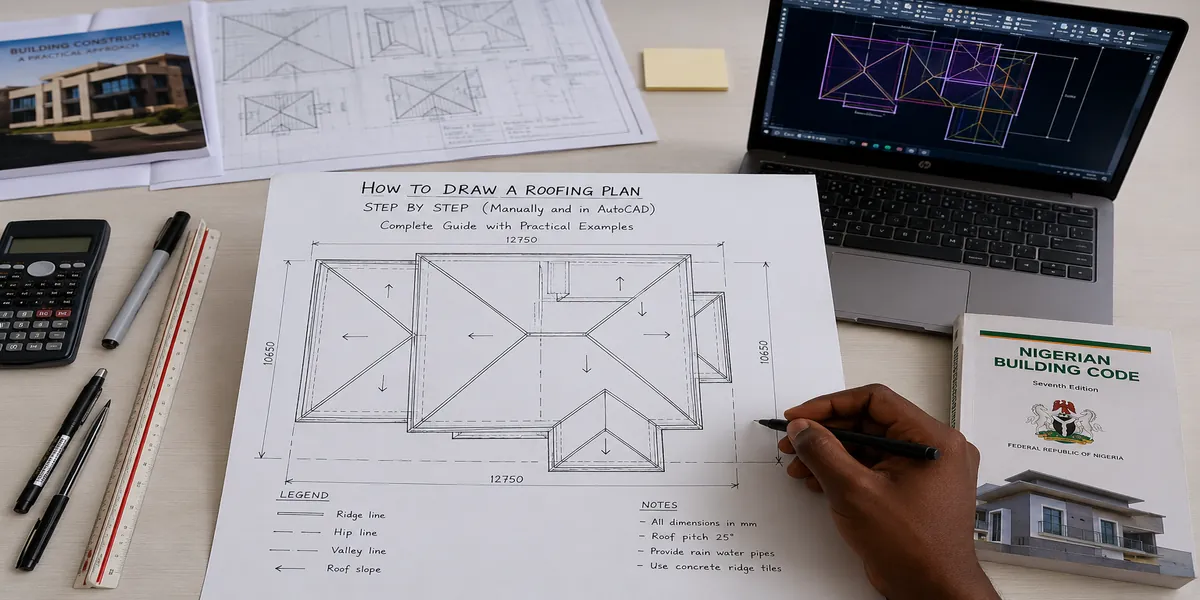
How to Draw a Roofing Plan Step by Step (Manually and in AutoCAD)
If you want to know how to draw a roofing plan step by step, here is the short answer first: you start from your building’s wall plan, mark out your roof pitch and overhang, decide your roof type based on your building shape and our Nigerian climate, then draft the roof outline either by hand using simple projection lines, or in AutoCAD using polylines, offsets, and slope annotations. That is the summary. Now let me break it down properly, the way I would explain it to someone sitting with me in the studio.
I know why you are here. A lot of people builders, students, even some site supervisors can draw a floor plan reasonably well, but the moment it is time to draw the roof, everything scatters. And this is not a small matter o, because I have seen it happen: a roof drawn wrongly on paper leads to a roof built wrongly on site, and that one mistake alone can cost more to correct than almost any other part of the building. Especially now that plots are getting smaller in our cities and every square meter matters, getting your roofing plan right the first time is not optional again it is survival.
Why the Roofing Plan Deserves Its Own Careful Attention
In my experience, many people treat the roof plan as something you “figure out” after the real design work is done. That thinking is what causes problems. Based on projects I have worked on, the roof is one of the most expensive single elements of a Nigerian building, and it is also the part most exposed to our weather realities heavy rains, strong sun, and sometimes windy conditions depending on your location. A roof plan that isn’t carefully thought through leads directly to leaking roofs, wasted roofing sheets, and constant maintenance headaches for the owner.
Understanding Your Roof Type Before You Draw Anything
Before touching a pencil or opening AutoCAD, you need to decide what type of roof suits your building and your plot.
- Gable roof: Simple, affordable, and sheds rain well. Good for straightforward rectangular building shapes and tighter budgets.
- Hip roof: Slopes on all sides, gives a more finished, premium look, and handles wind slightly better, but uses more roofing material and is more complex to draw and construct.
- Combination roof (gable and hip mixed): Common on Nigerian duplexes where the building shape is not a simple rectangle.
- Flat or low-slope roof: Less common for residential buildings in our climate because of drainage challenges, unless properly waterproofed and detailed.
One lesson I learned early is that your roof type should match your building’s shape and your budget, not just what looks nice in a picture online. A complicated hip roof drawn onto an irregular small-plot building will waste material and give the contractor endless headaches on site.
Step 1: Start From Your Approved Wall Plan
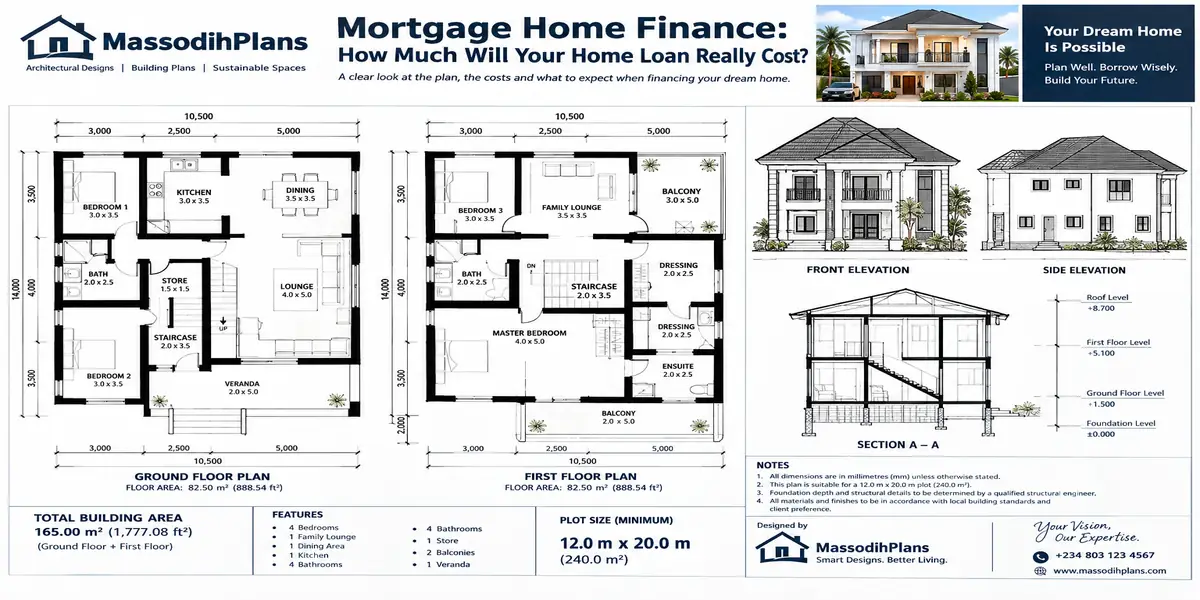
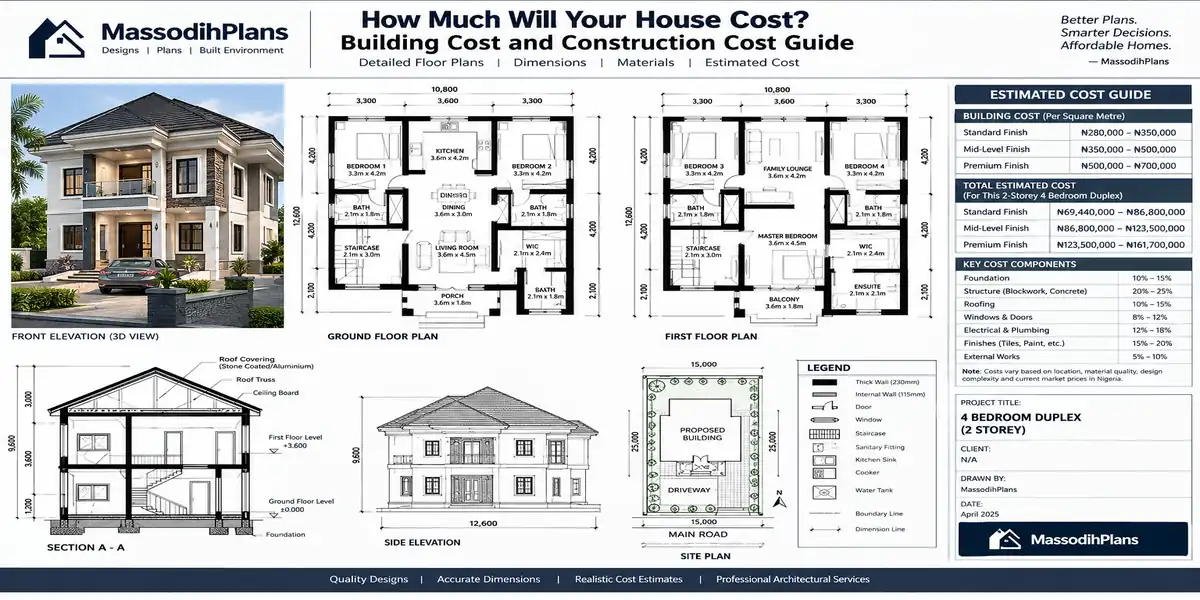
You cannot draw a roofing plan properly without first having your finished wall or floor plan ready, because the roof plan is essentially a projection built directly from your wall layout.
- Confirm all your external wall lines are finalized — no more room adjustments at this stage.
- Note where your roof needs to extend beyond the walls (the overhang), typically 450mm to 600mm for our climate, to protect walls from driving rain and reduce heat gain.
- Identify any changes in building height or roof level, such as a lower roof over a garage or veranda attached to a taller main roof.
Common Beginner Mistake: Starting the roof plan before the wall plan is fully settled. Any late change to the walls forces you to redo the roof plan from scratch, and I have seen this waste hours of work that proper sequencing would have avoided.
Step 2: Drawing a Roofing Plan Manually Step by Step
For those who want to understand the logic by hand first before jumping into software, here is the manual approach.
- Trace your wall outline onto a fresh sheet, using your wall plan as the base reference, including all overhangs projected outward from each wall face.
- Draw your ridge lines: the highest points of the roof typically running along the center of the longest span of the building, or wherever your roof design dictates.
- Draw your hip or valley lines from each corner of the building toward the ridge, at a consistent angle, if you are doing a hip roof. For a simple gable, you only need the two sloped planes meeting at the ridge.
- Mark your roof pitch: commonly between 22 and 35 degrees for sheet roofing in our context, depending on the roofing material and rainfall intensity in your area.
- Indicate slope direction with arrows, showing which way rainwater will flow off each roof plane toward your gutters.
- Add your gutter and downpipe positions, making sure they align with practical points where rainwater can be channeled away from the building foundation, not toward it.
Step 3: Drawing a Roofing Plan in AutoCAD Step by Step
Once you understand the manual logic, AutoCAD simply lets you execute it with more precision and speed.
- Import or reference your wall plan as a base layer, and create a new dedicated layer specifically for the roof plan, so the two don’t get mixed up.
- Offset your wall outline outward using the OFFSET command to represent your roof overhang distance (450mm to 600mm as discussed).
- Use PLINE to draw your ridge, hip, and valley lines, following the same logic as the manual method — hips run from each corner toward the ridge at a consistent angle.
- Use the LINE and ARRAY commands to represent roofing sheet direction or purlin spacing if you want to show construction detail, though this is optional for a basic presentation roof plan.
- Annotate roof pitch and slope direction using MTEXT and simple directional arrows drawn with LEADER or basic line-and-arrowhead blocks.
- Dimension your overhangs and ridge positions using DIMLINEAR, the same way you would dimension a floor plan, so a contractor can build exactly what you drew.
- Add a roof plan title block and north arrow, consistent with the rest of your drawing set, so it reads clearly alongside your floor plans and elevations.
Common Beginner Mistake: Forgetting to offset for the overhang before drawing hip and valley lines. If you draw your roof lines directly on the wall outline without accounting for overhang first, your entire roof geometry will be wrong once you try to extend it.
Nigerian Reality Layer: What You Must Consider Beyond the Drawing
This is the section most tutorials skip entirely, and it is exactly where real projects succeed or fail.
- Unstable material prices: Roofing sheet and timber prices shift often. From what I have seen in practice, it pays to finalize your roof design and material specification early, then source materials in one planned batch rather than buying piecemeal as prices rise.
- Power supply realities: If your roofing involves any site fabrication (welding trusses, for instance), plan your site work schedule around your power situation, whether that means generator use or working within available public supply hours.
- Flooding and drainage: Your roof plan must work together with your site drainage plan. I have encountered this situation multiple times — a roof correctly designed on paper still causes flooding at the entrance because gutter and downpipe positions weren’t coordinated with the ground drainage channels.
- Heat management: Wider overhangs and, where possible, ceiling insulation under the roof significantly reduce indoor heat, which matters a lot given how hot our afternoons can get.
- Compound security and gatehouse positioning: If your compound includes a gatehouse or security post, make sure its roof design is planned alongside the main building roof, not as an unrelated afterthought — it affects the overall roofline and drainage layout of the compound.
- Generator space and borehole planning: Roof overhangs and gutter downpipes should not discharge water directly onto generator housing or borehole equipment plan these positions together from the start.
Small Plot Optimization: Roofing on Tight Plots
On a small or narrow plot, your roof plan needs extra thought:
- Overhang restrictions: If your setback allows very little room, you may need to reduce your overhang on that side, or use a parapet detail instead, to avoid the roof projecting over the boundary or into a neighbor’s airspace.
- Circulation efficiency above: Where you have a duplex on a tight plot, keep your roof geometry simple over the stairwell and corridor areas — an overly complex roof over small internal spaces just adds cost without adding usable value.
- Compact luxury: A clean, well-detailed gable roof with quality ridge capping and gutters often looks more premium on a small plot than an overly ambitious hip roof that the plot doesn’t comfortably accommodate.
Human Lifestyle Layer: How Roof Design Affects Daily Living
- Family lifestyle suitability: A roof with proper ceiling height and insulation directly affects how comfortable bedrooms feel, especially for families without constant access to air conditioning.
- Children’s safety: If you’re including any flat roof deck or accessible roof area, plan parapet heights and access points with child safety in mind from the drawing stage.
- Elderly accessibility: For homes with elderly residents, avoid roof designs that force complicated internal ceiling drops or low headroom areas near ground floor rooms they use daily.
- Work-from-home considerations: If a room under the roof is intended as a home office, pay attention to heat gain on that section of roof — orientation and overhang matter here just as much as in bedrooms.
- Future family growth: If you’re planning a future upper floor extension, design your current roof structure in a way that a licensed structural engineer confirms can be adapted later, rather than one that must be completely demolished to add a floor.
Construction Experience Layer: What Builders Usually Get Wrong
While assisting with development control activities, I witnessed firsthand how frequently roofing goes wrong on site, even with a correct drawing in hand.
- Contractor mistakes: Rushing truss installation without following the drawn pitch and spacing accurately, leading to sagging or uneven roof lines.
- Material waste: Poor cutting planning for roofing sheets, especially on hip roofs, wastes significant material if the contractor doesn’t plan sheet layout against the drawn roof geometry first.
- Supervision tips: Always confirm the roof pitch on site with an actual level or angle tool before sheets go on I have seen roofs built at the wrong pitch because nobody checked against the drawing during the truss stage.
- Structural planning awareness: A roofing plan is not a structural drawing. Always have a structural engineer confirm truss sizing and support spacing; the architectural roof plan shows geometry and drainage, not load calculations.
Cost Estimate Considerations
You cannot get an exact figure from a drawing alone, but your roof decisions heavily influence your final cost:
- Roof complexity: Every additional hip, valley, or change in roof plane increases both material and labor cost significantly compared to a simple gable.
- Roofing material choice: Material selection affects not just price but also durability and maintenance cost over the building’s lifetime — a decision that should be locked in early, given how prices shift.
- Overhang size: Larger overhangs cost more in material but reduce long-term wall maintenance and heat gain, so it is often a worthwhile investment rather than a cost to minimize blindly.
Experience has taught me that clients who finalize their roof design early and source materials in one planned purchase almost always spend less overall than those who make roofing decisions piecemeal as construction progresses.
Investment Layer: Why Your Roof Plan Affects Long-Term Value
- Resale potential: A well-detailed, properly proportioned roof significantly affects how a building looks and is valued at resale it is one of the most visually dominant elements of any house.
- Rental profitability: Roofs with poor drainage detailing lead to recurring maintenance costs that eat into rental income over time; getting it right from the drawing stage protects that income.
- Estate suitability: If you’re building within an estate with design guidelines, confirm your roof type and pitch align with the estate’s architectural requirements before finalizing your drawing.
- Long-term practicality: A roof designed with proper overhangs, drainage, and material specification from the start saves significant maintenance cost over the life of the building.
Common Mistakes to Avoid When Drawing a Roofing Plan
- Starting the roof plan before the wall plan is fully finalized
- Ignoring overhang requirements before drawing hip and valley lines
- Choosing a roof type that doesn’t match the building shape or budget
- Failing to coordinate gutter and downpipe positions with site drainage
- Treating the roof plan as a structural drawing instead of a geometry and drainage drawing
- Overcomplicating the roof on a small plot where a simple design would perform and look better
Frequently Asked Questions
Can I draw a roofing plan without AutoCAD?
Yes. The manual method covered above teaches you the same logic wall outline, overhang, ridge, hip/valley lines, and slope direction which you can execute by hand before or instead of using software.
What roof pitch is best for Nigerian roofing sheets?
Most sheet roofing in our climate works well between 22 and 35 degrees, though your specific roofing material manufacturer’s recommendation should always guide the final figure.
Do I need a structural engineer if I already have a roof plan?
Yes. The architectural roof plan shows shape, slope, and drainage. Truss sizing and structural support require a licensed structural engineer’s calculations separately.
What is the biggest roofing mistake on small plots?
Choosing an overly complex roof type that the plot’s setback and building shape cannot comfortably accommodate, leading to overhang restrictions and higher unnecessary cost.
conclusion
I did not learn this from a textbook alone both classroom learning and years of field observation support everything covered in this article. Your roofing plan is not just a drawing exercise; it is the decision that protects your building from our weather, protects your wallet from wasted material, and protects your family’s comfort for decades to come. Take your time on this stage. Confirm your wall plan first, choose a roof type that matches your plot and budget, and don’t rush past the overhang and drainage details they matter far more than they look on paper.
If you want to see these roofing principles applied to real, ready-made designs, browse our plans library for layouts across different plot sizes, or explore our plan school section for more step-by-step lessons like this one. If you’re working on your own project and want expert support getting your roofing plan right, our design services are there to help directly. And if this is your first time here, start from our homepage (massodihplans.com) to see everything we offer.
Read this related article to complete this lesson
- How Do You Design a Functional Mosque Building Plan Step by Step?
- How Is a Modern Court Building Designed for Safety and Efficiency? (Complete Guide)
- Nigerian Building Approval Checklist for Overseas Property Owners
- Building a House in Nigeria While Living Abroad: Complete Approval and Documentation Guide
- How to Draw a Floor Plan Step by Step: A Complete Beginner’s Guide
- Modern Nigerian House Plans That Meet International Building Standards
- Best Roofing Sheets for Nigeria Compared with International Brands
- Best Roofing Sheets for Nigerian Weather: Complete Guide
- How to Choose Roofing Materials for Nigeria’s Climate: Advice for Overseas Homeowners
- Cost of Roofing a 4 Bedroom Duplex in Abakaliki (Complete Guide)
- Cost of Blocks, Cement, Iron Rod and Roofing Sheets in Uyo: Real Prices From the Field Now
- Cost of Roofing a Bungalow and Duplex in Abuja Small Plot Now
- How to Draw a Building Plan Section A-A, B-B: Step by Step Complete Beginner’s Guide
- How to Draw Building Elevations Step by Step (Manually and in AutoCAD): Complete Guide for Beginners