How to Create House Plans Using Graph Paper
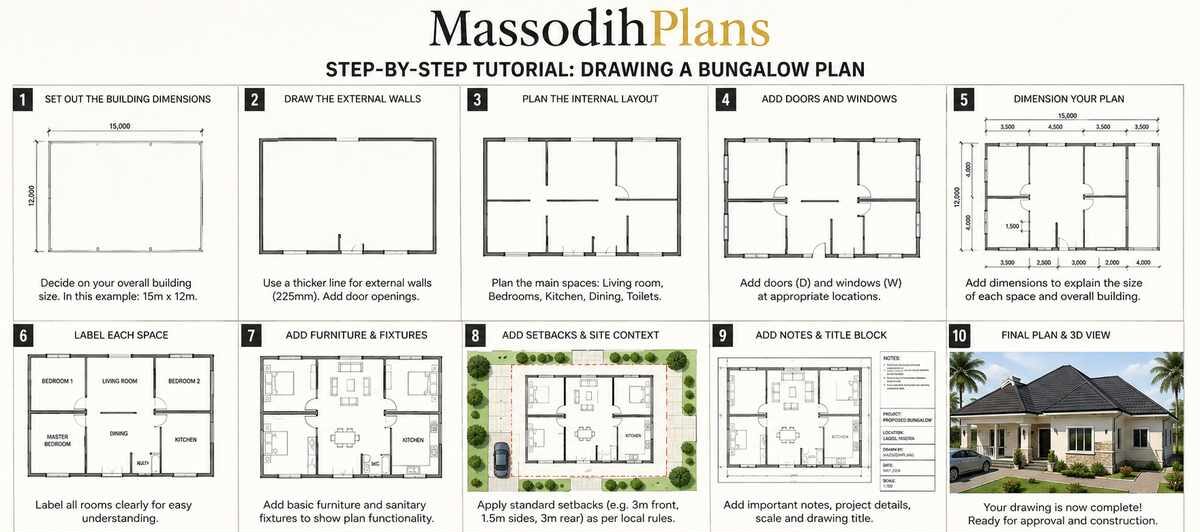
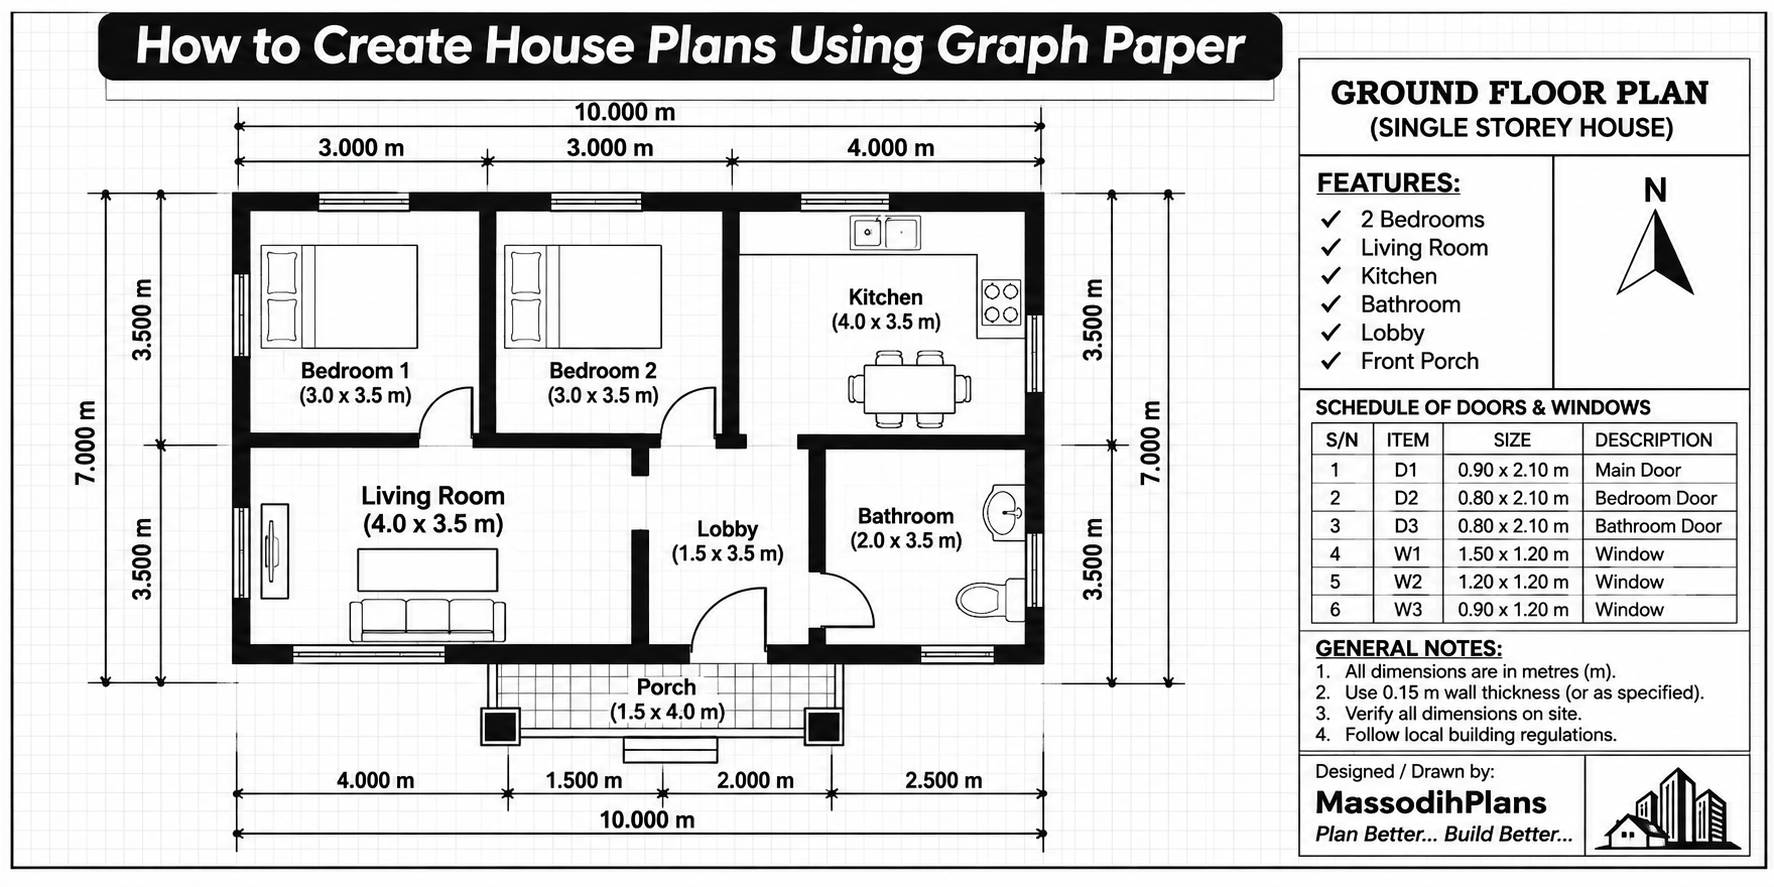
To create a house plan on graph paper, pick one scale and keep it (on 1 cm graph paper, 1 square = 0.5 m gives the standard 1:50). Draw your plot from the survey measurements, then subtract your setbacks to find the rectangle you are actually allowed to build in. Add up the rooms you want and check that they fit inside that rectangle before you draw a single wall. Only then draw the walls on the grid lines, cut the door and window openings, place scaled furniture, and write every dimension on the sheet. The order matters more than how neat your lines are.
I put the fit check before the drawing on purpose. Most graph paper tutorials start with one room and a sofa, which is fine for rearranging a sitting room. A house is different because it sits on land, and the land has rules around it. Draw first and check later, and you can finish a beautiful plan that is 30 square metres bigger than your plot allows. Step 3 shows exactly that, using the same 3-bedroom house on a full plot and on a half plot. One fits with room to spare. The other doesn’t fit at all, and I’ll show you three ways out.
You don’t need to be an architect and you don’t need software. You need A3 graph paper, a pencil, a ruler, a calculator and about two evenings. It works the same whether you’re a family buying your first plot in Uyo or Lagos, someone abroad briefing an architect back home, or a student in Berlin or Singapore learning how a plan is put together. Only the units change, and there’s a table for that near the end.
What to put on your desk before the first line
Let’s start with the desk, because the wrong paper wastes more time than the wrong design.
| Item | Why you need it |
|---|---|
| A3 graph paper, 1 cm squares | Big enough for a whole house at 1:50. A4 is too small for most houses (you’ll see why below). |
| 2H and HB pencils | 2H for light construction lines, HB for the final walls. |
| 30 cm ruler or a 1:50 / 1:100 scale rule | Measuring in millimetres on paper is faster than counting squares. |
| Set square | Keeps corners at 90 degrees. A book corner works in an emergency. |
| 5 m tape and a 30 m tape | The short one for rooms, the long one for the plot. |
| Tracing paper | Lets you try a new layout over the old one without redrawing. |
| Thin card and scissors | For furniture cut-outs (Step 7). |
| Calculator | Every formula in this guide is simple, but you will use it. |
If you print your own graph paper, set the printer to “actual size”, not “fit to page”. Then measure one square with a ruler. It must be exactly 10 mm. Many printed sheets come out 3 to 5 percent small, and every dimension you draw on them is quietly wrong.
Choose the scale first, because it decides what fits on the paper
With the desk ready, the first real decision is the scale. Everything after it depends on this choice.
A scale is a promise: 1 mm on paper equals a fixed number of millimetres on the ground. The number after the colon is the scale denominator, S. Here are the three formulas you need.
Formula 1: Scale from your grid
S = (metres per square × 1000) ÷ square size in mm
- 1 cm squares, 1 square = 0.5 m: S = 500 ÷ 10 = 50, so the scale is 1:50
- 1 cm squares, 1 square = 1 m: S = 1000 ÷ 10 = 100, so 1:100
- 5 mm squares, 1 square = 0.25 m: S = 250 ÷ 5 = 50, so 1:50 again, only with a finer grid
And Formula 2: Paper length needed
Paper length (mm) = real length (mm) ÷ S
Formula 3: Smallest scale that will fit
S minimum = real length (mm) ÷ usable paper length (mm)
Usable paper is the sheet minus a 15 mm margin all round. That gives 267 mm × 180 mm on A4 (landscape) and 390 mm × 267 mm on A3.
A home-owner guide from Resene in New Zealand says house plans traditionally use 1:50, which makes 20 mm on paper equal one metre, and that 1:100 sits more comfortably on an A3 sheet. That matches the numbers above: on 1 cm paper, 20 mm is two squares, so 1 square is 0.5 m. habitatbyresene
Here is what each scale lets you draw on a 1 cm grid:
| Scale | 1 square equals | A4 covers (18 × 26 squares) | A3 covers (26 × 39 squares) | Use it for |
|---|---|---|---|---|
| 1:25 | 0.25 m | 4.5 × 6.5 m | 6.5 × 9.75 m | One room, a kitchen or bathroom detail |
| 1:50 | 0.5 m | 9 × 13 m | 13 × 19.5 m | The whole floor plan |
| 1:100 | 1 m | 18 × 26 m | 26 × 39 m | The plot and where the house sits |
| 1:200 | 2 m | 36 × 52 m | 52 × 78 m | Very large plots, estates |
Worked example. Take a house that measures 11.5 m × 10.5 m on the outside. At 1:50 on A4 landscape:
- 11 500 ÷ 50 = 230 mm, which fits the 267 mm side.
- 10 500 ÷ 50 = 210 mm, which does not fit the 180 mm side. It is 30 mm too big.
So A4 fails by a few centimetres, and A3 works. You only discover this by doing the sum before you start. Otherwise you find out on the last wall.
The two-sheet method. A whole plot and a whole house rarely fit on one sheet at a useful scale. So draw two sheets:
- Sheet 1 (site plan), 1:100. The plot, the setbacks, the gate, the house as a simple rectangle.
- Sheet 2 (floor plan), 1:50. The house only, with rooms, walls, doors and windows.
Sheet 1 tells you what you are allowed to build. Sheet 2 tells you what you want to build. Step 3 compares them.
Draw a scale bar on every sheet, a short line marked 0 to 5 m. Photocopies, phone photos and printer settings all change the size of a drawing, but a scale bar changes with them. A written “1:50” doesn’t.
Step 1: Turn your plot measurements into metres
With the scale chosen, you need the land’s real dimensions. Take them from your survey plan, not from what people call the plot. “Half plot” and “full plot” mean slightly different things in different states and layouts.
Formula 4: Feet to metres
metres = feet × 0.3048
| Plot (feet) | Metres | Area (m²) | Draw it on 1:100 as | Area drawn (m²) |
|---|---|---|---|---|
| 40 × 80 | 12.19 × 24.38 | 297.3 | 12 × 24 squares | 288 |
| 50 × 50 | 15.24 × 15.24 | 232.3 | 15 × 15 squares | 225 |
| 50 × 100 | 15.24 × 30.48 | 464.5 | 15 × 30 squares | 450 |
| 60 × 120 | 18.29 × 36.58 | 668.9 | 18 × 36 squares | 648 |
Notice that I round the plot down to a whole metre. For a 50 × 100 ft plot that costs you 14.5 m², about 3.1 percent of the land. In return, anything that fits on your drawing will fit on the real ground. If you round up, you can design a house that doesn’t fit. Round the plot down and round the house to the nearest half-square.
Check that the plot is really a rectangle. Many plots are not. Two measurements will tell you:
The diagonal check. For a true rectangle the diagonal is d = √(W² + D²). For 15.24 × 30.48 m:
d = √(232.26 + 929.03) = √1161.29 = 34.08 m
Measure both diagonals on the ground. If they differ by more than a few centimetres, the plot is not a rectangle and you must draw its true shape.
The 3-4-5 check. To test a corner, mark 3 m along one boundary and 4 m along the other. The distance between the two marks must be exactly 5 m. A 6-8-10 triangle is more accurate on a big plot.
If the plot is irregular. A four-sided shape is not rigid. Four side lengths can make many different shapes, so four sides alone are not enough to draw it. Add one diagonal and the shape is locked, because a triangle cannot change shape. Draw the base line, then find each remaining corner by swinging two arcs from the ends of the base at the scaled distances. Where the arcs cross is the corner. Your survey plan’s bearings and distances give you the same information.
Step 2: Draw the plot and subtract the setbacks
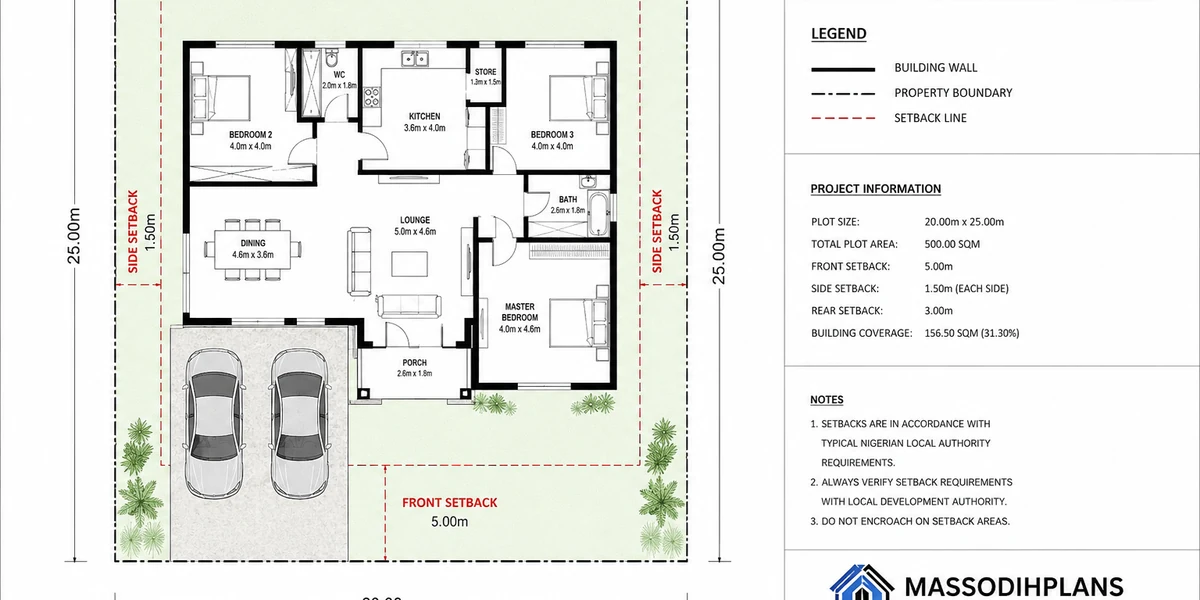
Now that the plot is on paper, mark the strip around it where you cannot build. That is the setback, and what is left is your buildable envelope.
Formula 5: Buildable envelope
- Buildable width = W − (left setback + right setback)
- Buildable depth = D − (front setback + rear setback)
- Envelope area = buildable width × buildable depth
Formula 6: Plot coverage
Coverage % = (building footprint ÷ plot area) × 100
If your authority sets a maximum coverage, the smaller of the envelope and the coverage cap is your real limit, which I’ll call L.
For the numbers below I use example setbacks: front 4.5 m, rear 3.0 m, sides 1.5 m each. These are illustrations only. Your planning authority sets the real figures, and they change with the state, the layout and the road type. Get them in writing before you finalise anything.
| Full plot (50 × 100 ft) | Half plot (50 × 50 ft) | |
|---|---|---|
| Drawn plot (W × D) | 15 × 30 m | 15 × 15 m |
| Plot area | 450 m² | 225 m² |
| Buildable width (15 − 1.5 − 1.5) | 12.0 m | 12.0 m |
| Buildable depth | 30 − 4.5 − 3.0 = 22.5 m | 15 − 4.5 − 3.0 = 7.5 m |
| Envelope area | 270 m² | 90 m² |
| Envelope as % of plot | 60% | 40% |
| Example 50% coverage cap | 225 m² | 112.5 m² |
| Limit L that applies | 225 m² | 90 m² |
On your 1:100 sheet this is easy. Draw the plot rectangle, then draw a second rectangle inside it, starting 1.5 squares from each side boundary, 4.5 squares from the front and 3 squares from the rear. Shade the space between the two rectangles lightly. Nothing gets built there.
That shaded border is the most useful thing on the whole sheet. Every time you are tempted to stretch a room, look at it.
Step 3: Work out how big the house must be before you draw it
This is the step that most guides skip. You now know the limit L. Next, find out how much house you are asking for.
Step 3a: List the rooms with clear (finished) sizes. Here is a compact 3-bedroom brief:
| Room | Clear size (m) | Area (m²) | Squares at 1:50 |
|---|---|---|---|
| Living room | 4.5 × 4.5 | 20.25 | 9 × 9 |
| Dining | 3.5 × 3.5 | 12.25 | 7 × 7 |
| Kitchen | 3.0 × 3.5 | 10.50 | 6 × 7 |
| Master bedroom | 4.0 × 4.0 | 16.00 | 8 × 8 |
| Master ensuite | 2.0 × 2.5 | 5.00 | 4 × 5 |
| Bedroom 2 | 3.5 × 3.5 | 12.25 | 7 × 7 |
| Bedroom 3 | 3.0 × 3.5 | 10.50 | 6 × 7 |
| Common bathroom | 1.5 × 2.5 | 3.75 | 3 × 5 |
| Guest toilet | 1.5 × 1.5 | 2.25 | 3 × 3 |
| Store | 1.5 × 2.0 | 3.00 | 3 × 4 |
| Net room area, N | 95.75 |
Step 3b: Add passages and walls. Rooms don’t touch each other. You need passages between them and walls around them.
Formula 7: Gross footprint
G = N × (1 + c) × (1 + w)
- c is the passage allowance. I use 12 percent for a compact plan. Use about 8 percent for a mostly open plan and 15 percent if there is a long corridor.
- w is the wall allowance, the floor area the walls themselves take up. I use 12 percent for 225 mm external and 150 mm internal block walls. Check this figure against your own drawing at the end.
G = 95.75 × 1.12 × 1.12 = 120.1 m²
So this brief needs a footprint of about 120 m² as a bungalow. That works out to roughly 80 percent usable floor and 20 percent passages and walls (efficiency = 95.75 ÷ 120.1 = 0.80).
Step 3c: Compare G with the limit L.
| Full plot | Half plot | |
|---|---|---|
| Limit L (from Step 2) | 225 m² | 90 m² |
| Needed footprint G | 120.1 m² | 120.1 m² |
| Does it fit? | Yes, with space to spare | No, it is 33% too big (120.1 ÷ 90 = 1.33) |
| Coverage | 120.1 ÷ 450 = 26.7% | not allowed |
On the full plot, the 120 m² house leaves about 330 m² of open ground for parking, a generator spot, a garden and a boys’ quarters if you want one. On the half plot, the same wish-list cannot be built as a bungalow. Finding that out on paper costs you nothing. Finding it out after you have bought blocks costs you a lot.
Three ways out for the half plot:
Way 1: Go up. A storey building splits the floor area over two levels. Each level also carries the stair, so I add about 6 m² per floor for it (a 1 m wide flight, its landings and the void).
Floors needed: n = ⌈G ÷ (L − 6)⌉ = ⌈120.1 ÷ 84⌉ = ⌈1.43⌉ = 2
Footprint per floor: F = G ÷ n + 6 = 60.1 + 6 = 66.1 m²
An 11.0 × 6.0 m footprint (66 m²) fits inside the 12.0 × 7.5 m envelope. It uses 73 percent of the envelope and 29 percent of the plot. That is the real reason small plots produce duplexes.
Way 2: Trim the brief. Drop Bedroom 3 and the store, and merge dining into the living room. Then N = 95.75 − 10.5 − 3.0 − 12.25 = 70.0 m², and G = 70.0 × 1.2544 = 87.8 m². That fits inside 90 m², but with only 2.2 m² to spare. In practice it is too tight, so treat it as a theoretical answer.
Way 3: Ask the authority. Ask in writing whether the setbacks or coverage on your particular layout differ from what you assumed. Never reduce a setback on your own drawing and hope nobody notices.
A quick stair calculation for Way 1. With a floor-to-floor height of 3.0 m and a target riser of 175 mm:
- Risers = 3000 ÷ 175 = 17.1, so use 17 risers of 3000 ÷ 17 = 176.5 mm
- Treads = 16, with a going of 250 mm each, so the stair run is 16 × 0.25 = 4.0 m (8 squares at 1:50)
- Comfort check (Blondel): 2 × riser + going = 2 × 176.5 + 250 = 603 mm. A good stair lands between roughly 550 and 700 mm.
Your local code sets the maximum riser and minimum going, so check it before you fix these numbers.
Every extra square metre you draw is one you will pay to build, roof, plaster and paint. Taking 10 m² of dead corridor off a plan costs you an eraser. Taking it off after the blocks are laid costs you a demolition. Do your cutting on paper.
Step 4: Draw the walls (where most graph paper plans quietly go wrong)
With the size of the house settled, we can draw the walls. Most beginners draw each wall as one thin line, and that single habit is the biggest source of error in home-made plans.
A wall has thickness, and the thickness comes out of your rooms. In Nigeria the usual blocks are 225 mm (9 inch) for external walls and 150 mm (6 inch) for internal ones. Add roughly 12 to 15 mm of plaster on each face and the finished walls are about 250 mm external and 175 mm internal. At 1:50 that is 5 mm and 3.5 mm on paper. Notice that 5 mm is half a grid square. So an external wall is exactly half a square thick. You can draw it by eye.
Draw every wall by its centre line, on a grid line. Then thicken it equally on both sides with your HB pencil. Never draw one wall for each room, because a wall shared by two rooms is drawn once.
Formula 8: Clear size of a room
Clear size = centre-line size − (half of each wall’s finished thickness)
- Between two internal walls: C − 0.175 m
- Between one external and one internal wall: C − 0.2125 m
- Between two external walls: C − 0.25 m
Formula 9: Area lost to walls
Loss % = 1 − (clear area ÷ drawn area)
Here is what happens to square rooms drawn on centre lines:
| Room drawn (centre-line) | Drawn area | Clear with 175 mm walls | Loss | Clear with 250 mm walls | Loss |
|---|---|---|---|---|---|
| 2.5 × 2.5 m | 6.25 m² | 2.325² = 5.41 m² | 13.5% | 2.25² = 5.06 m² | 19.0% |
| 3.0 × 3.0 m | 9.00 m² | 2.825² = 7.98 m² | 11.3% | 2.75² = 7.56 m² | 16.0% |
| 3.5 × 3.5 m | 12.25 m² | 3.325² = 11.06 m² | 9.8% | 3.25² = 10.56 m² | 13.8% |
| 4.0 × 4.0 m | 16.00 m² | 3.825² = 14.63 m² | 8.6% | 3.75² = 14.06 m² | 12.1% |
Read the first row again. A toilet-and-bath sized room (2.5 × 2.5 on the drawing) loses between a seventh and a fifth of its floor to walls. Small rooms suffer most, which is exactly why small plots need this step.
To get the clear size you want, draw bigger. Add the wall allowance, then round up to the next half-square (0.25 m at 1:50):
| Room | Clear size wanted | Walls | Draw centre-line | Squares at 1:50 |
|---|---|---|---|---|
| Master bedroom | 4.0 × 4.0 | one external, one internal (+0.2125) | 4.25 × 4.25 | 8.5 × 8.5 |
| Bedroom 2 | 3.5 × 3.5 | internal both sides (+0.175) | 3.75 × 3.75 | 7.5 × 7.5 |
| Kitchen | 3.0 × 3.5 | internal both sides (+0.175) | 3.25 × 3.75 | 6.5 × 7.5 |
Outside Nigeria, the formula is the same but the walls differ. A timber-frame wall in the US or Canada (a 2×4 stud with half-inch drywall on both faces) finishes at about 114 mm. Well-insulated external walls in Germany, Austria, Switzerland and the Nordic countries are often 350 to 500 mm thick. Put t = 0.40 m into Formula 8 and a 3.0 m centre-line room gives a clear 2.6 × 2.6 m, which is 6.76 m², a loss of 24.9 percent. The thicker your wall, the more this step matters.
Step 5: Place the rooms on the grid
Walls understood, you can now place rooms. Use the corner method: write every room as two corner points, (x1, y1) and (x2, y2), counted in squares. You can then check areas without a ruler:
Area (m²) = (x2 − x1) × (y2 − y1) × 0.25 at 1:50
(Each square is 0.5 m × 0.5 m, so one square of area is 0.25 m².)
Worked example: a master suite. Take the rear-left corner of the house as (0, 0). Measure x to the right and y towards the front.
| Room | Corners (squares) | Centre-line size | Clear size | Clear area |
|---|---|---|---|---|
| Master bedroom | (0, 0) to (8, 8) | 4.0 × 4.0 m = 16.0 m² | 3.79 × 3.79 m | 14.3 m² (10.3% lost) |
| Ensuite | (8, 0) to (13, 5) | 2.5 × 2.5 m = 6.25 m² | 2.33 × 2.29 m | 5.3 m² (14.9% lost) |
The master bedroom’s left and rear walls are external (250 mm), so its clear size is 4.0 − 0.2125 = 3.79 m each way. The ensuite sits against the master’s right wall, so it shares the x = 8 line. Its rear wall is external and its front wall is internal. The strip below it, from (8, 5) to (13, 8), is free for a passage or a wardrobe.
Notice that I asked for a 4.0 × 4.0 master in the brief and this drawing gives 3.79. Draw it as 8.5 squares instead and you get 4.04. This is why Step 4 comes before this one.
Placement rules that cost nothing and save a lot:
- Group wet rooms back to back. Kitchen, bathrooms and toilets sharing walls share plumbing runs.
- Keep bedrooms away from the street side if the plot allows it, and put the living room nearest the entrance.
- Trace the daily path with your finger. Door to living room to kitchen to bedroom to bathroom should never pass through another bedroom.
- Keep passages at least 0.9 m wide clear, which is 18 mm on paper at 1:50.
- Don’t let a door open onto a bed, a wardrobe or another door. You’ll check this in Step 6.
Step 6: Cut the doors and windows
Rooms placed, the next job is openings. Draw a gap in the wall, then show the door swing as a quarter-circle with a radius equal to the door width.
| Opening | Typical real width | On paper at 1:50 | On paper at 1:100 |
|---|---|---|---|
| Main door | 1.0 m | 20 mm | 10 mm |
| Internal door | 0.9 m | 18 mm | 9 mm |
| Bathroom door | 0.75 m | 15 mm | 7.5 mm |
| Window | 1.2 m | 24 mm | 12 mm |
| Wide window | 1.5 m | 30 mm | 15 mm |
| 225 mm block wall (plastered) | 0.25 m | 5 mm | 2.5 mm |
| 150 mm block wall (plastered) | 0.175 m | 3.5 mm | 1.75 mm |
Window size for ventilation. Designers often use a rule of thumb of openable window area ≈ 10 percent of the room’s floor area. Some codes set a lower minimum, around 5 percent, so check yours. Here is where graph paper pays off:
Bedroom 2 is 12.25 m². At 10 percent you need 1.2 m² of openable area. A 1.2 × 1.2 m window has 1.44 m² of glass. But a sliding aluminium window opens only half of itself, so its openable area is 1.44 ÷ 2 = 0.72 m². That passes a 5 percent test (0.61 m²) and fails a 10 percent one (1.23 m²). To reach 1.23 m² with sliding windows you would need about a 2.4 × 1.2 m opening. A casement or louvre window opens fully and solves it in less width.
In a hot, humid climate, I prefer to design for the 10 percent figure. Nobody ever complained about a bedroom that was too well ventilated.
Step 7: Cut furniture to scale
Windows in, it’s time to test whether the rooms actually work. Cut a piece of thin card for each piece of furniture at the same scale as the plan, and slide them around.
| Item | Real size (m) | Card size at 1:50 (mm) |
|---|---|---|
| Double bed | 1.5 × 2.0 | 30 × 40 |
| King bed | 1.8 × 2.0 | 36 × 40 |
| Single bed | 0.9 × 1.9 | 18 × 38 |
| Wardrobe (per metre of width) | 1.0 × 0.6 | 20 × 12 |
| 3-seater sofa | 2.0 × 0.9 | 40 × 18 |
| 6-seat dining table | 1.6 × 0.9 | 32 × 18 |
| Fridge-freezer | 0.7 × 0.7 | 14 × 14 |
| Cooker | 0.6 × 0.6 | 12 × 12 |
| TV unit | 1.6 × 0.45 | 32 × 9 |
| Shower tray | 0.9 × 0.9 | 18 × 18 |
Then check clearances:
- Walking space: 0.9 m minimum (18 mm).
- Beside a bed: 0.6 m minimum on each side you use.
- In the kitchen, the sink, cooker and fridge form a triangle. Kitchen designers use a guideline that its three sides add up to between about 4 m and 8 m.
Worked check: Bedroom 2 (3.5 × 3.5 m clear).
- Across the room: bed 1.5 + 0.6 + 0.6 = 2.7 m, which fits in 3.5 m with 0.8 m spare.
- Along the room: bed 2.0 + wardrobe depth 0.6 + walkway 0.9 = 3.5 m, which fits with exactly 0.0 spare.
It works, but with zero slack. If the wardrobe doubled in depth, or the door swung into the walkway, it would fail. That’s the sort of thing you only see with cut-outs on the sheet, and you want to see it before the walls are up.
Step 8: Add the arrows and services that save the house
Furniture placed, there are a few marks that don’t appear on most home-drawn plans but decide how the house lives.
North arrow and sun. Draw it first. In Nigeria and across the tropics, the sun is high and the east and west walls take the hardest heat. Put long walls facing north and south where you can, keep east and west openings small or shaded. In the temperate north (USA, Canada, UK, Germany, Switzerland, Luxembourg, Iceland), main glazing normally faces south to catch winter sun. In the southern hemisphere (Australia, South Africa) the logic reverses and it faces north. Near the equator (Singapore) north and south walls are again the easiest to protect.
Wind and rain. Mark the direction of the rainy-season wind and the dry-season wind if your area has a strong one, and arrows showing which way the roof and the compound slope so water leaves the plot instead of pooling at the gate.
The three things Nigerian plots always need and graph paper plans always forget:
- A generator or inverter spot with ventilation and a safe distance from bedroom windows.
- Water. The borehole, tank stand or overhead tank position.
- The car, the gate and the setback together. A parking bay needs about 2.5 m × 5.0 m (12.5 m² per car). On a 4.5 m front setback, a 5 m car doesn’t fit behind a closed gate without overhanging. Draw the car and the gate swing on Sheet 1 and test it.
Septic tank, soakaway and borehole. Mark all three on the site sheet, and keep the borehole well away from the septic tank and soakaway. Your authority or engineer will give the minimum distance. Don’t guess it.
Step 9: Audit the plan before you show anyone
The drawing is finished. Before you take it to an architect, spend ten minutes proving it is correct.
| Check | How | Pass when |
|---|---|---|
| Scale bar present | Look at both sheets | Bar and “1:50” / “1:100” are written |
| Dimension chain | Σ clear room widths + Σ wall thicknesses = overall outside width | Totals agree |
| Area tally | Add all clear room areas | Matches N from Step 3 within a few percent |
| Footprint vs limit | Measure the building outline on Sheet 1 | G ≤ L |
| Right angles | Diagonal of the outline = √(W² + D²) | Both diagonals match |
| Door swings | Look at each arc | None hits a bed, wardrobe or another door |
| Walking path | Trace door to bedroom to bathroom | No room is crossed that shouldn’t be |
| Ventilation | Openable window area ÷ floor area | Meets your target |
| Wet walls | Kitchen and bathrooms | Back to back where possible |
| North arrow | Both sheets | Present |
Worked dimension chain. Three rooms in a row have clear widths 3.40 m, 3.60 m and 3.10 m. Add two internal walls of 0.175 m and two external walls of 0.25 m:
3.40 + 3.60 + 3.10 = 10.10
- (2 × 0.175) = 0.35, giving 10.45
- (2 × 0.25) = 0.50, giving 10.95 m overall
On paper at 1:50 that is 10.95 ÷ 50 = 0.219 m, so the outline must measure 219 mm. If it measures 215 or 225, one of your walls is in the wrong place.
Worked diagonal check. For the 11.5 × 10.5 m house, the diagonal is √(132.25 + 110.25) = √242.5 = 15.57 m. At 1:50 that is 311 mm. Measure it on your paper. A different number means a corner is not square.
Two-storey houses on graph paper
Half-plot readers (and anyone who chose Way 1 in Step 3) need one more skill. Draw each floor on its own sheet at the same scale. Make three small cross marks in the same three corners of both sheets and put the sheets over each other on a window or light table. The marks must line up. Then:
- Stack the walls. Upper-floor walls should sit over ground-floor walls or beams. A wall floating over an open room is a structural question for your engineer.
- Keep the stair in the same place on both sheets.
- Stack wet rooms so pipes run straight down.
Graph paper to professional drawings: what to hand over
A graph paper plan is your brief. It is not an approval drawing. Planning authorities in Nigeria, and in many other countries, expect drawings prepared and stamped by a registered professional. Requirements differ from place to place, so check your authority’s rules. What your sketch does is make the architect’s first meeting ten times more useful. Take along:
- Sheet 1 (site plan at 1:100) with the survey dimensions and setbacks marked
- Sheet 2 (floor plan at 1:50) with all dimensions
- Your room schedule (the table from Step 3) with N and G calculated
- A one-page list of must-haves and nice-to-haves
- A copy of your survey plan, plus photos of the plot
- Your budget range
Once the layout is stable, redraw it in software. Digital tools are better for changes, copies and approvals. Paper is better for thinking.
Using this method in other countries
The formulas never change. Only the units and wall build-ups do.
| Where you are | Scale people commonly use | Grid and unit | What to adjust |
|---|---|---|---|
| Nigeria, UK, Australia, South Africa, Singapore, UAE, Qatar | Metric, 1:50 floor plan, 1:100 site | 1 cm grid, 1 square = 0.5 m or 1 m | Use your local authority’s setbacks and wall build-up |
| USA, Canada | 1/4 inch = 1 foot (1:48, since 12 ÷ 0.25 = 48) | 1/4-inch grid, 1 square = 1 ft | Convert with metres = feet × 0.3048. Lot setbacks come from local zoning |
| Germany, Switzerland, Luxembourg | Metric, with 1:100 widely used for layouts | 1 cm grid | Thicker insulated walls: raise t in Formula 8 |
| Iceland, Norway, Sweden, Finland, Denmark | Metric | 1 cm grid | Walls of 350 to 500 mm are common. The area loss is much larger |
Mistakes that ruin graph paper plans (and the fix)
| Mistake | What it causes | Fix |
|---|---|---|
| Drawing rooms before checking setbacks | A plan bigger than the land allows | Do Steps 2 and 3 first |
| Rounding the plot up | A house that doesn’t fit | Round the plot down |
| Walls drawn as single lines | Rooms 8 to 19 percent smaller than planned | Centre lines plus thickness (Formulas 8 and 9) |
| No scale bar | Copies and phone photos change the scale | Draw a 0 to 5 m bar |
| Counting a sliding window at full size | Hot, stuffy bedrooms | Count only the openable half |
| Forgetting the stair | An upper floor that doesn’t work | Add about 6 m² per floor |
| No car or gate swing on the site sheet | A car that sticks out into the road | Draw both on Sheet 1 |
| Not keeping a clean copy | Losing the version that worked | Trace the final plan on tracing paper |
Your worksheet: fill this in before you draw
- Plot width W = ___ m, depth D = ___ m, area = W × D = ___ m²
- Setbacks (from your authority): front ___, rear ___, left ___, right ___
- Buildable width = W − left − right = ___
- Buildable depth = D − front − rear = ___
- Envelope area = ___ × ___ = ___ m²
- Coverage cap (if any) = ___% × plot area = ___ m²
- Limit L = smaller of lines 5 and 6 = ___ m²
- Net room area N = sum of all clear room areas = ___ m²
- Gross footprint G = N × 1.12 × 1.12 = ___ m²
- If G ≤ L, a bungalow fits. If not, floors n = ⌈G ÷ (L − 6)⌉ = ___, and footprint per floor F = G ÷ n + 6 = ___ m²
Frequently Asked Questions
What scale should I use to draw a house plan on graph paper?
Use 1:50 (1 square = 0.5 m on 1 cm paper) for the floor plan and 1:100 (1 square = 1 m) for the plot. If the house won’t fit on your sheet, use Formula 3 to find the smallest scale that works.
How many squares equal one metre?
It depends on your scale. On 1 cm graph paper, 2 squares per metre at 1:50, and 1 square per metre at 1:100. On 5 mm paper, double those counts.
What size graph paper is best for a house plan?
A3 with a 1 cm grid. A4 can only hold a house of about 9 × 13 m at 1:50, and often not even that once you leave margins.
Can I use my graph paper plan for building approval?
Not on its own. Approval usually needs drawings prepared and stamped by a registered professional, though the exact rule depends on where you build. Use your graph paper plan as the brief you hand to that professional.
How do I draw a house plan for a small plot?
Do the fit check first (Step 3). Draw the plot, subtract the setbacks, compare the footprint you need with the buildable envelope, and decide whether the house must go up, shrink or change shape before you draw any walls.
How thick should walls be on a house plan?
Draw the real finished thickness. For Nigerian block construction that is about 250 mm external and 175 mm internal (225 and 150 mm blocks with plaster). At 1:50 that is 5 mm and 3.5 mm. Use your local build-up elsewhere.
How do I convert feet to squares?
Convert to metres first (feet × 0.3048), then divide by metres per square. For example, 50 ft is 15.24 m, which is 30.5 squares at 1 square = 0.5 m. In the US, with 1/4-inch paper at 1/4 in = 1 ft, 50 ft is simply 50 squares.
How do I draw a two-storey house plan on graph paper?
Draw one sheet per floor at the same scale, put cross marks in the same three corners of each, and use tracing paper to check that walls, the stair and wet rooms line up.
Should I use graph paper or software?
Use graph paper to think and software to finalise. Paper is faster for testing ideas and shows you problems early. Software is better once the layout is settled and you need clean copies.
Conclusion
A house plan on graph paper is really three small calculations wearing a drawing: how much land you may use, how much house you are asking for, and how much of that disappears into walls and passages. Do those three first and the drawing becomes the easy part. Skip them and you can end up with a lovely sheet of paper that your plot cannot hold.
If you want plans already sized for small Nigerian plots, browse our Plans Library. And if you’d like to learn how to read and check a plan before you commission one, visit Plan School. If you want help turning your graph paper sketch into a proper drawing that can go for approval, our Services page shows how we work. You can find more house plan and planning guides on our Homepage. Read these related posts:
- How to Draw a Fence Layout Plan Correctly (Dimensions, Pillars and Gates)
- How to Draw Doors and Windows in Floor Plans (Step by Step)
- How to Design a Functional Master Bedroom: Size, Layout, Wardrobe and Ensuite (With Formulas)
- Best Scale for House Plan Drawing in Nigeria: 1:50, 1:100 or 1:200? (With Formulas)
- How to Draw Walls Correctly in Floor Plans: Thickness & Scale
Author
Massodih Okon is a Nigerian built-environment professional with academic and professional experience in urban and regional planning, geography, architectural design, Landscape Design, GIS and land development.
He holds a Master’s degree in Urban and Regional Planning from the University of Uyo and a first degree in Geography and Regional Planning.
Through MassodihPlans, he publishes practical guides on Nigerian house plans, building design, physical planning, site planning, development approval and residential construction. Read the full author profile →