How I Draw a Bungalow Plan Step by Step (The Way I Wish Someone Had Shown Me)
Step-by-Step Tutorial for Drawing a Bungalow Plan
To draw a bungalow plan step by step, you start by measuring your plot, setting out your setbacks, sketching the room layout in rough, converting to a scaled drawing, adding walls and openings, then dimensioning and labelling the final plan. That is the short answer. But if you want to understand every stage well enough to do it yourself or supervise a professional doing it for you, this tutorial will walk you through the complete process using real Nigerian examples and practical measurements.
I want to be honest with you from the beginning. And I am not writing this because I want to appear on the first page of Google. I am writing this because I have sat across from many Nigerian homeowners who spent months confused about how an architectural drawing actually works, who paid for plans they could not read, and who handed over land documents to contractors without understanding what was supposed to go where.
That confusion costs money. It causes delays. And sometimes it causes structural problems that are very expensive to fix later. So let us go through this together, the same way I would explain it to a junior draughtsman in my office on a Monday morning.
If you prefer to skip the drawing process and work directly with a professional, our Plans Library has ready-to-use bungalow plans in various sizes. But if you want to understand the full drawing process, keep reading.
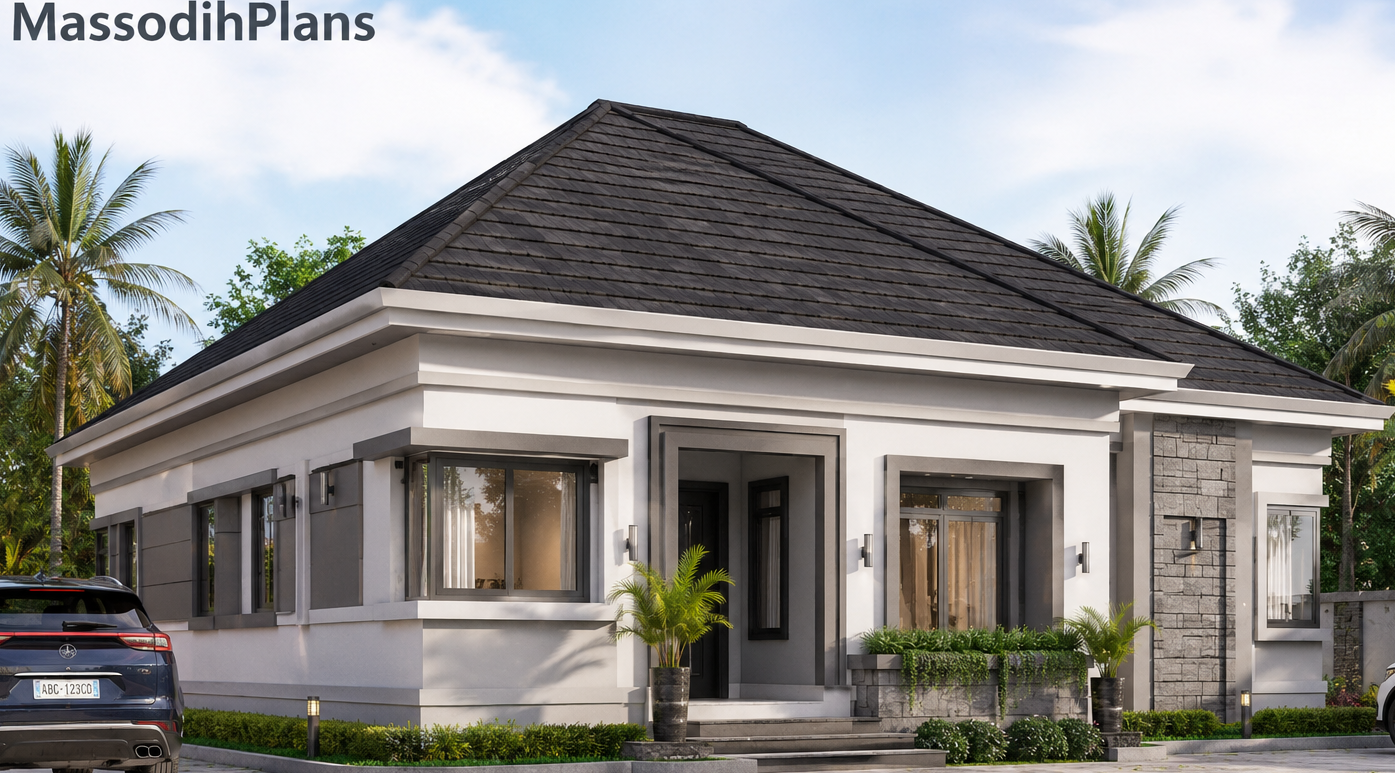
What Is a Bungalow Plan and Why Does It Matter?
A bungalow plan is a scaled architectural drawing that shows the layout of a single-storey residential building from a top-down (bird’s eye) view. It tells you where every room sits, how big each room is, where doors and windows go, and how people move through the building.
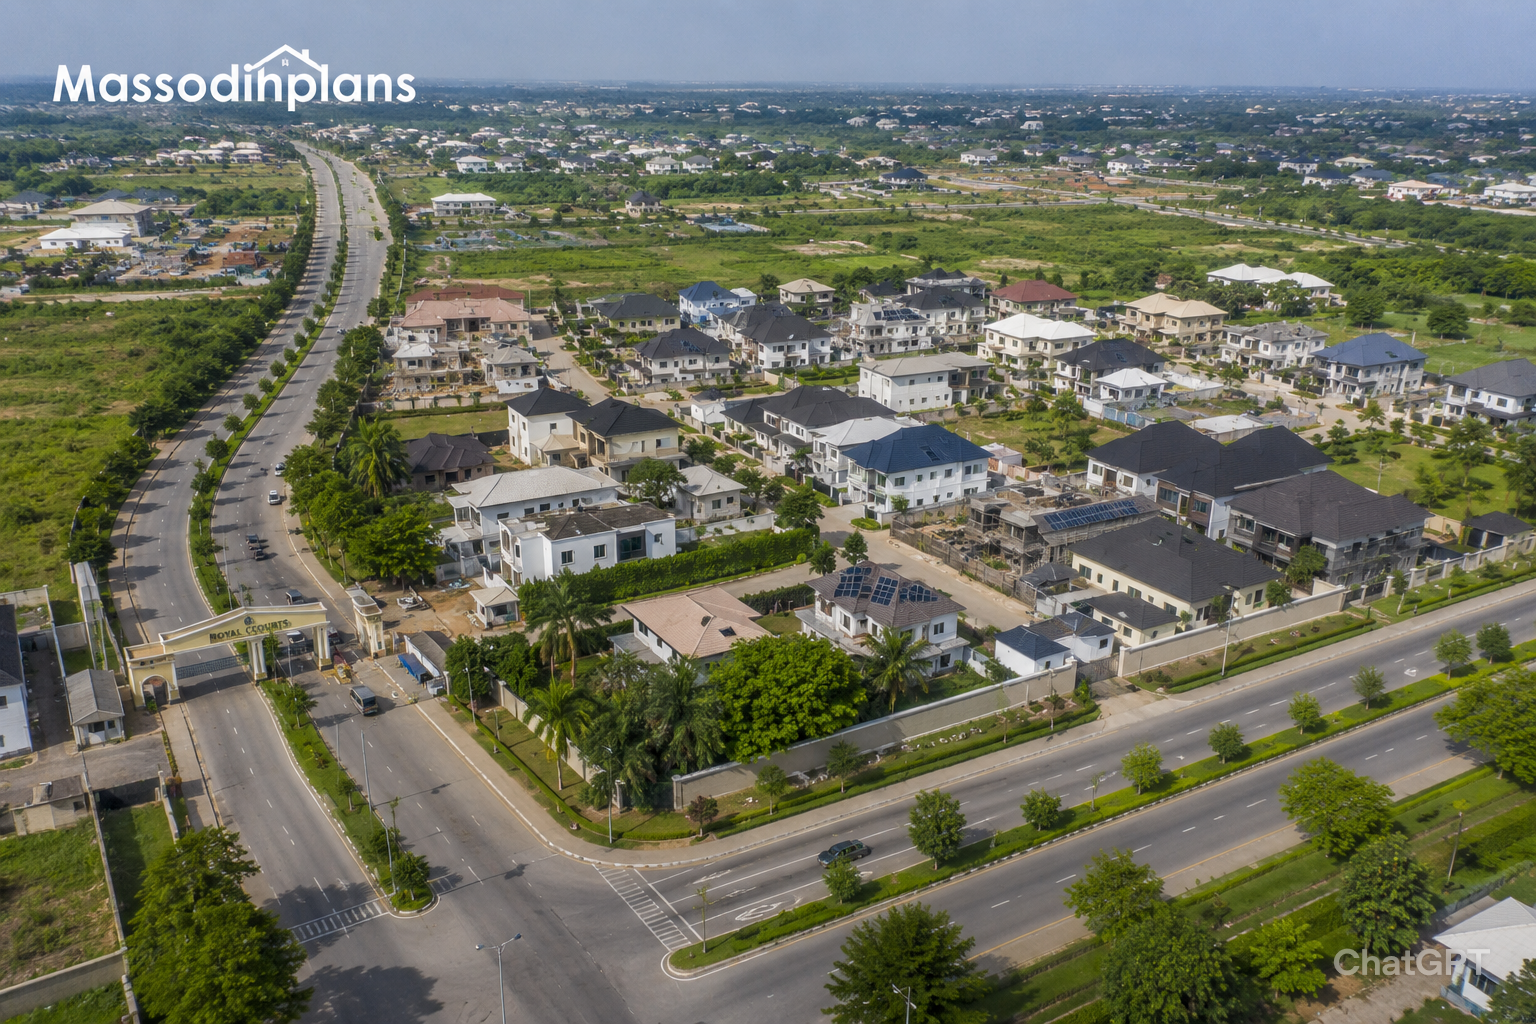
In Nigeria, bungalows remain the most common residential building type across smaller cities, semi-urban areas, and rural communities. In Uyo, Owerri, Onitsha, Lafia, Ilorin, and many state capitals, you will find more bungalows than multi-storey buildings. The reasons are practical: they are faster to build, cheaper to construct, easier to maintain, and more suitable for elderly occupants.
Many people assume that only an architect can draw a bungalow plan. My experience suggests otherwise. With the right guidance, a motivated homeowner or a junior draughtsman can produce a good preliminary drawing. You may still need a registered professional to certify the final drawings for approval, but understanding the process makes you a far better client and project supervisor.
Tools You Need Before You Start Drawing
Let me separate this into two categories: manual drawing tools and digital drawing tools. Both are valid. I started with manual tools, and I still respect them because they teach you to think spatially in a way that software sometimes does not.
For Manual (Hand) Drawing
- Drawing board or drafting table (minimum A1 size for a comfortable working area)
- T-square or parallel rule for drawing horizontal lines
- Set square (30/60 degrees and 45 degrees) for vertical and diagonal lines
- Scale ruler, specifically an architect’s scale with 1:100, 1:50, and 1:200 divisions
- Sharp HB and 2H pencils for layout lines, and F or B pencils for final line work
- Drawing compass for arcs and door swings
- Eraser and erasing shield for clean corrections
- Tracing paper overlay sheets for working through multiple iterations
- Drafting tape to secure your paper to the board
For Digital Drawing
- AutoCAD (industry standard, requires a subscription, steep learning curve)
- SketchUp Free (easier to learn, very good for 3D visualization)
- LibreCAD (completely free, open source, good for 2D plans)
- com (browser-based, beginner-friendly, no download needed)
- SmartDraw or RoomSketcher (good for quick layouts)
During my undergraduate studies in Town Planning at the University of Uyo, we started with hand drawing before we ever touched a computer. I am glad for that. Hand drawing teaches you to feel the scale of a space. When you draw a 3-metre bedroom by hand with a 1:50 scale ruler, you start to understand how small or large it really is. Software can hide that intuition behind zoom controls.
Understanding Scale Before You Draw
Scale is everything in architectural drawing. It is how we represent a large building on a small sheet of paper in a way that maintains accurate proportions.
Scale Explained Simply
- 1:100 scale means 1 centimetre on paper equals 100 centimetres (1 metre) in real life
- 1:50 scale means 1 centimetre on paper equals 50 centimetres (half a metre) in real life
- For a bungalow floor plan, 1:100 is the most commonly used scale in Nigeria
- For detailed drawings (toilet layout, kitchen layout), use 1:20 or 1:50
- Always write your scale on every drawing sheet
One thing our lecturers constantly emphasised was this: a drawing without a scale is not a drawing. It is a sketch. The moment you add a verified scale, you have something buildable. Please remember this.
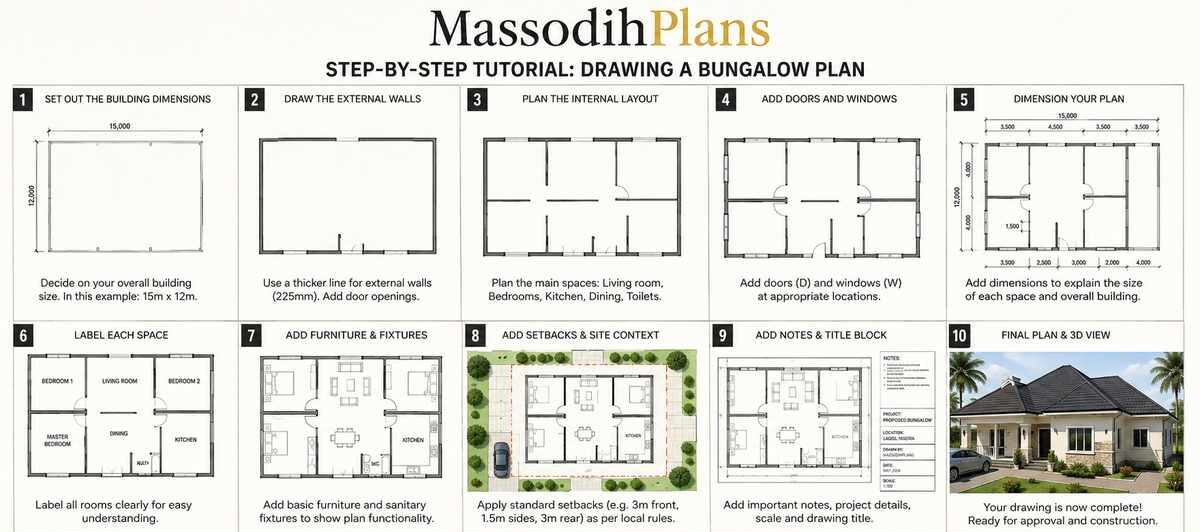
The Step-by-Step Tutorial: Drawing Your Bungalow Plan
Now we get into the practical work. Follow these steps in order. Do not skip any step. Each one prepares the ground for the next.
STEP 1: Collect Your Site Information
Before you put pencil to paper, you need real data from your actual plot. This is the step most beginners skip, and it is the step that causes the most problems later.
- Get your plot dimensions from your survey plan or deed of assignment
- Measure the actual land on site with a measuring tape if you can access it
- Note the direction of north, this determines your building orientation
- Find out the road frontage direction and where your main gate will be
- Check your local planning authority for setback requirements in your area
- Confirm if there are any existing services like overhead cables, drains, or pipes crossing your land
On a project I worked on in Ikot Ekpene, the client had assumed the plot was a perfect rectangle. When we went to site, it turned out to have a triangular cut-off at the rear due to a drainage easement. Designing without that information would have been a waste of time. Always verify your site data first.
| Typical Nigerian Setback Requirements (Check Locally) |
| Front setback (from road): 6 metres minimum in most Nigerian urban areas |
| Side setback: 1.5 to 3 metres depending on state regulations |
| Rear setback: 3 metres minimum |
| These vary by state, zone, and plot size. Confirm with your planning authority |
| Violating setbacks can lead to demolition orders and fines |
STEP 2: Set Up Your Drawing Sheet
Once you have your site data, prepare your drawing sheet. For a bungalow plan at 1:100 scale, an A1 sheet is usually adequate.
- Fix your drawing paper securely to the board with drafting tape
- Draw a title block at the bottom or right margin: project name, client name, drawing title, scale, date, draughtsman name
- Draw a border line around the usable drawing area, leaving 20mm margins on all sides
- Sketch a north arrow in one corner of the drawing
- Leave enough space for dimensions and notes outside the building outline
STEP 3: Draw the Plot Boundary and Setback Lines
Now draw the actual land parcel and mark your building lines. This tells you exactly how much space you have to place your building.
- Draw the outer plot boundary to scale using your plot dimensions
- Measure and draw the front setback line parallel to the road boundary
- Measure and draw the rear and side setback lines
- The area inside all four setback lines is your buildable area. Your building footprint must stay within this area
- Shade or hatch the setback zones lightly so you can distinguish them from the building area
At the University of Uyo, we were taught to always draw the site boundary first, then the setbacks, then the building. That sequence protects you from designing a building and then discovering it violates setbacks. I have reviewed planning applications where this error occurred and the applicant had to completely redesign.
STEP 4: Sketch the Rough Layout First (Do Not Draw to Scale Yet)
This is the most creative part of the process, and it should not be rushed. Before you pick up your scale ruler, sketch the room arrangement roughly on a separate sheet or on tracing paper placed over your site plan.
Ask yourself these questions:
- Where is the main entrance? Usually facing the road
- Where does the sitting room go? It should connect directly to the entrance
- Where is the kitchen? Ideally at the rear with access to the service yard
- Where are the bedrooms? Away from noise and preferably facing a cooler direction
- Where is the toilet? Not facing the main entrance directly
- Where does natural light enter? Plan windows on at least two sides of each major room
In my experience, the sketch stage is where the real thinking happens. I have worked with clients who spent three weeks doing rough sketches before settling on a layout that felt right. That time is not wasted. It saves you from costly changes after construction starts.
STEP 5: Establish Your External Wall Lines to Scale
Now bring your rough sketch to the actual drawing. Using your scale ruler and T-square, draw the external wall outline of the building to scale.
- Use light pencil lines first, you will darken them later
- Standard external wall thickness in Nigeria: 225mm (9-inch blockwork) for external walls
- Standard internal partition wall: 115mm (4.5-inch or half-block)
- Draw walls as double lines to show wall thickness
- At 1:100 scale, a 225mm wall appears as a 2.25mm gap between two lines. Mark them precisely
This is something I have encountered many times in Nigerian construction: builders who use the same block size for all walls. Structurally, your external walls carry more load and weather exposure and should always be thicker. Your internal partitions can be thinner to save cost and increase usable space.
STEP 6: Lay Out Internal Walls and Room Divisions
Now subdivide the interior of your building into rooms. Work from the rough sketch you made in Step 4.
- Draw the corridor or circulation space first, it is the spine of the plan
- Mark each room outline with its approximate dimensions
- Check that your room sizes match your programme. A typical Nigerian master bedroom is 4.0m x 4.5m to 5.0m x 6.0m
- Ensure no room is a dead end without natural ventilation from at least one window
- Make sure circulation paths are minimum 900mm wide for comfortable movement
- Position wet rooms (bathrooms, toilets, kitchen) close to each other to minimise plumbing run lengths
| Room | Minimum Size | Comfortable Size |
| Sitting Room | 4.0m x 5.0m | 5.0m x 6.5m |
| Dining Room | 3.5m x 4.0m | 4.0m x 5.0m |
| Master Bedroom | 4.0m x 4.5m | 5.0m x 6.0m |
| Bedroom 2 or 3 | 3.5m x 4.0m | 4.0m x 4.5m |
| Kitchen | 2.5m x 3.5m | 3.5m x 4.5m |
| Bathroom / Toilet | 1.5m x 2.0m | 1.8m x 2.5m |
| Corridor | 900mm wide min | 1.2m wide ideal |
| Store Room | 2.0m x 2.0m | 2.5m x 3.0m |
Note: These are internal clear dimensions. Add wall thicknesses when calculating overall building footprint.
STEP 7: Mark Doors and Windows
Doors and windows are not just openings. They control light, air, privacy, and movement. Getting their position right is one of the most important decisions in the drawing.
Doors
- Main entrance door: minimum 900mm clear opening width (1.0m leaf is better for a luxury home)
- Bedroom doors: 800mm to 900mm
- Toilet and bathroom doors: 700mm to 750mm, and swing outward where space is tight
- Draw door swings using a compass or door swing template. Always show the swing direction
- Mark door positions with the standard architectural symbol (a thin line for the door leaf and an arc for the swing)
Windows
- Mark windows as breaks in the wall lines with thin lines showing the frame
- Sitting room windows: minimum 1.2m wide to provide adequate light and ventilation
- Bedroom windows: minimum 900mm wide and positioned for cross-ventilation
- Kitchen window: position near the cooking area and as high as practical to exhaust heat
- Bathroom windows: louvred for permanent ventilation even when closed
- Always provide windows on two opposite sides of every main room for cross-ventilation
During a design review I conducted in Uyo, I found a plan where all the bedroom windows faced the same direction. The room on the leeward side of the building would have been almost unventilated. That is a serious comfort issue in the Nigerian climate. Cross-ventilation is not optional here. It is essential.
STEP 8: Add Dimensions
Dimensioning is what transforms a drawing from a sketch into a construction document. Every measurement must be clear, accurate, and easy for a builder to read on site.
- Dimension every room both ways: width and length
- Show overall building dimensions outside the building outline
- Use chain dimensioning: a continuous string of dimensions along one wall from one corner to another
- Place dimension lines at least 10mm outside the wall line
- Use dimension numbers in millimetres (for detail drawings) or metres (for floor plans)
- Always include the unit: write 4500 or write 4.500m, not just 4.5 without context
- Double check that your dimension strings add up correctly end to end
From what I have seen in practice, dimensioning errors are responsible for a significant number of on-site rework incidents in Nigerian construction. A wall built 500mm in the wrong position can cascade into door alignment problems, window size mismatches, and room proportion issues that cost far more to fix than the original drawing would have cost to produce correctly.
STEP 9: Add Ventilation, Drainage, and Service Notes
A good bungalow plan does not just show rooms. It communicates services.
- Mark the position of the septic tank or soak pit (rear of compound, minimum 3m from building)
- Mark the borehole position (minimum 15 to 30 metres from the septic tank)
- Indicate roof drainage downpipe positions on the building outline
- Mark the generator room or provision area
- Mark the overhead water tank position (usually above the toilet block for gravity pressure)
- Indicate the gate and driveway position on the site plan
- Show external compound drainage direction with a simple arrow or gradient note
These service elements are what separate a complete professional drawing from an incomplete one. Our Plan School section has specific tutorials on service planning for Nigerian residential buildings.
STEP 10: Complete Linework and Label All Rooms
Now darken your final lines and add all labels. This is where your drawing takes on its professional appearance.
- Go over all wall lines with a firmer pencil or ink pen for final line weight
- External walls: use the thickest line weight
- Internal walls: medium line weight
- Furniture symbols and annotations: thin lines
- Label every room clearly in the centre of the space
- Add the room dimensions inside each room as well for quick reading
- Add hatching or solid fill to wall sections so walls read clearly as solid elements
- Fill in your title block: project name, address, drawing title, scale, date, revision number
Orientation, Ventilation, and the Nigerian Climate
I need to say something about this that most tutorials skip. In the United Kingdom, the sun is weak and buildings need to maximise solar gain through south-facing windows. In Nigeria, the sun is aggressive. We need to manage it, not invite it in.
- Ideally, the longer axis of your bungalow should run east to west so that north and south walls catch the prevailing breeze
- Avoid large windows on the west wall. Afternoon sun from the west is the most brutal heat source in Nigeria
- Use roof overhangs of at least 600mm to shade windows from overhead sun
- Design your corridor or lobby as a transitional buffer between outdoors and living spaces
- A verandah or covered porch at the entrance adds significant comfort and beauty to any Nigerian bungalow
- Plant trees on the west side of your compound for natural shading within five years of construction
My experience in planning and design has shown me that buildings oriented correctly for the Nigerian climate cost less to cool and feel more comfortable without air conditioning. This is especially important now that electricity costs are rising significantly.
Drawing a Bungalow Plan on a Small Plot
Many Nigerians are working with plots of 300 to 500 square metres. You can still draw a functional and beautiful bungalow plan on a small plot if you plan efficiently.
| Small Plot Space-Saving Strategies |
| Use open-plan sitting and dining to reduce corridor space and make rooms feel larger |
| Place the bathroom inside the bedroom suite instead of along a shared corridor |
| Use built-in wardrobes instead of freestanding furniture to recover floor space |
| Position the kitchen at the rear with a service yard that doubles as a laundry area |
| Use a sliding or folding door instead of a swing door in tight corridors |
| Build a single covered car porch instead of a full garage to free up compound space |
| Avoid a separate store room. Use a utility space under the stairs or a wall-mounted cabinet area |
For inspiration on how professionals handle small plots, browse through our Plans Library where we have bungalow designs for plots ranging from 300 to 1000 square metres.
How to Show Roofing and Drainage on a Bungalow Plan
A floor plan does not usually show the roof directly, but it includes information that drives roof design. Here is what to consider:
- The roof plan is a separate drawing showing ridge positions, slopes, and drainage fall directions
- On the floor plan, indicate where roof drainage downpipes will be located
- A hip roof is ideal for a Nigerian bungalow because it drains in all four directions and reduces wind uplift
- A simple gable roof is cheaper but concentrates drainage at two ends
- Ensure every downpipe connects to a drain or soakaway. Open discharge across the compound causes erosion and flooding
- Mark your compound perimeter drain on the site plan to show how rainwater exits the property
During field inspections in Uyo and surrounding communities, I have seen several bungalows where rainwater from the roof erodes the external plaster at the base of the wall because downpipes were not properly routed. This is a simple planning error that becomes an expensive maintenance problem over time.
Realistic Cost Estimate for a 3-Bedroom Bungalow in Nigeria
I am giving you a range, not a fixed figure, because material prices in Nigeria change rapidly. These figures are based on current market observations across South-South and South-West Nigeria.
| Item | Budget Range (NGN millions) | Notes |
| Foundation (strip or raft) | 3M – 6M | Depends on soil type and depth |
| Block work and columns | 6M – 10M | 9-inch external, 4.5-inch internal |
| Roofing (hip, long-span) | 4M – 8M | Includes fascia, gutter, downpipes |
| Electrical installation | 3M – 6M | Include inverter provision |
| Plumbing and drainage | 3M – 6M | Include borehole connection |
| Plastering and screeding | 3M – 5M | Internal and external |
| Tiling (floor and walls) | 4M – 7M | Depends on tile grade |
| Doors, windows, frames | 4M – 7M | Security door at main entrance |
| Painting (two coats) | 2M – 4M | Textured or smooth finish |
| Compound, fence, gate | 3M – 6M | Includes drainage channel |
| Generator room, borehole, septic | 2M – 4M | Essential utilities |
| TOTAL (estimated range) | 37M – 69M | Excludes land, fees, and approvals |
One lesson I learned early in practice is that budgets without contingency are not budgets. They are wishes. Always add 10 to 15 percent of your total estimated cost as a contingency allowance for unforeseen site conditions, price increases, and design changes.
The Nigerian Reality Layer: What the Drawing Must Prepare For
If you only draw to solve the room layout problem, you are only half done. A real bungalow drawing in Nigeria must also prepare for these realities:
Power and Generator
- Mark a generator enclosure on your drawing, minimum 2.5m x 2.5m
- Position it away from bedroom windows and the main entrance
- Include a cable duct from the generator room to the main distribution board
Water Supply
- Mark the borehole position and pump house
- Show the water header tank position (usually above the bathroom block at roof level)
- Include a plumbing riser note showing how water reaches the tank
Flooding and Site Level
Working alongside experienced planners taught me that in many Nigerian cities, the biggest risk to a completed building is flooding. Your plan must address this:
- Build your finished floor level a minimum of 300mm above the road level or surrounding ground level
- Show external perimeter drains on the site plan
- Mark the direction of compound drainage fall on the drawing
Security
- Mark the gatehouse or security post position on the site plan
- Show perimeter fence height note (minimum 2.4m recommended)
- Indicate CCTV provision points if this is a high-end property
Designing for Real Nigerian Family Life
I have worked with clients who design their bungalow entirely around the architect’s ideal layout without thinking about how their family actually lives. Here is what I tell every client:
- If you have elderly parents who visit often, ensure at least one bedroom is on the ground floor with easy bathroom access
- If you have young children, their bedroom should be close enough to the master bedroom that you can hear them at night
- If you work from home, consider a room that can serve as a study or home office without disrupting household traffic
- If you receive guests regularly, position the guest toilet near the sitting room, not at the end of the bedroom corridor
- If a family member uses a wheelchair, ensure corridor widths are at minimum 1.2m and there are no level changes without a ramp
These lifestyle considerations are discussed in more detail across our Plan School articles where we break down how to tailor standard plans to specific Nigerian family needs.
Common Drawing Mistakes Beginners Make (and How to Avoid Them)
- Drawing without a scale. Every line must represent a real measurement. Set your scale before the first line.
- Not checking setbacks first. Many first-time drawers design the building then discover it violates setbacks.
- Making corridors too narrow. Less than 900mm is uncomfortable and may violate building regulations.
- Placing the toilet facing the main entrance. This is a cultural and hygiene concern in Nigeria and most African contexts.
- Forgetting door swings. A door that swings into a corridor or into another door causes daily frustration.
- No cross-ventilation. Every main room must have windows on at least two sides for air movement.
- Omitting service elements. A plan without borehole, septic tank, generator, and drainage positions is incomplete.
- Not labelling rooms clearly. Builders will misinterpret unlabelled spaces.
- Ignoring wall thickness. Drawing single lines for walls creates a plan that looks good but cannot be built accurately.
- Skipping the title block. A drawing without a title block, scale notation, and date is not a professional document.
Reference: Architectural Drawing Standards
The Nigerian Institute of Architects (NIA) recommends that all architectural drawings submitted for development approval comply with international drafting conventions including scale notation, room labelling, dimensional accuracy, and site plan inclusion. Both manual and CAD-produced drawings are accepted, provided they meet the required standards of legibility and completeness.
Source: Nigerian Institute of Architects (NIA), Practice Notes on Architectural Documentation and Drawing Standards.
The Investment Value of a Well-Drawn Bungalow Plan
If you are building a bungalow with the intention of renting or selling it in the future, the quality of your drawings and the soundness of your design will directly affect your return on investment.
| Investment Notes on Nigerian Bungalows |
| A well-designed 3-bedroom bungalow in Uyo, Owerri, or Ilorin rents for 400,000 to 900,000 NGN per annum |
| In Lagos suburbs (Ikorodu, Badagry, Epe), similar properties rent for 600,000 to 1.5M NGN per annum |
| A professionally designed bungalow sells faster and at a higher price than an informally built one |
| Building plan approval increases your property value by giving it legal backing |
| A bungalow on a 500+ sqm plot with parking and full compound work is always in demand for rent |
For more on property investment in Nigerian cities, visit MassodihPlans where we regularly publish practical advice for Nigerian property owners and investors.
Frequently Asked Questions
Can a non-architect draw a bungalow plan in Nigeria?
Yes, a non-architect can draw a preliminary bungalow plan for planning purposes. However, for building plan approval in Nigerian cities, the drawing must be signed and stamped by a registered architect under ARCON registration. You can draw the concept yourself, then take it to a registered professional for certification and submission.
What scale should I use for a bungalow floor plan?
For a typical bungalow floor plan submitted for building approval, use 1:100. This means every centimetre on paper represents one metre on the ground. For detailed room drawings (kitchen, bathroom), use 1:20 or 1:50.
How long does it take to draw a bungalow plan?
A first-time draughtsman working carefully can produce a rough sketch layout in one day and a clean scaled drawing in three to five days. A professional architectural draughtsman typically completes a full set of working drawings (floor plan, elevations, sections, site plan) in five to ten working days for a simple bungalow.
Do I need a building plan approval before construction in Nigeria?
Yes, absolutely. Every building in Nigeria requires a development permit or building plan approval from the local planning authority before construction starts. Building without approval exposes you to demolition orders, fines, and future difficulties with property sales and mortgage applications. This is not optional.
What software is best for drawing a bungalow plan for beginners in Nigeria?
For beginners, I recommend starting with Floorplanner.com because it is browser-based and does not require installation. For those who want to learn a professional tool, LibreCAD is free and good for 2D plans. AutoCAD remains the industry standard but requires investment in learning and licensing.
How do I know if my bungalow plan will pass for approval in Nigeria?
Contact your state urban planning authority and ask for their minimum requirements checklist. Common requirements include: site plan showing setbacks, floor plan at 1:100, elevations, section, and drawings signed by a registered architect. Our Services page explains how we handle building plan approval submissions for clients across Nigeria.
Finally: Now You Know How to Draw a Bungalow Plan
Let me close this tutorial the same way I opened it: honestly.
Drawing a bungalow plan is not magic. It is a skill. And like every skill, the more you practise it, the better you get. I started drawing by hand on A3 paper with a cheap set square and a borrowed scale ruler. My early plans were full of errors. But I kept drawing, kept learning, and kept applying what I learned from studio exercises, field inspections, and real projects.
What I want for you is the same journey, but faster and without the mistakes I had to discover on my own. That is why I wrote this tutorial in full detail instead of summarising it in five bullet points.
If you follow the ten steps in this article, you will produce a functional bungalow plan that communicates your ideas clearly to a builder, a planner, or an architect. It may not be perfect on the first attempt. But it will be real. It will be yours. And it will be a genuine starting point for building the home you have been imagining.
Your Next Steps After Reading This Tutorial
- 1. Gather your site survey and plot dimensions before anything else
- 2. Sketch your room arrangement by hand on plain paper. Do it three times before you commit to one
- 3. Set your scale and draw the plot boundary and setbacks first
- 4. Only then begin drawing the building
- 5. If you need a certified plan for approval, contact a registered architect or engage our services
Browse our Plans Library if you want to see finished examples that can guide your own drawing. Visit Plan School for more tutorials like this one. And if you want us to draw or certify your plan professionally, our Services page tells you how to get started.
More Resources on MassodihPlans
- 3 Bedroom Bungalow Plan in Nigeria – See a complete ready-to-use 3-bedroom bungalow plan with dimensions and cost estimate
- 4 Bedroom Bungalow Plan in Nigeria – A larger bungalow option for families who need more bedroom space
- Bungalow Plan for Small Plot in Nigeria – How to fit a comfortable bungalow on a 300 to 450 sqm plot
- Building Plan Approval in Nigeria – What to expect when submitting your drawings to the planning authority
- How to Read Architectural Drawings – Understand the symbols, line types, and notation used in building plans
- Cost of Building a Bungalow in Nigeria – Current construction cost breakdown for Nigerian bungalows
- Site Plan in Nigeria – What a site plan contains and how it differs from a floor plan
- Bungalow vs Duplex in Nigeria – Which is better for your plot, budget, and family situation
- Ventilation in Nigerian Homes – Practical cross-ventilation strategies for every room type
- Building Materials Price in Nigeria – Updated prices for blocks, cement, roofing sheets, and tiles