The Elevation Drawing That Separates a Beginner From a Confident Designer
How to Draw Building Elevations Step by Step (Manually and in AutoCAD)
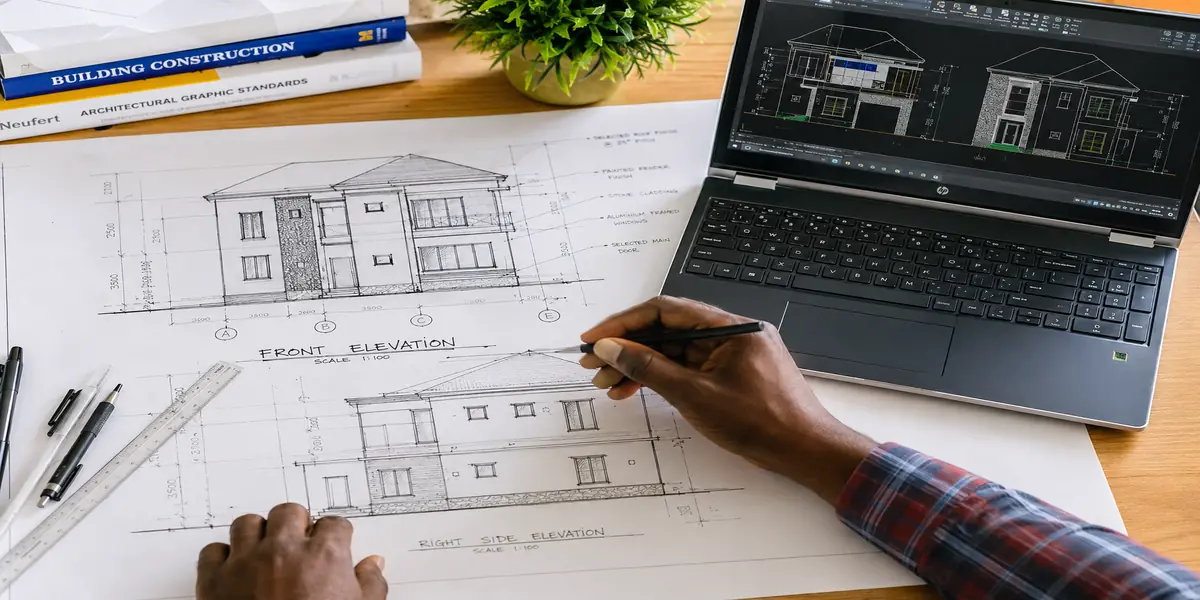
See, if you really want to know how to draw a building elevation step by step, here is the short answer first: an elevation is a flat, straight-on view of one face of your building front, rear, or side drawn by projecting heights directly from your section and widths directly from your floor plan, then adding doors, windows, roof lines, and material finishes exactly where they appear on that face. That’s the summary. Now let’s go through it slowly, step by step, the way I would explain it to someone learning this for the very first time.
I know why you are here. A lot of people can manage a floor plan reasonably well, but the moment it’s time to draw the elevation, things start looking flat, wrong, or disconnected from the plan underneath. And this is not a small matter, because I have seen it happen: an elevation drawn without proper projection from the plan and section ends up showing windows in the wrong position, roof lines that don’t match the actual roof plan, or proportions that simply look “off” the moment construction begins. Especially now that plots are getting smaller in our cities, where every design decision has to work harder, getting your elevation right the first time protects both your design’s appearance and your client’s confidence in you.
What an Elevation Actually Is, and Why It Matters So Much
In my experience, many beginners treat the elevation as “the pretty picture” they draw last, almost like decoration. That mindset creates problems. An elevation is not decoration. It brings together the widths from your floor plan and the heights from your section on one flat face of the building. From the projects I have completed, I have noticed that most awkward-looking buildings did not suffer from poor design taste. Instead, designers failed to project the elevation correctly from the floor plan and section, allowing the proportions to drift until builders had already completed the structure.
Understanding the Different Elevations You Need
Before you start drawing, understand exactly what you need to produce.
Front elevation: This view shows the front of the building from the main entrance side. It usually contains the highest level of detail and receives the most design attention.
Rear elevation: This view shows the back of the building. Although it often looks simpler, you must still align every window and door with the floor plan.
Side elevations (left and right): These views clearly show the roof pitch and demonstrate how the building relates to neighboring properties and required setbacks.
One lesson I learned early in my career is that every elevation must come directly from the same floor plan and section. If you sketch each elevation from memory or estimate the dimensions by eye, the drawings will conflict with one another. Builders will quickly notice those inconsistencies during construction, and correcting them can become expensive.
Step 1: Finalize Your Floor Plan and Section First
You cannot create an accurate elevation until you finalize the floor plan and section because the elevation depends on both drawings.
- Finalize the wall layout and the positions of every window and door before you begin. Avoid making layout changes at this stage.
- Finalize all section heights, including the floor-to-ceiling height, slab thickness, and roof pitch, because these dimensions determine the appearance of your elevation.
- Check any changes in ground level across the site, since they determine how the building sits relative to the finished ground line.
Common Beginner Mistake
Many beginners start drawing the elevation before they finish the floor plan and section. When they later move a window, adjust a door, or change a ceiling height, they must redraw the elevation. Throughout my career, I have seen this mistake waste countless hours that proper planning could have prevented.
Step 2: Drawing an Elevation Manually Step by Step
For beginners who want to understand the logic by hand first, here is the manual approach.
- Draw your ground line at the bottom of your sheet, representing the finished ground level for that face of the building.
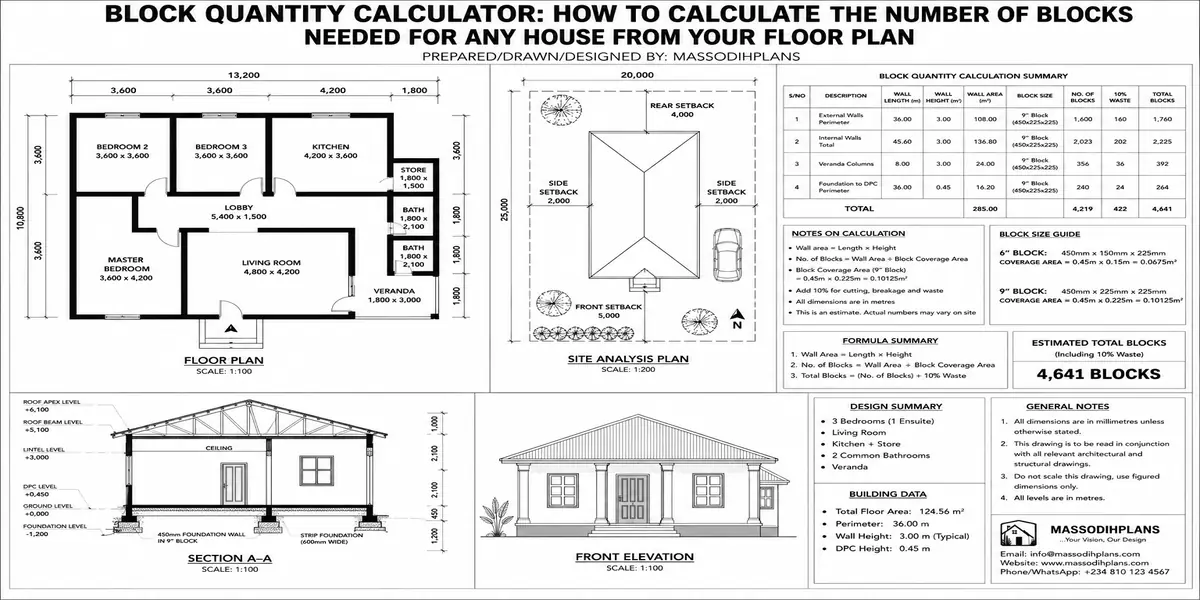
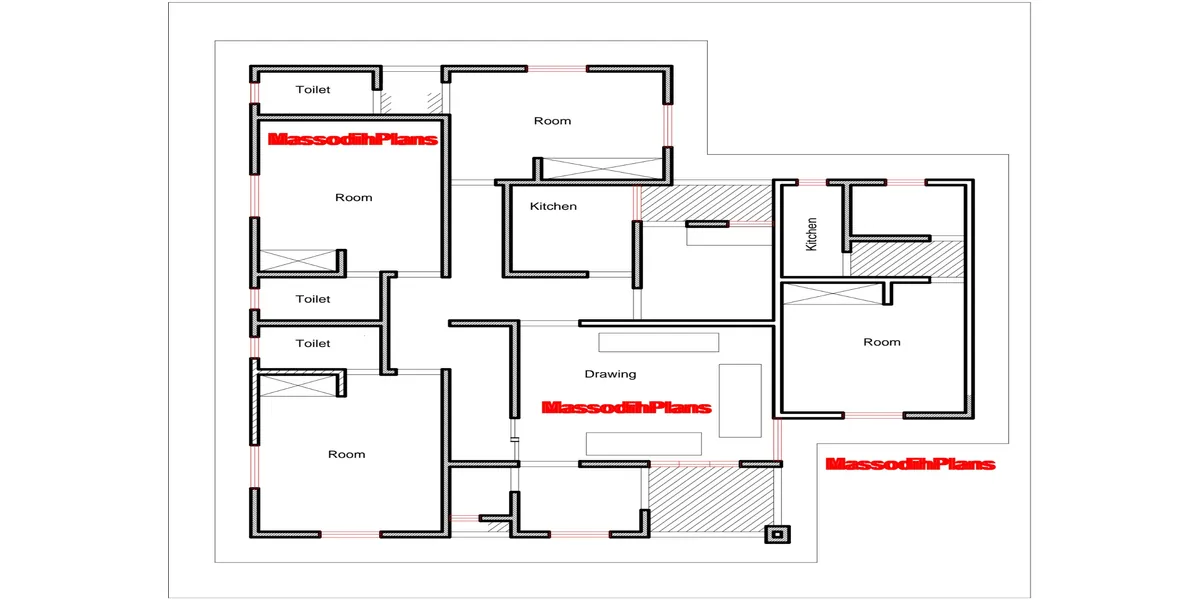
- Project wall widths across from your floor plan using vertical guide lines, marking where each wall, window, and door falls along that face.
- Project heights upward from your section floor-to-ceiling height, floor slab lines, and roof level — using horizontal guide lines across the sheet.
- Draw window and door openings at their correct width and height, based on where the projected guide lines intersect.
- Draw the roof outline, including pitch angle and overhang, matching exactly what you drew in your roof plan and section.
- Add material and finish indications: texture lines for render, block, stone cladding, or timber detailing to show how the finished surface will actually look.
Step 3: Drawing an Elevation in AutoCAD Step by Step
Once you understand the manual logic, AutoCAD lets you execute the same process with more precision and speed.
- Reference your floor plan and section as base layers, and create a dedicated new layer for the elevation, so it doesn’t get mixed with your other drawings.
- Use XLINE or construction lines to project vertical guides from the floor plan (marking wall, window, and door positions) and horizontal guides from the section (marking floor, ceiling, and roof levels).
- Draw the outer building outline using PLINE, following the intersections of your projected guide lines.
- Insert window and door blocks, or draw them with LINE and RECTANGLE, positioned precisely at your projected intersections.
- Draw the roof profile using LINE, matching the pitch angle and overhang already established in your section and roof plan.
- Add hatch patterns for material finishes using the HATCH command, choosing patterns that represent render, block, or cladding realistically.
- Dimension key heights and widths using DIMLINEAR, so a contractor can confirm proportions directly from the drawing rather than guessing.
- Label the elevation clearly (“Front Elevation,” “Side Elevation,” etc.) in your title block, consistent with the rest of your drawing set.
Common Beginner Mistake: Drawing window and door positions “by eye” on the elevation instead of properly projecting them from the floor plan. Even a small misalignment here creates a building where the windows shown on the elevation don’t match where they actually are on the plan.
Nigerian Reality Layer: What You Must Consider Beyond the Drawing
This is the part most tutorials skip, and it’s exactly where real projects succeed or fail on site.
Unstable material prices: Elevation finishes (render, cladding, decorative features) can vary significantly in cost. From what I have seen in practice, deciding your finishes early, during the elevation drawing stage, helps you source materials before prices shift further.
Power supply realities: If your elevation specifies features requiring site fabrication or power tools, plan that stage of work around your realistic power access.
Flooding and drainage: Your elevation should clearly show finished floor level relative to surrounding ground level I have encountered this situation multiple times where a building’s entrance sat too close to ground level, and the elevation drawing, if properly cross-checked with the section, would have caught it early.
Ventilation needs and heat management: Window sizes and positions shown on your elevation directly affect cross-ventilation and heat gain a beautiful elevation with poorly placed, undersized windows is still an uncomfortable house to live in.
Compound security and gatehouse positioning: If your gatehouse has its own elevation, make sure its proportions and finishes are drawn to relate sensibly to the main building, not as a completely unrelated structure.
Generator space and borehole planning: If these are visible from the street-facing elevation, consider how their enclosure or screening is represented in the drawing, so the overall composition still looks intentional.
Small Plot Optimization: Elevations on Tight Plots
On a small or narrow plot, your elevation carries extra design responsibility:
Vertical composition: Limited floor area demands a well-composed elevation that uses height, proportion, and material contrast to create a strong visual presence instead of making the building appear cramped.
Window placement under setback constraints: Reduced setback space requires careful window sizing and positioning on side elevations to preserve privacy while allowing sufficient natural light, especially when neighboring buildings limit side views.
Compact luxury concepts: A clean, well-proportioned elevation with balanced material contrast such as rendered walls paired with stone or timber accents creates a more premium appearance than a busy, over-decorated facade.
Human Lifestyle Layer: How Elevation Design Affects Daily Living
Family lifestyle suitability: Window sizes and positions in the elevation determine how much natural light enters interior spaces and influence comfort throughout the day.
Guest privacy: Careful window placement on side elevations prevents direct sightlines into private rooms and protects the privacy of both occupants and neighbors.
Elderly accessibility: If the main entrance includes steps, consider incorporating a gentle ramp or graded approach to improve access for family members with limited mobility.
Work-from-home considerations: A home office facing the street benefits from thoughtful window design, such as higher sill heights or appropriate glazing, to balance natural light, privacy, and reduced street noise.
Future family growth: Plan the current elevation with future expansion in mind so that an additional floor integrates seamlessly into the overall architectural design instead of appearing like an afterthought.
Construction Experience Layer: What Builders Usually Get Wrong
While assisting with development control activities, I witnessed firsthand how often site work drifts from the elevation drawing without anyone noticing until the building is already taking shape.
Contractor mistakes: Adjusting window or door positions slightly on site “to make it easier,” without checking back against the elevation and floor plan, leading to a facade that doesn’t match the approved design.
Material waste prevention: A clearly detailed elevation with specified finishes helps contractors order the correct quantities of render, cladding, or paint, reducing wasteful over-ordering.
Supervision tips: Always confirm window and door openings on site against the elevation drawing before rendering or finishing begins I have seen facades that looked wrong only because an opening had shifted slightly from the drawn position, and by then, correcting it meant breaking finished work.
Structural planning awareness: An elevation shows appearance and opening positions. It does not replace structural drawings lintel sizes and load-bearing considerations around large openings must be confirmed separately by a structural engineer.
Cost Estimate Considerations
Your elevation decisions influence cost more than most beginners expect:
Facade complexity: Multiple materials, decorative features, and complex roof lines shown in elevation all add cost compared to a simpler, clean-lined facade.
Window and door sizing: Larger openings cost more in framing and glazing but improve light and ventilation, so this is a balance worth making deliberately at the elevation stage, not by default.
Finish selection: Render, cladding, stone, or timber accents shown on the elevation carry very different costs and maintenance requirements over the life of the building.
Experience has taught me that clients who finalize their elevation finishes early, rather than deciding “on site” as construction progresses, consistently spend less overall and end up with a more coherent final look.
Investment Layer: Why Your Elevation Affects Long-Term Value
Resale potential: The elevation is the first thing anyone sees, in photos or in person a well-proportioned, well-detailed elevation significantly affects perceived value and first impressions.
Rental profitability: A well-designed elevation with good window sizing supports comfortable interiors, which supports both rental appeal and tenant retention.
Estate suitability: If your project sits within an estate with design guidelines, your elevation is the drawing that gets checked against those guidelines before approval.
Long-term practicality: Elevation decisions around materials and finishes affect long-term maintenance cost some finishes age and weather far better than others.
Common Mistakes to Avoid When Drawing an Elevation
- Starting the elevation before the floor plan and section are fully settled
- Positioning windows and doors “by eye” instead of properly projecting from the plan
- Ignoring finished ground level relative to the surrounding site
- Overcomplicating the facade with too many materials or decorative features on a small plot
- Forgetting to dimension key heights and widths for the contractor
- Treating the elevation as decoration instead of a coordination drawing tied to the plan and section
Frequently Asked Questions
Can I draw a building elevation without AutoCAD?
Yes. The manual method covered above teaches the same core logic projecting widths from the plan and heights from the section which you can execute by hand before or instead of using software.
How many elevations does a typical building need?
Most residential projects need at least four: front, rear, and both side elevations, since each face may have different window positions, roof visibility, or setback conditions.
Does the elevation need to match the section exactly?
Yes. Any mismatch between elevation heights and section heights usually means one of the two was drawn from estimation rather than proper projection, and this should always be corrected before construction.
What’s the biggest elevation mistake on small plots?
Overloading the facade with too many materials or decorative features, which increases cost without necessarily improving how premium the building actually looks.
Final Thoughts
I did not learn this from a textbook alone both classroom learning and years of field observation support everything covered in this article. A building elevation is not the “pretty picture” stage of your project; it’s where your floor plan and section are proven to agree with each other on the finished appearance of the building. Take your time projecting your heights and widths properly, settle your finishes early, and don’t let the elevation become an afterthought it’s often the single drawing that determines whether a building looks intentional or accidental once it’s standing.
If you want to see these principles applied to real, ready-made designs, browse our plans library for layouts across different plot sizes, or explore our plan school section for more step-by-step lessons like this one. If you’re working on your own project and want expert support getting your elevations right, our design services are there to help directly. And if this is your first time here, start from our homepage (massodihplans.com) to see everything we offer. Building information modeling (BIM) and digital construction standards.