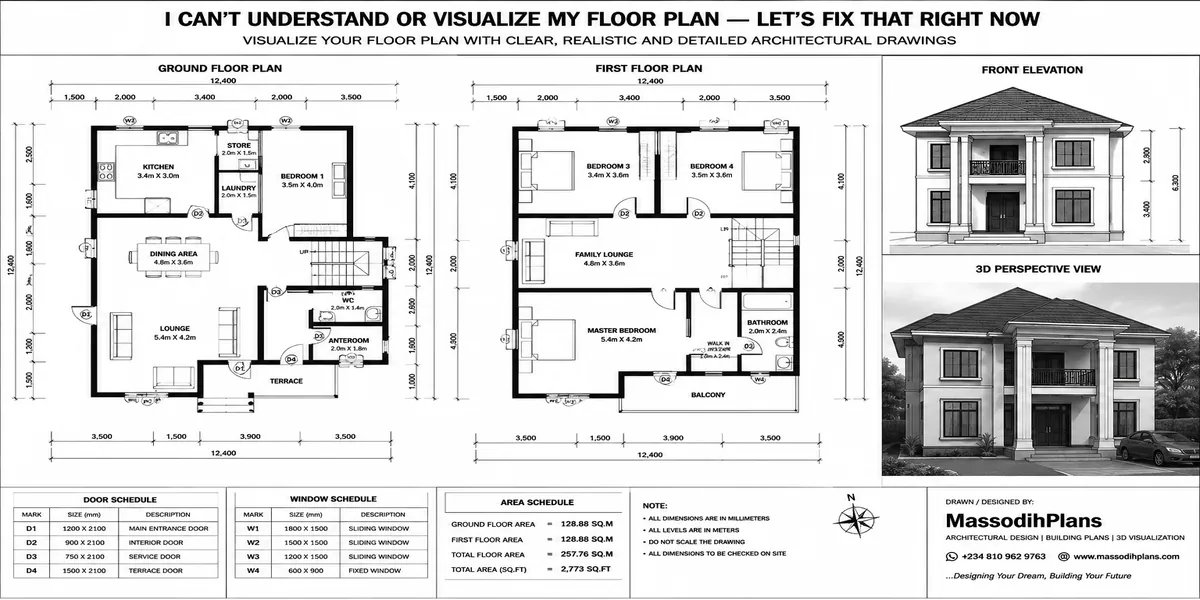
I Can’t Understand or Visualize My Floor Plan — Let’s Fix That Right Now
Here’s a conversation I’ve had more times than I can count. A client sits across from me, or messages me a plan on WhatsApp, and says some version of: “Massodih, I’m looking at these lines and numbers and I genuinely cannot tell if this is a good house or a small house. I don’t even know what I’m looking at.”
I want you to hear this clearly before we go any further: that feeling is not a sign that you’re bad at this, or that house planning “isn’t for you.” A floor plan is a foreign visual language, and nobody is born fluent in it. Architects spend years in school just learning to read and produce these drawings properly. If you’ve never been taught the code, of course the lines look like lines and the numbers look like random numbers. You’re not slow. You just haven’t been shown the key.
So let’s sit down together like I would with a friend, a client, or one of the students I mentor and actually go through it. Not a checklist you’ll forget in ten minutes, but a way of seeing that will stay with you for every plan you look at from now on, including the one you’ll eventually build.
The Real Problem Isn’t “Reading” — It’s Translating
Most guides on this topic treat the problem as purely technical: here are the symbols, here’s the scale, go and read. That’s only half the problem, and honestly, it’s the easier half.
The harder half is this: a floor plan is a translated version of a house, and your brain doesn’t naturally translate 2D lines on flat paper into a 3D space you can feel yourself standing in. That’s not a knowledge gap it’s a spatial imagination gap, and it exists even in people who are otherwise very intelligent and detail-oriented. I’ve had structural engineers people who calculate loads and stresses for a living tell me they still find it hard to “feel” a room’s size from a floor plan alone without a section drawing or a 3D view next to it.
So this guide solves two separate problems, because you likely came here with both of them tangled together:
- How do I decode what these lines, numbers, and symbols actually mean? (Reading)
- How do I turn that decoded information into a mental picture of walking through my actual house? (Visualizing)
And because I know a lot of you reading this aren’t even at “I have a plan and can’t read it” some of you are at “I don’t even know what plan to ask for” I’ve built in a third layer nobody else covers: how to actually decide what house plan to build in the first place, when every option on Pinterest and every architect’s portfolio looks equally appealing and equally overwhelming.
Layer One: How to Read a Floor Plan (The Decoding Part)
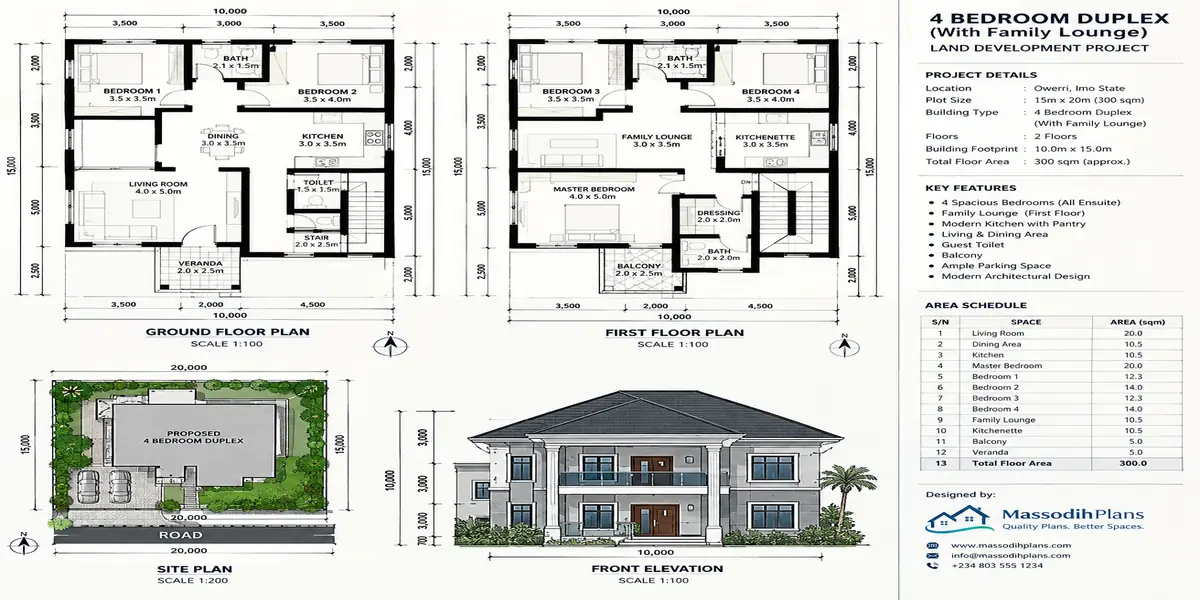
A floor plan is simply your house with the roof lifted off, looked at straight down from above. Every wall becomes a line, every opening becomes a gap or a symbol, and every room becomes a labelled box. That’s it. That’s the whole trick behind the drawing style once you know you’re looking down, not sideways, everything else starts making sense.
Start With the Title Block, Not the Drawing
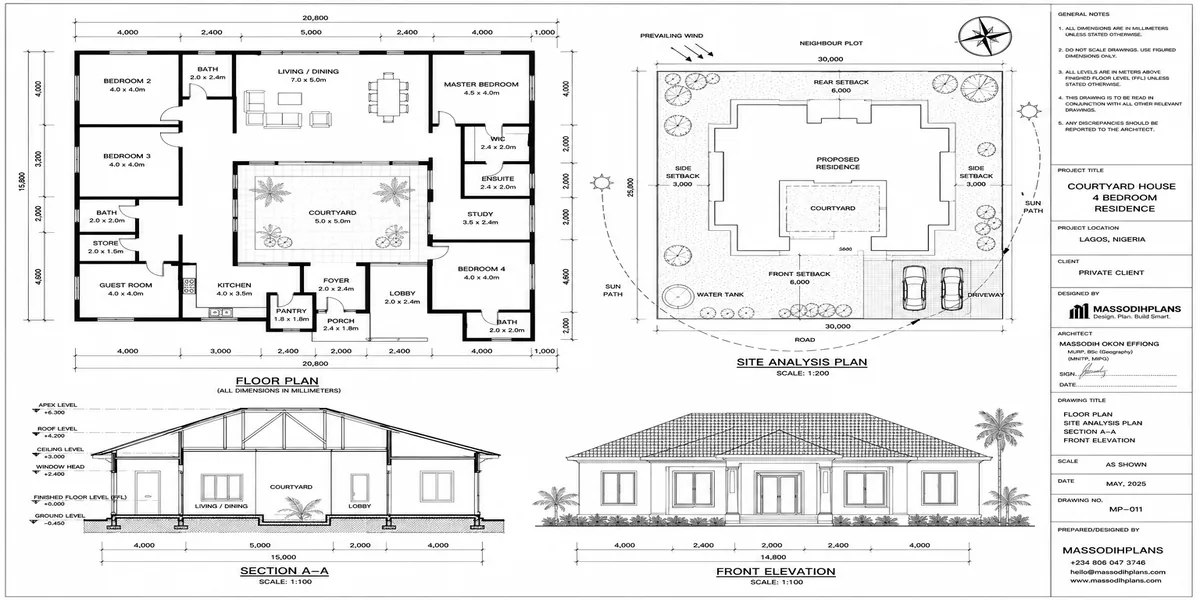
Before you even look at the rooms, find the small boxed section usually bottom right or along one edge called the title block. It tells you the scale, the drawing name (ground floor plan, first floor plan, roof plan), the date, and sometimes the drawn-by information. If you skip this and jump straight into the rooms, you’ll misjudge everything that follows, because you won’t know what scale you’re actually looking at.
Understand Scale the Simple Way
Nigerian architectural drawings are typically drawn in metric scale commonly 1:100, meaning 1 unit on the paper equals 100 of that same unit in real life. So 1cm on the drawing equals 1 metre on the ground. You don’t need to memorize a ruler conversion chart for this. Just find the scale bar (a small ruler-like graphic usually near the title block) and lay a strip of paper or a real ruler against it to get a feel for how big 1 metre looks on that specific drawing. Do this once per plan, and every room on that sheet will start to make visual sense.
Learn the Wall Language
Walls are drawn as parallel lines, and the space between those lines is the actual wall thickness usually 225mm (9 inches) for external block walls and 150mm (6 inches) for internal partition walls in typical Nigerian construction, though this varies by design. This matters because room dimensions are sometimes given as internal (the usable floor space you’ll actually stand in) and sometimes as external or centreline (measured to the middle or outer face of the wall). Always check which one you’re looking at, because the difference between the two can be 20-30cm per wall enough to matter when you’re fitting a wardrobe against it.
Doors and Windows Aren’t Guesswork
A door is shown as a break in the wall line with a quarter-circle arc that arc is the door swinging open, and which way it curves tells you which way the door opens and which side the hinge sits on. A window is a break in the wall line, usually shown with thinner parallel lines across the gap. The width of that gap, read against the scale, tells you exactly how wide that window will be not roughly, exactly, if you read it correctly.
Room Labels Tell You Function, Not Guaranteed Comfort
Just because a box says “Bedroom 3” doesn’t mean it’s automatically a comfortable bedroom. This is where most people stop reading too early. The label tells you intended function. The dimension tells you whether that function will actually feel good in daily life which brings us to the next section, because this is genuinely the most important skill in this entire guide.
The very first thing I do with any plan mine or a client’s is find the smallest bedroom and check its dimensions before anything else. If the smallest room on the plan is comfortable, the rest of the house is almost always fine. If it’s cramped, that’s usually a sign the whole plan was squeezed to hit a floor-area or cost target.
Layer Two: How to Understand House Dimensions and Know Real Room Sizes
This is where I want to slow down, because this single skill reading a dimension and actually knowing what it means for your body, your furniture, your daily movement is the one thing that, once you have it, makes every future plan instantly less intimidating.
Dimensions Are Always Written, Never Estimated by Eye
A room that looks small on paper because it’s drawn in a corner of the sheet might actually be generous, and a room that looks huge because it’s drawn large on the page might actually be tight. Never trust your eye on a printed page always trust the written dimension string (the numbers with the little tick marks along a line). This single habit will save you from more disappointment than anything else in this guide.
Convert the Number Into Something You Already Understand
Here’s the trick almost nobody teaches: don’t just read “3.6m x 3.3m” as an abstract fact. Convert it into a space you already know. A standard car park bay is roughly 2.4m x 4.8m picture that, then adjust. Your current bedroom, sitting room, or even your parents’ dining room measure it once with a tape, and now you have a personal reference library. Every future dimension you read gets compared against a room you’ve actually stood in, not an abstract number.
The Furniture Math That Actually Prevents Disappointment
This is the single biggest source of “I built it and now it feels small” complaints I hear, and it is completely avoidable. Before approving any room size, list the furniture you actually intend to put in it, with real dimensions:
- A standard queen bed: roughly 1.5m x 2m
- A king bed: roughly 1.8m x 2m
- A 4-door wardrobe: roughly 1.2m–2m wide, 0.6m deep
- A dining table for 6: roughly 1.8m x 0.9m, plus at least 0.9m clearance on all sides for chairs to pull out and people to walk past
Add these up, add walking clearance (a comfortable minimum is 0.6m–0.9m around major furniture), and compare that total against the room dimension on the plan. If the furniture and clearance you need adds up to more than the room offers, you now know before you’ve laid a single block that the room will feel cramped. This is not guesswork. This is arithmetic, and it is the most powerful tool in this entire guide.
House Dimensions vs. Land Dimensions
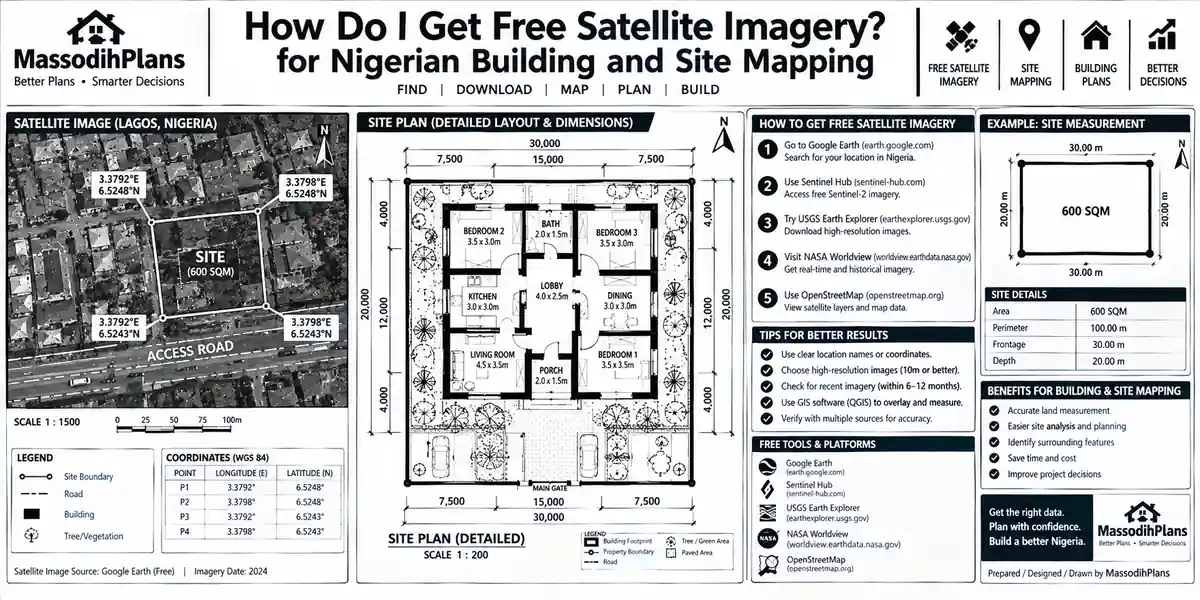
One confusion I see constantly with Nigerian clients: your land size (say, a 15m x 30m plot) is not your building size. Setbacks (mandatory clear space from your boundary, often 1.5m–3m depending on your local planning authority), parking, and compound space all come out of that land size before your actual building footprint is determined. Never assume your building will be as large as your land always ask your architect what the buildable footprint actually is after setbacks.
If a plan doesn’t show written dimensions for every room only room labels and a pretty layout that is not a complete floor plan, and you should not approve it or pay for it as final. A plan without dimensions is a sketch, not a buildable document.
Layer Three: How to Read Architectural Symbols (A Quick, Practical Key)
You don’t need to memorize every symbol an architect uses. You need the handful that appear on almost every residential plan. Here’s the shortlist that actually matters:
- Solid thick parallel lines walls
- Break in a wall with a quarter-circle arc a door, with the arc showing swing direction
- Break in a wall with thin lines across the gap a window
- A rectangle with a diagonal line and small circles at the corners inside a bathroom box a bathtub or shower tray
- A small circle or oval inside a bathroom box a toilet (WC)
- A pair of parallel diagonal lines with a small circle a wash hand basin
- A rectangle with a zigzag or straight line pattern inside it, usually against a wall a staircase, with the line showing the direction of ascent (an arrow usually points “up”)
- A dashed or dotted line running along the ceiling area usually indicates something above, like a beam or a change in ceiling height
- A circle with a cross inside it a column
- “N” with an arrow, usually top-right or top-left of the sheet north direction, which tells you sun orientation for every room
Once these ten symbols are familiar, you can walk into almost any residential floor plan Nigerian or otherwise and read it without needing someone standing next to you explaining it line by line.
Layer Four: How to Read Architectural Drawings as a Full Set (Not Just the Floor Plan)
Here’s something almost every other article on this topic gets wrong by omission: they teach you to read the floor plan and stop there. But a floor plan alone cannot fully answer “what will this house feel like?” because a floor plan only tells you the footprint. It cannot show you height, so it cannot show you volume, and volume is a huge part of how a space actually feels.
A complete drawing set includes:
- Floor plans the top-down layout you’ve now learned to read
- Elevations straight-on views of each exterior face (front, rear, both sides), showing you what the house will actually look like from the street, including window proportions, roof lines, and material zones
- Sections a vertical “slice” through the building, showing floor-to-ceiling heights, roof pitch, and how a double-height space (if any) actually rises through the building
- Roof plan how the roof is shaped and how water drains off it
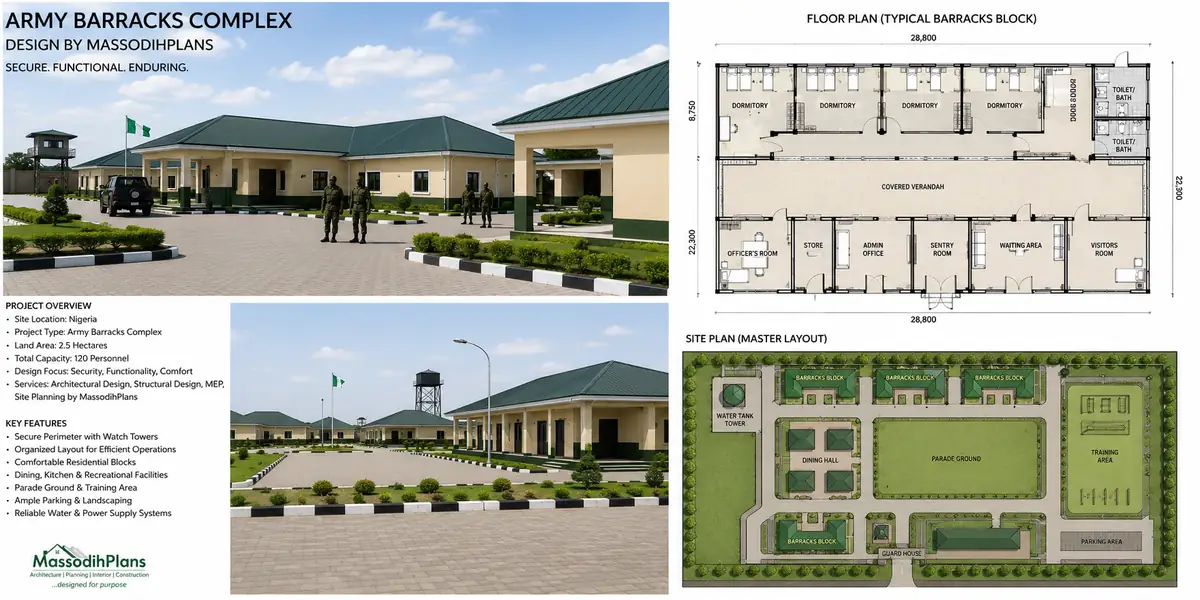
- Site/location plan how the building sits on your actual plot, relative to boundaries and the road
If you’ve only ever been shown a floor plan and asked to “imagine” the rest, that’s precisely why you couldn’t visualize it. You were missing half the information needed to build a mental 3D model. Always ask for at least the floor plan, elevations, and one section together that trio alone solves most of the visualization struggle before you even need software or a 3D render.
Layer Five: How to Actually Visualize a Floor Plan (Turning Lines Into a Feeling)
This is the section I most wanted to write, because it’s the part every other guide treats as an afterthought “just imagine walking through it” without actually teaching you how.
Method One: The Tape-on-the-Floor Walkthrough
This is the single most effective, lowest-cost method I recommend to every client, and it works whether you’re a total beginner or someone who’s built three houses already. Using masking tape, marker chalk, or even a rope, mark out the actual room dimensions from your plan on any open floor you have access to your current living room floor, a compound, an empty hall. Then physically walk into that marked-out space. Stand where the bed would go. Walk to where the wardrobe would be. Sit where the dining table would sit. Your body will tell you things your eyes on a piece of paper never will whether a room feels tight, whether a doorway is too close to a bed, whether the space between the dining table and the wall lets a chair actually pull out.
Method Two: The Cardboard and Cut-Out Furniture Model
For those who want a step further without paying for software, print your floor plan at the correct scale (your architect can provide this), then cut out simple scaled rectangles representing your furniture at that same scale a rectangle for the bed, one for the wardrobe, one for the dining table. Move these cut-outs around directly on the printed plan. This turns an abstract layout into a physical puzzle you can manipulate with your hands, and it very quickly reveals furniture-fit problems that are almost invisible just by staring at the plan.
Method Three: Ask for a 3D View, But Ask for the Right Kind
A 3D exterior render (the pretty image of the finished house you usually get shown first) is the least useful 3D visual for actually solving “I can’t visualize my floor plan,” because it shows you the outside, not how the inside feels. What you actually want is:
An interior 3D view or “walkthrough” render of the main living spaces and at least one bedroom, showing furniture placed to scale
An axonometric or “dollhouse” view a 3D view with the roof removed, looking down at an angle, which shows you the whole layout in one glance in a way a flat floor plan simply cannot
A furniture-layout overlay on the floor plan itself many architects can provide this on request, showing scaled furniture symbols placed directly on the 2D drawing, which is often enough on its own to solve the visualization problem without needing full 3D software at all
If your designer has only ever shown you a flat, unfurnished floor plan and an exterior render, ask directly for a furnished interior view or a dollhouse-style 3D this single request solves the visualization gap for the vast majority of clients I’ve worked with.
Method Four: The Daily Routine Test
Once you can picture the space, test it against your actual life, not a generic ideal life. Walk yourself, in your mind or on your taped-out floor, through: waking up and reaching the bathroom, bringing groceries from the car to the kitchen, receiving a visitor at the front door, doing laundry from the bedroom to the laundry area. If any of these everyday routes feel long, awkward, or force you through a private space to reach a public one, that’s a real design issue not a small preference, a genuine flaw worth raising with your architect before construction, not after.
Do the tape-on-the-floor walkthrough with the actual people who will live in the house, not alone. A teenager, a parent, and a grandparent will each walk the same taped-out plan differently and catch different problems a wardrobe door that blocks a walking path, a bathroom too far from an elderly parent’s room, a kitchen too far from where the family actually eats.
Layer Six: “I Don’t Know What House Plan to Build” Solving the Bigger Problem
Now let’s talk about the problem underneath the problem, because for a good number of you, the real struggle isn’t reading a specific plan someone gave you it’s that you don’t have a plan yet, and every option feels equally overwhelming.
Here is the honest truth: you will never “browse” your way to the right house plan by looking at enough beautiful photos. Photos show you facades and finishes. They cannot tell you whether a layout fits your family’s actual life. Use this sequence instead, which is the exact process I walk clients through before a single drawing starts.
List your non-negotiables first, not your wants.
How many people will actually live in the house, and what are their real needs an elderly parent who can’t manage stairs, a home office, a nursing mother’s room near the kitchen? Start here, not with “modern” or “duplex.”
List your daily routines, in order.
Morning routine, cooking routine, receiving guests, laundry routine. A good plan supports these routines with short, logical paths. A plan chosen purely for looks often ignores them completely.
Set your real budget ceiling before you fall in love with anything.
A plan that’s beautiful but 40% over your actual budget isn’t a real option it’s a distraction that will cost you months of indecision.
Choose your footprint before your style.
Bungalow or storey building is a decision driven by your land size, your budget, and your family’s mobility needs (stairs are a real consideration for elderly parents or very young children) decide this before you decide “modern” or “contemporary.”
Bring your list to a designer, not a Pinterest board.
A good architect’s job is to translate your actual list family size, routines, budget, footprint into a plan. Skipping straight to “show me modern designs” without this list is exactly how people end up with a beautiful plan that doesn’t fit their life.
Test two or three shortlisted plans with the tape-on-the-floor method above
Not just by looking at them. The plan that survives an actual physical walkthrough by your real family, doing your real routines, is very often not the one that looked best in a photo.
That process needs, routines, budget, footprint, then style solves “I don’t know what to build” far more reliably than scrolling through inspiration images, because it starts from your actual life instead of someone else’s finished house.
A Quick Symbol-and-Term Translator (For When You’re Talking to Your Architect)
- “Elevation” = what the house looks like from outside, one face at a time
- “Section” = a vertical slice showing heights
- “Setback” = required empty space between your building and your plot boundary
- “Circulation” = corridors, passages, and any space whose only job is letting you move between rooms
- “Load-bearing wall” = a wall holding up the structure above it; never remove or move this without an engineer’s approval
- “Partition wall” = a non-structural interior wall, generally safe to reposition during design (not after construction, without proper assessment)
- “Massing” = the overall 3D shape and bulk of the building, before finishes are considered
Knowing these seven terms alone will change how confidently you can speak with any architect or contractor, because you’ll be using their language instead of guessing at it.
Finally
If you started this article unable to picture your own house from a piece of paper, I hope you now see that the gap was never about intelligence it was about never having been shown the code, the math, and the physical methods that turn flat lines into a space you can actually feel yourself standing in. Read the dimensions before you trust your eyes. Do the arithmetic on your furniture before you approve a room size. Tape it out on your floor before you sign off on anything. And if you’re still choosing what to build at all, start from your family’s real routines, not from a photo you liked.
That’s the whole method. It works whether you’re my friend asking me over the phone, a client I’m meeting for the first time, or a student trying to pass a design studio review.
If you want plans that already come with furniture-layout overlays and interior 3D views built in, browse our Plans Library. If you want to go deeper on reading and commissioning drawings step by step, visit Plan School. If you’d rather have us walk your specific plan or land with you directly, our Services page shows how that works. And for more practical, no-fluff building guides like this one, explore our Homepage. See Lagos Approval guide
Related Articles to guide you right
- My Floor Plan Has Poor Circulation: How to Fix It and Improve Flow
- I Don’t Know How to Arrange My Rooms: Here’s How to Actually Figure It Out
- My Rooms Are Too Small: How Big Should Each Room Be in a House?
- I Don’t Know How Big Each Room Should Be: Standard Room Size Guide
- How Much Building Can I Put on My Plot? Building Coverage and Setbacks
- My House Plan Doesn’t Fit My Land: What to Do Before You Build
- I Need a House Plan That Fits My Plot with Exact Dimensions and Layout
- I Don’t Know What House Plan to Build? Here’s How to Decide
- Architectural Design Principles Every Architect and Homeowner Should Know
- Architectural Drawings Guide: Types, Symbols, Standards, Dimensions and Examples
- Architectural Engineering and Architectural Design Courses for House Building Plans
Author
Massodih Okon is a Nigerian built-environment professional with academic and professional experience in urban and regional planning, geography, architectural design, Landscape Design, GIS and land development.
He holds a Master’s degree in Urban and Regional Planning from the University of Uyo and a first degree in Geography and Regional Planning.
Through MassodihPlans, he publishes practical guides on Nigerian house plans, building design, physical planning, site planning, development approval and residential construction. Read the full author profile →