Yes, you can build on sloped land, and in most cases the slope itself is not what decides whether the house survives. Measure it first with one line of arithmetic: slope % = rise ÷ run × 100. Up to about 10%, you build almost as you would on flat ground, with a stepped foundation and a good drain. From 10% to 20%, you choose between a split-level house and a levelled platform held by a retaining wall with drainage behind it. Above 30%, an engineer leads and you follow. In every one of those bands, what hurts people is the water that runs across the slope during a storm. So a sloped plot needs a house plan, a site plan and a drainage plan drawn together, not one after the other.
That paragraph will get you started, but it will not protect your money. A sloped plot usually sells for less than a flat one and usually costs more to build on, and whether you come out ahead depends on arithmetic you can do on your phone in ten minutes. By the end of this post you will have worked out the real steepness of your land, how much earth you would have to move, how hard the soil pushes on a retaining wall, how many litres of water your plot receives in a ten-minute storm, and a score that tells you whether to build, negotiate or walk away.
One result near the end surprises almost everyone. After heavy rain, the same 2 m retaining wall carries a little over twice the load it carries on a dry day. That one fact explains why so many walls look fine at handover and fail in the first or second rainy season, and it is why the drainage section matters more than the wall section. I write this for people building on small Nigerian plots, where a 40 by 80 ft or 50 by 100 ft piece of land leaves no spare room to hide a mistake. The maths is the same if you are buying a hillside lot in Vancouver, a plot in a Hanglage near Stuttgart or a sloping site in Singapore, so there is a section for readers in those countries too.
Quick Verdict: Your Slope and What It Usually Means
| Slope (rise ÷ run) | Angle | Ratio | What it usually means for the house |
|---|---|---|---|
| 0 to 5% | 0 to 2.9° | flatter than 1:20 | Treat it as flat. Raise the floor, shape the ground so water leaves, add a drain. |
| 5 to 10% | 2.9° to 5.7° | 1:20 to 1:10 | Stepped foundation or light cut-and-fill. A low wall at most. |
| 10 to 20% | 5.7° to 11.3° | 1:10 to 1:5 | Split-level or levelled platform. Retaining wall of 1 to 2 m. Real drainage work. |
| 20 to 30% | 11.3° to 16.7° | 1:5 to 1:3.3 | Engineer-designed walls or columns. Soil tests at the top and bottom of the plot. |
| Over 30% | over 16.7° | steeper than 1:3.3 | Engineer-led. Columns, piles or carefully engineered terraces, plus a slope stability check. |
These bands are planning rules of thumb, not legal limits. Your local authority and your engineer have the final word.
With the overview done, we can start where every sloped-plot project should start: with the real number.
1. How Steep Is Your Land? Measure It Before Anything Else
Everyone says “my land is very steep,” and the word means something different to each person. A plot that looks dramatic to the eye is often 8%, and a plot that looks gentle can be 15%. So we measure.
Three formulas to keep
- Slope % = (rise ÷ run) × 100
- Angle in degrees = arctan(rise ÷ run)
- Ratio 1:n, where n = 100 ÷ slope %
Example: the plot rises 3.05 m over a length of 30.48 m (that is 10 ft over 100 ft, a normal 50 by 100 ft plot). Slope = 3.05 ÷ 30.48 × 100 = 10%. Angle = 5.7°. Ratio = 1:10.
Percent and degrees are not the same thing
| Slope % | Angle | Ratio |
|---|---|---|
| 5% | 2.9° | 1:20 |
| 10% | 5.7° | 1:10 |
| 15% | 8.5° | 1:6.7 |
| 20% | 11.3° | 1:5 |
| 25% | 14.0° | 1:4 |
| 30% | 16.7° | 1:3.3 |
| 33% | 18.4° | 1:3 |
| 40% | 21.8° | 1:2.5 |
| 50% | 26.6° | 1:2 |
| 100% | 45° | 1:1 |
If a seller tells you the plot is “about 30 degrees,” that is a slope of 58%, which is very steep. If he means 30%, it is only 16.7°. Always ask which unit he is using.
Four ways to measure your slope
String and line level (free). Drive two pegs 10 m apart along the line of fall. Tie a string at ground level on the uphill peg, pull it level (use a line level or a spirit level hung on the string) and measure the gap between the string and the ground at the downhill peg. With a 10 m run, the gap in centimetres divided by 10 gives you the slope in percent. A gap of 80 cm means 8%.
Phone clinometer app. Lay the phone on a straight board about 1 m long, read the angle, then convert: slope % = tan(angle) × 100. Measure in three or four places and average them.
Contour map from a surveyor. Slope % = contour interval ÷ horizontal distance between contours × 100. If 1 m contours sit 8 m apart, the slope is 12.5%. Water always runs at right angles to the contour lines, so you can read the flow paths straight off the map.
Google Earth Pro elevation profile (for screening only). Draw a path along the plot, choose “Show Elevation Profile,” and you get a rough slope. If you live abroad and are deciding whether a plot deserves a surveyor’s visit, this is a fair first filter. The free data can be off by a metre or more, so it is never a design tool.
Every 1% of slope is 1 cm of drop per metre. On a house that is 10 m deep, that is 10 cm of drop per 1%, which is why the next sections keep using a 10 m deep house as the working example.
Measuring tells you the steepness. It does not tell you whether the ground will stay where it is, so the next job is to read the land itself.
2. Read the Land: Is This Plot Buildable at All?
Two plots with the same 12% slope can behave completely differently. One sits on firm lateritic gravel and the other on loose sand that has moved a little every rainy season for decades. Before you draw anything, spend twenty minutes walking the plot, preferably the day after a heavy rain.
The 20-minute site walk
Stand at the top, then at the bottom, and look for the path water took. Mud lines, flattened grass and little channels as wide as a finger show you where it ran.
Look along the top of the slope for fresh cracks in the ground. A crack running across the slope near the crest is a warning that a block of soil has started to move.
Check the bottom of the slope for a bulge or a swollen, wet toe.
Look at the trees and poles. Trunks that curve or lean downhill, and electric or fence poles that tilt, show slow ground movement.
Look for seepage. Wet patches halfway down the slope in the dry season mean groundwater is coming out of the hill.
Check the neighbours’ walls and cuts. Cracked, leaning or sagging walls tell you how the ground has behaved.
Look 50 m around the plot for gullies, especially above it. An active gully close to a plot is a bigger concern than the slope itself.
Find out where the street drain or road runoff ends. If it ends on or above your plot, you are about to inherit someone else’s water.
The soil test: two points, not one
Ask for at least two trial pits or boreholes, one near the top of the plot and one near the bottom. Soil changes over very short distances on a slope, and a test in the middle misses both the fill at the bottom and the weathered layer at the top. The test gives you bearing capacity for the foundation and the soil’s angle of internal friction (written φ), which feeds the retaining wall maths later.
Slope Risk Scorecard (a screening tool, not engineering)
Score each row from 0 to 3, add them up and read the result below.
| Factor | 0 | 1 | 2 | 3 |
|---|---|---|---|---|
| Slope | under 5% | 5 to 10% | 10 to 20% | over 20% |
| Water coming from above | none visible | small plot above | road or estate drain points at you | clear flow path or seasonal stream |
| Erosion within 50 m | none | small rills | small gully | active gully or collapsed structures |
| Soil | firm gravel or laterite | sandy laterite | soft clay or silt | loose sand, fill or high water table |
| Access slope from the road | under 8% | 8 to 12% | 12 to 18% | over 18% |
| Neighbours at the edge | none | boundary wall only | old cuts or retaining walls | unsupported cuts or buildings near the edge |
- 0 to 5: straightforward. Design carefully and use an engineer for any wall.
- 6 to 10: buildable. Bring in an engineer early and budget for drainage and walls.
- 11 to 14: engineer-led project. Price it at the high end of the allowances in section 11.
- 15 to 18: negotiate a very large discount or walk away.
A score of 11 or more, any crack across the crest, any seepage at mid-slope or any active gully within 50 m means you stop and bring in a COREN-registered engineer before you spend money on drawings.
Once you know the plot is buildable, you have to decide how the house will meet the slope. That is the next choice, and there are only five.
3. Building on Sloping Land: The Five Ways to Put a House on a Slope
Every sloped-plot design, however fancy it looks, is one of these five or a mix of them.
| Strategy | How it works | Fits slopes of roughly | Main cost | Main risk |
|---|---|---|---|---|
| Stepped foundation | The house stays on the natural ground and the floor steps up in small jumps | 5 to 15% | Extra footing depth and blockwork on the low side | Water pooling at the steps if drainage is ignored |
| Balanced cut and fill | Soil cut from the high side fills the low side to make one flat platform | 5 to 20% | Earthworks and a low wall | Half the house sitting on fill |
| Split-level | Floors follow the ground in half-storey steps | 10 to 35% | Stairs and more complex roofs | Poor planning wastes space on stairs |
| Terraces with walls | Retaining walls create flat steps for house and garden | 15 to 30% | Walls, which are the biggest cost | Wall failure from poor drainage |
| Columns or piles | The floor sits on columns above the ground | over 25 to 30% | Deep structural work | Cost and engineering complexity |
The earth-moving formula nobody gives you
For a platform W metres wide (across the slope) and D metres deep (along the slope) on a uniform slope s (written as a decimal, so 10% = 0.10):
- Balanced cut and fill: volume of cut = volume of fill = W × D² × s ÷ 8
- Cut only (platform at the lowest level): volume = W × D² × s ÷ 2
- Same for fill only (platform at the highest level)
Notice that D is squared. A house that is deep along the slope moves a lot of earth, and a house that is shallow along the slope moves very little.
Worked example: a 50 by 100 ft plot (15.24 m × 30.48 m), 10% slope
Put a house footprint of 12 m wide by 10 m deep on the slope.
- Drop across the house = 10 × 0.10 = 1.0 m
- Balanced cut and fill: 12 × 100 × 0.10 ÷ 8 = 15 m³ of cut and 15 m³ of fill, with the maximum cut or fill depth at the edges only 0.5 m. No soil leaves the site, and the back wall is about 0.5 m high.
- Cut only: 12 × 100 × 0.10 ÷ 2 = 60 m³. Loosened soil takes up roughly 25% more space, so that is about 75 m³ to haul away, or about 7 loads of a 12 m³ tipper.
- Illustration only: at an assumed ₦70,000 per trip (replace this with your actual quote), 7 trips is ₦490,000 to carry away soil, with nothing gained.
Same house, turned a different way
Keep the same 120 m² footprint and change only the direction.
| Footprint | Width across slope | Depth along slope | Balanced cut or fill at 10% |
|---|---|---|---|
| Long side along the contour | 15 m | 8 m | 15 × 64 × 0.10 ÷ 8 = 12 m³ |
| Square-ish | 12 m | 10 m | 15 m³ |
| Long side up the slope | 8 m | 15 m | 8 × 225 × 0.10 ÷ 8 = 22.5 m³ |
Turning the house to run up the slope instead of across it moves nearly twice as much earth for exactly the same floor area. Put the long side along the contour lines.
How the numbers change as the slope grows (12 m × 10 m footprint)
| Slope | Drop across the house | Max depth of cut or fill (balanced) | Balanced cut = fill | Cut only | Wall height if cut only |
|---|---|---|---|---|---|
| 5% | 0.5 m | 0.25 m | 7.5 m³ | 30 m³ | 0.5 m |
| 10% | 1.0 m | 0.5 m | 15 m³ | 60 m³ | 1.0 m |
| 15% | 1.5 m | 0.75 m | 22.5 m³ | 90 m³ | 1.5 m |
| 20% | 2.0 m | 1.0 m | 30 m³ | 120 m³ | 2.0 m |
| 25% | 2.5 m | 1.25 m | 37.5 m³ | 150 m³ | 2.5 m |
| 30% | 3.0 m | 1.5 m | 45 m³ | 180 m³ | 3.0 m |
Look at the 10% row again. At a gentle slope the retaining wall you need is tiny, so do not let anyone sell you a huge wall for a 10% plot.
Three foundation rules on a slope
Never found half the house on fill and half on natural ground. The two halves settle at different rates and the walls crack diagonally, usually at the corners. Take footings through the fill down to natural ground, or build the whole house on the same material.
Compact fill in layers. Place fill in layers of about 150 to 200 mm and compact each layer before adding the next.
Step footings gently. A common good-practice rule is that each vertical step in a strip footing should not be taller than the footing is thick, and the two levels should overlap by at least twice the height of the step (and not less than 300 mm). Your engineer sets the final detail.
Choosing a strategy is half the job. The other half is deciding where on the plot the house stands.
4. How to Position a Building on a Slope
Position matters because moving a house 3 m up or down a slope can change your earthworks, your wall height and your drainage all at once. I use these rules in order.
Rule 1: Long side along the contour. The table above already proved it.
Rule 2: Build on the most stable ground, not the best view. Firm ground, away from the crest edge and away from the lowest wet corner, beats a pretty outlook every time.
Rule 3: Stay clear of edges. Keep footings back from the top of a steep drop. A reference used in the United States for slopes steeper than 1 vertical to 3 horizontal (33%) is to set the footing back from the slope face by about one-third of the slope height, up to 12 m. Treat that as a minimum starting point and let your engineer set the figure for your soil.
Rule 4: Keep the house out of the water path. On the contour map, draw the flow lines coming from above. Place the cut-off drain uphill of the house, and place the house so that the drain protects it instead of sitting beside it.
Rule 5: Let the road side decide the plan.
| Road above the plot (the plot falls away from the street) | Road below the plot (the plot rises from the street) | |
|---|---|---|
| Entrance | Level with the street, which is easy | Climbs from the gate to the door |
| Parking | Easy at the top | Needs a driveway ramp, see below |
| Cuts and walls | Small, because the house sits near the high side | Larger, because the back of the house cuts into the hill |
| Sewer and drains | Fall away from the house to the back or low side | Fall toward the street, which is easier to connect |
| Water | Street water runs onto your plot, so build a kerb or drain at the boundary | Uphill neighbour’s water arrives at your back wall |
| Responsibility | You are upstream, so your discharge reaches the neighbour below | You are downstream, so protect your back |
Rule 6: Check the buildable envelope. On a 50 by 100 ft plot (15.24 × 30.48 m), assume for illustration a 6 m front setback, 3 m rear and 1.5 m sides. The buildable envelope is (15.24 − 3) × (30.48 − 9) = 12.24 × 21.48 = 263 m². With 3 m side setbacks it shrinks to 9.24 × 21.48 = 198 m². Your planning authority sets the real values, and setbacks are usually measured horizontally, not along the slope surface. Ask the office to confirm, because on a steep plot that difference matters.
Rule 7: Keep the driveway gentle. Ramp length L = rise ÷ gradient. To climb 1.2 m at 12.5% (1:8), you need 1.2 ÷ 0.125 = 9.6 m.
| Driveway gradient | What it feels like |
|---|---|
| Up to 5% | Easy for everything |
| 5 to 10% | Comfortable |
| 10 to 15% | Fine for most cars, slippery when wet laterite or clay is the surface |
| 15 to 20% | Low-clearance cars scrape, wet days become hard |
| Over 20% | Avoid |
Ease the top and bottom of any ramp over 2 to 3 m with a gentle curve so bumpers do not scrape. Rib or groove concrete or use interlocking paving for grip.
Rule 8: Use the slope for services.
Water tank on the highest ground. Water pressure = 9.81 kPa for every metre of height. A tank 3 m above the tap gives about 29 kPa (0.29 bar, roughly 4 psi), and 5 m gives about 0.5 bar, which is enough for a normal tap and a modest shower. On a sloped plot with unreliable power, a gravity-fed tank saves pumping.
Sewer and drains fall by gravity. A 100 mm drain commonly needs a fall of roughly 1 in 40 to 1 in 60 (about 1.7 to 2.5%).
Soakaway and septic tank downhill. Keep them downhill of the house, downhill of any borehole, and clear of retaining wall footings and boundaries. Common practice keeps a soakaway at least 5 m from the building and a borehole 15 m or more away, but confirm local rules.
Rule 9: Think about wind and rain. Across most of Nigeria, rain-bearing winds arrive from the south-west in the wet season and the dry harmattan wind comes from the north-east. On a hillside, the windward face takes the worst rain, so give it a deep roof overhang.
Sketch the house three times on a printout of your contour map: one third of the way up, in the middle and one third from the bottom. Count the cut, fill and wall height for each. The cheapest of the three is rarely the one you first pictured.
Position decides the footprint. Next, the drawing itself has to change, because a flat-land plan placed on a slope does not work.
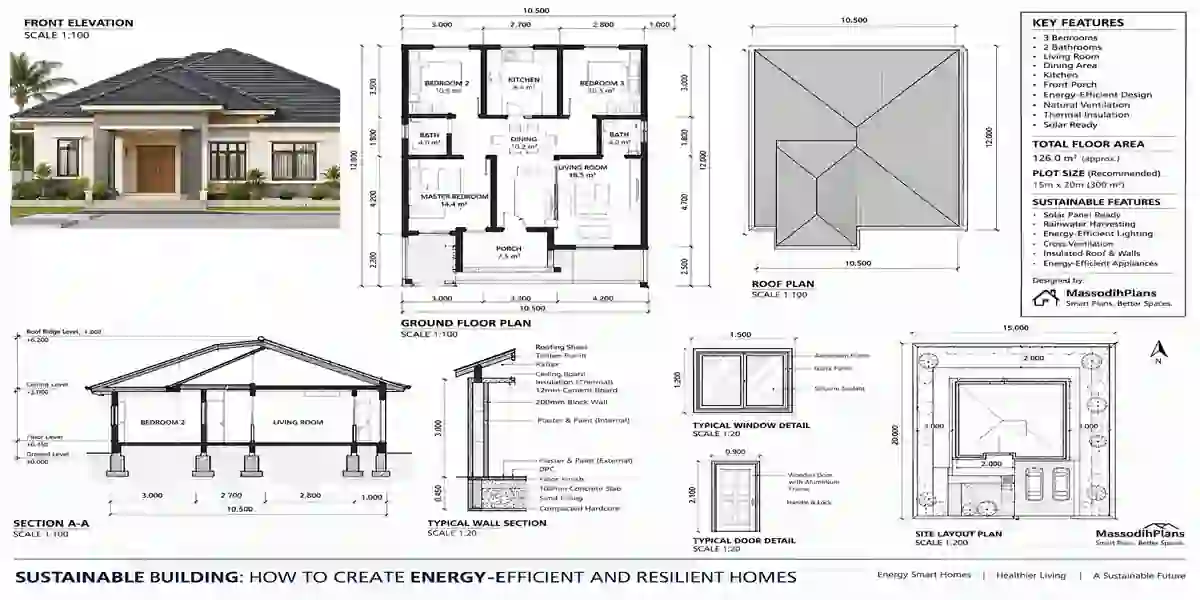
5. House Plan for a Sloped Plot: What Changes Inside the Drawing
A standard plan assumes one floor level and one ground level. On a slope you have to manage three, and you should write them on every drawing.
- EGL, the existing ground level, which is what the surveyor measured.
- FL, the formation level, the level of the cut-and-fill platform or footing base.
- FFL, the finished floor level of each floor.
A rule for the floor level. Set the FFL at least 150 mm above the highest ground touching the wall, and higher where flooding or ponding is possible. In wet areas of the South-South and South-East, many builders go to 450 mm or more.
Count the steps. A comfortable riser is about 170 mm. Number of risers = height difference ÷ 0.17.
- 1.0 m rise: 1.0 ÷ 0.17 = 5.9, so 6 risers of about 167 mm
- 1.5 m rise: 8.8, so 9 risers of about 167 mm
- Every metre of height costs you about six steps
That matters for people. Elderly relatives, small children, someone carrying shopping, and anyone on a muddy day in July all notice those steps. If a family member cannot manage stairs, put one bedroom and one bathroom on the entrance level.
Where each room goes
| Room | Best position | Why |
|---|---|---|
| Parking, store, generator | Lowest level at the road | Vehicles and heavy loads never climb stairs |
| Kitchen | Entrance or middle level, near service access | Gas, water and groceries move easily |
| Living and dining | Middle level, opening to the garden | Step-free garden access, good breeze |
| Master bedroom and the other bedrooms | Upper level | Quiet, dry, away from the ground |
| One bedroom and bath for an elderly person or visitor | Entrance level | No stairs |
| Water tank | Highest ground on the plot | Free pressure |
| Inverter and generator | Raised pad, outside the drain path | Water and electricity should never meet |
Keep bedrooms away from the cut wall. A bedroom wall pressed against a cut face gets damp and dark. Leave a gap of about 0.6 to 1.0 m between the house wall and the cut face and put a drain in the gap. It becomes a light well and a dry area, and it keeps the wall from becoming a retaining wall by accident.
The wall that is also the house. On sloped plots, the back wall of a lower level can double as the retaining wall. This saves money, but it must be designed as a retaining wall (reinforced, waterproofed and drained), not built as ordinary blockwork. Waterproofing a buried wall is not a place to save money.
Investment angle. A lower level that opens to the ground on one side can become a self-contained flat or office with its own entrance. On a small plot, that extra lettable space is sometimes the reason a sloped plot beats a flat one for return on cost.
A plan that follows the ground usually ends up as a split-level, so let us look at that form properly.
6. Split-Level House: When the Floors Follow the Ground
A split-level house has floors at staggered heights, usually half a storey apart, instead of full floors stacked above each other. On a slope the floors follow the ground, so you move far less earth and build far fewer retaining walls.
Three formulas
- Number of steps across the house = D × s ÷ ΔH, where D is the house depth (m), s is the slope as a decimal and ΔH is the height of each level change.
- Run needed for one level change on a given slope = ΔH ÷ s.
- Risers per level change = ΔH ÷ 0.17.
For a half-storey step of ΔH = 1.5 m (9 risers) and a house 10 m deep:
| Slope | Drop across 10 m | Number of 1.5 m steps | Practical result |
|---|---|---|---|
| 5% | 0.5 m | 0.3 | No split needed. Use a stepped footing or a raised plinth. |
| 10% | 1.0 m | 0.7 | One small step of about 1 m (6 risers) |
| 15% | 1.5 m | 1.0 | Classic split-level: one half-storey step |
| 20% | 2.0 m | 1.3 | One half-storey plus a shallow step |
| 25% | 2.5 m | 1.7 | Two steps, one shallower |
| 30% | 3.0 m | 2.0 | Two half-storey steps, three levels across the house |
| 40% | 4.0 m | 2.7 | Three steps, and an engineer must be involved |
Example level plan for a 15% fall across a 10 m deep house (a concept to discuss with your designer, not a drawing):
| Level | Height above entrance | Rooms |
|---|---|---|
| 1 | 0.00 m | Car porch, store, guest toilet, entrance hall |
| 2 | +1.50 m (9 risers up) | Living, dining, kitchen, with the rear veranda opening to the natural ground at the back |
| 3 | +3.00 m (9 more risers) | Bedrooms and bathrooms |
Because the ground rises 1.5 m across the footprint, the back of level 2 meets the ground. That gives you a back door at ground level without extra work.
Where a split-level pays off. From about 10 to 15% upward, usually until the slope exceeds 30%. It also suits small plots because the house climbs the hill instead of spreading across it.
Where it does not. On flat or almost flat plots, where the stairs only waste floor area. For clients who struggle with stairs, a single level with more earthworks may suit better.
Watch the roof. Staggered levels mean staggered roofs, with more valleys and junctions where leaks start. Ask the designer to draw the roof plan early and have a roofer review it.
A split-level reduces retaining walls but rarely removes them completely, and that is where the next section starts.
7. Site Plan for Sloping Land: What Must Be on the Drawing
A site plan for flat land shows boundaries, setbacks and the building. On a slope, the site plan is the drawing that proves you understand the ground, and it is the one planning offices ask the most questions about.
What a sloped-site plan should show
| Item | Why it matters |
|---|---|
| Boundary dimensions, north arrow, scale | Basic identification |
| Contours (0.5 m intervals on small plots, 1 m if gentle) and spot levels at corners and along boundaries | Shows the real shape of the ground |
| Benchmark (BM) with a reference level | Lets the builder set everything out from one fixed point |
| Building footprint with FFL for each floor | Ties the house to the ground |
| Cut and fill limits | Shows where earth is removed and added |
| Retaining walls with top-of-wall and bottom-of-wall levels, length and location | Proves the walls are planned, not improvised |
| Drainage layout: cut-off drain, fall arrows, outfall point, manholes, soakaway or septic | Shows where the water goes |
| Driveway with gradient arrows | Proves access works |
| Setbacks measured horizontally | Matches how authorities check them |
| Sections A–A and B–B through the steepest line of the plot | Shows heights and walls in profile |
| Neighbour’s wall and floor levels at the boundary | Protects both sides |
Always draw sections. A plan view hides height. A section through the steepest line of the plot shows the wall height, the step heights and how close the building sits to the edge at a glance.
Ask the office first. Authorities differ. Many ask for a survey plan with levels, a soil report and structural drawings for any retaining wall, prepared by a COREN-registered engineer. Phone or visit your planning authority before you draw, and write down what they request.
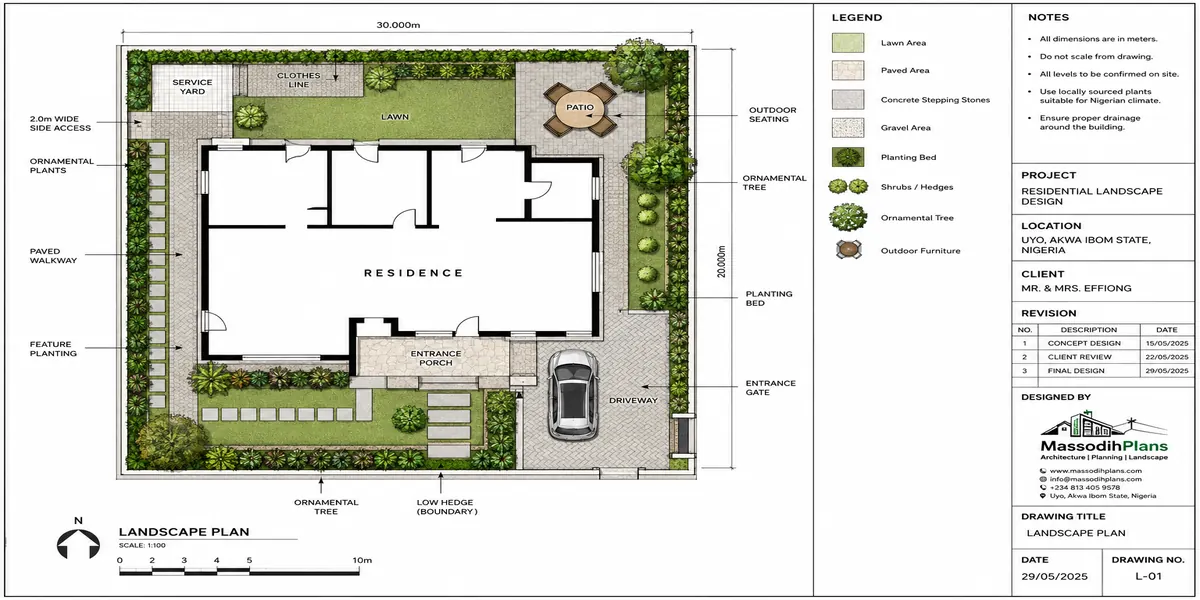
If you want a site plan that includes contours, cut-and-fill limits and drainage, MassodihPlans offers site planning and site analysis services built exactly for this kind of plot.
Now to the part of the drawing that makes people nervous: the retaining wall.
8. Retaining Wall: How Hard the Soil Pushes and What Keeps a Wall Standing
Retaining walls are not complicated in principle. Soil pushes sideways, the wall must resist it, and water behind the wall multiplies the push. The numbers below let you see the size of the problem before you meet an engineer.
The push of dry soil (Rankine active pressure)
- Ka = (1 − sin φ) ÷ (1 + sin φ)
- Thrust per metre length of wall: P = ½ × Ka × γ × H²
- Overturning moment about the base per metre: M = P × H ÷ 3
For a typical backfill with φ = 30° and unit weight γ = 18 kN/m³, Ka = 0.333.
The same wall dry and after heavy rain
If water saturates the backfill to the top and has no way out, the load is the sum of the submerged soil push (using γ′ = 10.2 kN/m³) and the water pressure ½ × 9.81 × H². That is a worst case, but it is exactly what happens behind a wall with no drainage.
| Wall height H | Dry thrust (kN/m) | Saturated thrust (kN/m) | Dry overturning moment (kN·m/m) | Saturated overturning moment (kN·m/m) |
|---|---|---|---|---|
| 1.0 m | 3.0 | 6.6 | 1.0 | 2.2 |
| 1.5 m | 6.8 | 14.9 | 3.4 | 7.4 |
| 2.0 m | 12.0 | 26.4 | 8.0 | 17.6 |
| 2.5 m | 18.8 | 41.3 | 15.6 | 34.4 |
| 3.0 m | 27.0 | 59.4 | 27.0 | 59.4 |
Read the table in two directions.
Down the columns: doubling the wall height from 1.5 m to 3.0 m multiplies the thrust by 4 (6.75 to 27) and the overturning moment by 8 (3.4 to 27). Height is the expensive variable, so shave every 0.5 m you can with smart positioning.
Across the columns: water behind the wall multiplies the thrust by about 2.2 at every height. A wall designed for dry soil faces more than double the load in a storm. Drainage is not an accessory, it is half the structure.
What drainage behind a wall looks like
- A granular drainage layer (clean coarse sand or 20 mm stone) about 300 to 450 mm thick against the back of the wall, wrapped in a filter fabric so soil does not clog it.
- A perforated pipe, about 100 mm, at the bottom of that layer, laid to a fall of at least 1% toward a proper outlet.
- Weep holes of about 75 to 100 mm through the wall at roughly 1.5 to 2 m centres, above the finished ground on the low side.
- A cut-off drain along the top of the wall so surface water never pours over it.
- Backfill placed in layers and compacted, never dumped.
Planning sizes (not for construction)
For a cantilever reinforced concrete wall of height H, common first sizes are a base width of 0.5 to 0.7 H, a base thickness and stem thickness of about H ÷ 10 to H ÷ 12 (never below about 200 mm). Your engineer will do the real design, including checks against sliding, overturning and bearing pressure, with typical safety targets of about 1.5 for sliding and 2.0 for overturning.
Quantity example. A 2.0 m cantilever wall with a 1.2 m base, a 0.25 m base thickness and a 0.20 m stem has concrete volume per metre = 1.2 × 0.25 + 0.20 × (2.0 − 0.25) = 0.30 + 0.35 = 0.65 m³/m. For 12 m of wall, that is 7.8 m³ of concrete, and at an illustrative 100 kg of steel per m³, about 780 kg of reinforcement. Use this to check whether a quote is in the right area, not to build from.
Common wall types
| Type | Typical use | Watch out for |
|---|---|---|
| Reinforced concrete cantilever | Most house walls from 1 to 4 m | Needs a proper design and drainage |
| Gravity wall (stone or mass concrete) | Low walls up to about 1 to 1.5 m | Heavy and wide |
| Gabion (stone-filled wire baskets) | Garden slopes, drainage-friendly | Needs good wire and stone |
| Stone pitching and planted slopes | Gentle embankments | Not for tall loads |
| Plain sandcrete block wall | Garden boundary only | A plain 225 mm sandcrete wall is a boundary wall, not a retaining wall |
I say that last row plainly because I see it too often: a block wall with no steel, no drainage and a bank of wet soil behind it.
Height thresholds. In many places, walls above roughly 1.0 to 1.2 m need engineer-designed drawings and a permit. Whatever your local rule says, if the wall holds up soil near a building, a boundary or a path, get an engineer.
Your neighbour and the law. In common-law countries, including Nigeria, owners generally have a right to support for their land in its natural state from the land next door. If you cut into your plot beside the boundary, you may owe your neighbour proper support, and you generally cannot collect water and send it onto their land. I am a planner, not a lawyer, so confirm the details with a property lawyer. In practice, settle it in writing, agree who builds and maintains a boundary wall, and photograph the existing conditions before you start.
Walls hold the soil. Drainage keeps the water from beating the walls, and that is the topic that decides most sloped-plot projects.
9. Drainage on Sloped Land: Where the Water Goes Decides Everything
Researchers from the University of Windsor and two Nigerian universities studied active gully systems in Abia, Anambra, Enugu and Imo States. They found that poorly designed and built roadside drainage is a major cause of gully erosion, because drains that end in the wrong place or fill with silt overflow, cut away their own sides and collapse, and the uncontrolled water drives gully heads upslope by as much as 60 metres a year. That is the whole drainage lesson in one sentence: water that has nowhere to go will make its own path. confex
So drainage on a sloped plot follows three steps: intercept the water coming from above, convey it safely across or around the house, and dispose of it where it does no harm.
Step 1: Work out how much water you get
Use the rational method for small catchments:
Q = C × i × A ÷ 360
where Q is flow in m³/s, C is the runoff coefficient, i is rainfall intensity in mm/h and A is the catchment area in hectares.
Your catchment is everything uphill whose water reaches your drain, including the uphill neighbour and any road that slopes toward you. On a small plot with a neighbour above, the catchment is often two to four times the plot area.
Typical runoff coefficients (approximate textbook ranges):
| Surface | C |
|---|---|
| Roof, concrete, paving | 0.85 to 0.95 |
| Compacted bare soil or laterite | 0.50 to 0.70 |
| Lawn or planted slope | 0.20 to 0.40 |
Combine surfaces with C = Σ(C × area) ÷ Σ area. If 40% of the catchment is roof and paving (C = 0.9) and 60% is bare soil (C = 0.5), C = 0.4 × 0.9 + 0.6 × 0.5 = 0.66.
Worked example. Your plot is 464 m² and the uphill neighbour and street add up to a catchment of 1,500 m² (0.15 ha). Take C = 0.60 and a short heavy storm of i = 120 mm/h as a screening figure (ask your engineer for the local design value, which often falls between about 120 and 180 mm/h for 5 to 10 minute storms in southern Nigeria).
Q = 0.60 × 120 × 0.15 ÷ 360 = 0.03 m³/s = 30 litres per second.
In ten minutes that is 30 × 600 = 18,000 litres, which would fill a 10,000-litre tank in under six minutes. Rain on that scale falls in the wet-season months in places such as Uyo, Calabar and Port Harcourt, which each receive well over 2,000 mm a year. A house with no plan for 18,000 litres in ten minutes is a house with a stream running through the yard.
Step 2: Size the channel (Manning’s equation)
Q = (1 ÷ n) × A × R^(2/3) × S^(1/2)
where n is roughness (0.015 for ordinary site-cast concrete), A is the flow area, R is the hydraulic radius (area ÷ wetted perimeter) and S is the channel slope as a decimal.
Capacity of two common cut-off drain sizes, flowing at about 75% of their depth:
| Channel (inside size) | at 0.5% fall | at 1% fall | at 2% fall |
|---|---|---|---|
| 225 mm wide × 200 mm deep | 26 L/s | 36 L/s | 51 L/s |
| 300 mm wide × 300 mm deep | 64 L/s | 90 L/s | 128 L/s |
For our 30 L/s example, a 225 × 200 mm drain at 1% (36 L/s) works, and a 300 × 300 mm drain at 1% (90 L/s) works with plenty of reserve for blockages. Always size up, because drains clog with leaves, sand and plastic.
Step 3: Control the speed
On a steep slope the water gains speed, and fast water erodes. Velocity V = Q ÷ A. The 225 × 200 mm channel at 5% fall runs at about 2.4 m/s, and at 10% it reaches about 3.4 m/s, which is fast enough to scour and shoot out of the end like a hose. On slopes steeper than about 5%, use stepped channels or drop structures to break the fall, and end every drain in a stone-lined apron at least 1 m long, wider than the drain, so the water spreads and slows.
Where the water finally goes
- A proper road drain or natural channel that you are permitted to use.
- A soakaway, only where the soil drains well, only downhill of the house and never at the crest of a slope.
- A storage tank that catches roof water. It reduces peak flow and gives you water to use.
Never end a drain on bare soil, never point a downpipe at the neighbour’s wall and never aim runoff at the top of a bank.
Surface and erosion control
- Slope all paving at least 1% (about 1 cm per metre) away from walls.
- Put a cut-off drain about 3 to 5 m above the house or the cut face, at the top of the slope, not at the bottom.
- Cover bare soil quickly. Vetiver grass planted in rows along the contour, with plants about 10 to 15 cm apart and rows spaced a metre or two apart vertically on steeper ground, is widely used in the tropics to hold soil. Ask a local landscape professional to confirm spacing for your site.
- Leave existing trees on the slope wherever you can.
Connect downpipes to the drainage system before the roof goes on. One rainy afternoon of roof water falling on a fresh cut slope can undo weeks of earthworks.
Good design on paper still has to survive construction, so the order and timing of the work matter as much as the drawing.
10. Build in the Right Order and the Right Season
On a flat plot, a delay costs time. On a slope in the rainy season, a delay can cost the slope. Work in this order.
- Topographic survey and soil tests (two points) before the design is finalised.
- Approvals, including wall drawings by a COREN-registered engineer if required.
- Set out the plot and protect a benchmark level that nobody will bury.
- Clear only the building area and leave vegetation elsewhere.
- Build the cut-off drain and temporary silt barriers first, so the first storm cannot wash the site away.
- Do the earthworks, placing and compacting fill in layers.
- Build retaining wall foundations and walls with the drainage behind them, backfilling in layers.
- Build the house foundation through any fill down to natural ground.
- Build the structure.
- Finish permanent drainage, connect downpipes and complete paving falls and steps.
- Plant the slopes.
- Test everything with the first heavy rain and with a hose beforehand.
Timing. Aim to finish steps 4 to 8 in the dry months (roughly December to March in the south, November to April further north) so the walls and drains are working before the heavy rains. Cover any bare slope you cannot finish.
Safety. Do not let workers stand in a trench deeper than about 1.2 m without shoring or sloped sides, and do not pile soil or materials at the crest of a cut. Soil on slopes fails without warning.
Having built it, the question every client asks me next is what it all costs, so let us put numbers on that.
11. What a Sloped Plot Really Costs, and Whether It Is a Bargain
Early-budget allowances. These are planning allowances on top of the cost of the same house on flat ground, not quotes.
| Slope | Typical extra works | Allowance on base building cost |
|---|---|---|
| Under 5% | Stepped footing or plinth, short drain | 0 to 3% |
| 5 to 10% | Stepped or deeper footings, minor cut and fill, drainage, low wall | 3 to 8% |
| 10 to 20% | Split-level or platform with 1 to 2 m walls, drainage system, steps | 8 to 15% |
| 20 to 30% | Engineered walls or columns, deeper footings, erosion protection | 15 to 30% |
| Over 30% | Piles or columns, geotechnical study, slope stabilisation | 30% and above, case by case |
Example: if the same house on flat ground would cost ₦40 million (illustrative figure) and your plot is at 15%, the allowance is 8 to 15%, which means ₦3.2 million to ₦6.0 million extra.
Is the plot a bargain? A one-line test.
Maximum fair price for the sloped plot = price of a comparable flat plot slope premium (extra construction cost)
If a comparable flat plot costs ₦18 million and your slope premium is ₦4.5 million, the sloped plot is only a bargain below ₦13.5 million. Add 10% of the premium as a risk allowance if the scorecard result is 6 or higher. A real view, a flood-free upper position or a lower unit you can rent can justify paying more.
If you are buying from abroad. Before you send money, pay a local surveyor to run levels along the long axis and both side boundaries. Ask the seller for photos taken after rain, ask where the water goes, and ask the neighbours how the plot behaves in July and August. That survey costs very little compared with the price of the land, and it can save millions.
Sloped land is a worldwide condition, and readers from other countries sometimes ask what local rules look like, so a short comparison follows.
12. Sloped Land Around the World: What Readers Outside Nigeria Should Check
The physics does not change at a border, but the rules do. Use this table as a starting list of questions for your local building department, not as a legal reference.
| Country | What to check first |
|---|---|
| United States | Grading and erosion-control permits. The model residential code sets special footing rules next to slopes steeper than 1 vertical to 3 horizontal (33%). Many cities require engineered walls above roughly 1.2 m (4 ft). |
| Canada | Footings below the local frost depth, which varies widely by region. Municipalities and conservation authorities often set setbacks from the top of a slope and ask for a geotechnical report. |
| United Kingdom | Building Regulations for structure and retaining walls. Under the Party Wall etc. Act 1996, excavation close to a neighbour’s building (generally within 3 m, or 6 m in some cases) can require notice. |
| Germany | A Baugrundgutachten (soil report) is standard on a Hanglage. Local development plans can fix reference ground levels and limit cut and fill. |
| Switzerland | Cantonal natural-hazard maps can restrict building where there is landslide, rockfall or flood risk. Soil reports are routine. |
| Luxembourg | Hilly terrain. Municipal development plans often govern terraces, levels and cut and fill. |
| Iceland | Avalanche and landslide hazard zoning (assessed by the Icelandic Met Office) can limit where you may build. Watch for frost and heavy rain too. |
| UAE | Hilly sites (for example in Ras Al Khaimah and Fujairah) and wadi flash-flood paths. Municipalities typically require a soil investigation and drainage approval. |
| Qatar | Gentle terrain, so “slope” is mostly about site grading and stormwater falls, where the drainage maths above still applies. |
| Australia | Look at AS 2870 (residential footings) and AS 4678 (earth-retaining structures). Many councils add controls for sloping sites and may ask for a geotechnical report. |
| Singapore | Earthworks and retaining structures normally involve a Qualified Person and a Professional Engineer. PUB’s surface water drainage code governs how stormwater leaves the site. |
Metric to imperial: 1 m = 3.28 ft. Slope percent, ratio and the formulas in this article work in any unit system as long as rise and run use the same unit.
13. Mistakes I Would Not Want You to Make
Levelling the whole plot flat with a bulldozer. It costs the most, strips the topsoil and creates a tall wall for nothing.
Building a wall without drainage. From the table, you just built a wall that must resist 2.2 times its design load after the first big storm.
Putting the house across the slope’s long direction. Turning it costs you nearly double the earthworks.
Founding half the house on fill. It cracks.
Soil test in the middle only. Test at the top and the bottom.
Ending a drain on bare soil. That is how a gully is born.
Placing the septic tank or soakaway uphill of the house or a borehole. Water follows the slope.
Leaving the drainage to the end. Build the cut-off drain first.
Paying a flat-land price for a sloped plot. Use the bargain test.
Copying a hillside house from a foreign website. Its wall depends on soil, rainfall and rules that are not yours.
Formula Sheet to Keep
| What | Formula |
|---|---|
| Slope % | rise ÷ run × 100 |
| Angle | arctan(rise ÷ run) |
| Slope from contours | contour interval ÷ spacing × 100 |
| 10 m string test | gap in cm ÷ 10 = slope % |
| Balanced cut = fill | W × D² × s ÷ 8 |
| Cut only or fill only | W × D² × s ÷ 2 |
| Steps for a level change | ΔH ÷ 0.17 |
| Levels across a house | D × s ÷ ΔH |
| Ramp length | rise ÷ gradient |
| Water pressure | 9.81 kPa per metre of head |
| Dry soil thrust on a wall | ½ × Ka × γ × H², with Ka = (1 − sin φ) ÷ (1 + sin φ) |
| Peak runoff | Q = C × i × A ÷ 360 |
| Channel capacity | Q = (1 ÷ n) × A × R^(2/3) × S^(1/2) |
| Fair plot price | flat plot price − slope premium |
Frequently Asked Questions
Can I build on a 30% slope?
Yes, but at 30% (16.7°) the project becomes engineer-led. Expect split-level or column foundations, engineered walls, a soil test at both ends of the plot and a drainage design. Budget 15 to 30% above flat-land cost.
How steep is too steep to build on?
There is no single number. Steepness, soil, water and nearby gullies decide. Slopes above about 30%, or any slope showing cracks, seepage or movement, need a geotechnical engineer to say yes.
Do I need a retaining wall?
Only if you cut or fill more than the soil can hold naturally. At a 10% slope, a balanced platform needs a wall of only about 0.5 m. At 20% it is about 1.0 m with balanced cut and fill, and 2.0 m if you cut the whole platform at the low level.
How high can a retaining wall be without an engineer?
Many authorities set the threshold around 1.0 to 1.2 m, but rules differ. If the wall supports soil near a building, boundary or road, use an engineer at any height.
Is a sloped plot more expensive to build on?
Usually yes. Use the allowances in section 11, from about 3 to 8% at 5 to 10% slope to 30% and above on very steep plots, and compare the total with the lower land price.
Where should the septic tank or soakaway go on sloped land?
Downhill of the house and of any borehole, clear of retaining wall footings and boundaries, and never on the crest of the slope. Confirm distances with your local authority.
Can I use a normal house plan on a sloped plot?
Only after it has been adjusted. A flat-land plan has one floor level, one ground level and no wall or drainage design. Have your designer adapt the levels, stairs, foundation and drainage to your contours.
What is a split-level house?
A house whose floors sit at staggered heights, usually half a storey apart, so the floors follow the ground. On a slope it cuts earthworks and walls.
How do I stop erosion on my slope during the rainy season?
Build the cut-off drain first, cover bare soil, plant grass in rows along the contour, end every drain on a stone apron and never let roof water run onto bare ground.
Is a sloped plot a good buy?
It can be, if the price is lower than a comparable flat plot by more than your slope premium, and if the scorecard result is 10 or less. Run both tests before you pay.
Your Next Seven Days
- Measure the slope with the string test and work out the percentage.
- Walk the plot after rain and note the water path, cracks and gullies.
- Score the plot on the Slope Risk Scorecard.
- Book a topographic survey and two soil test points.
- Work out the earthworks and wall height with the formulas above.
- Add the slope allowance to your budget and run the fair-price test.
- Ask a designer and a COREN-registered engineer to review the strategy before you buy materials.
The calculations in this article are planning-level screening tools. They do not replace the design of a geotechnical or structural engineer. Get an engineer for any wall above about 1 m, any slope steeper than about 20%, and any plot that shows signs of movement. Costs, setbacks and approval rules vary by location and change over time, so confirm them with your planning authority.
If you are still choosing a design, browse the Plans Library for house plans made for small Nigerian plots, and read more worked examples in Plan School. If your plot needs a contour-based site plan, drainage layout or land-suitability check, see our Services. You can start from the MassodihPlans homepage at any time.
- My Property Floods: How to Find the Cause, Fix It and Build So It Never Happens Again
- Building Approval in Gombe: Fees, Documents and Approval Process
- Building Approval Fees in Maiduguri: Exact Costs, Charges & Approval Process Explained
- Cost of Building a House in Enugu: Complete Budget Guide, Prices & Real Costs
- How Much Does It Cost to Build a 4 Bedroom Duplex in Minna?
Author
Massodih Okon is a Nigerian built-environment professional with academic and professional experience in urban and regional planning, geography, architectural design, Landscape Design, GIS and land development.
He holds a Master’s degree in Urban and Regional Planning from the University of Uyo and a first degree in Geography and Regional Planning.
Through MassodihPlans, he publishes practical guides on Nigerian house plans, building design, physical planning, site planning, development approval and residential construction. Read the full author profile →