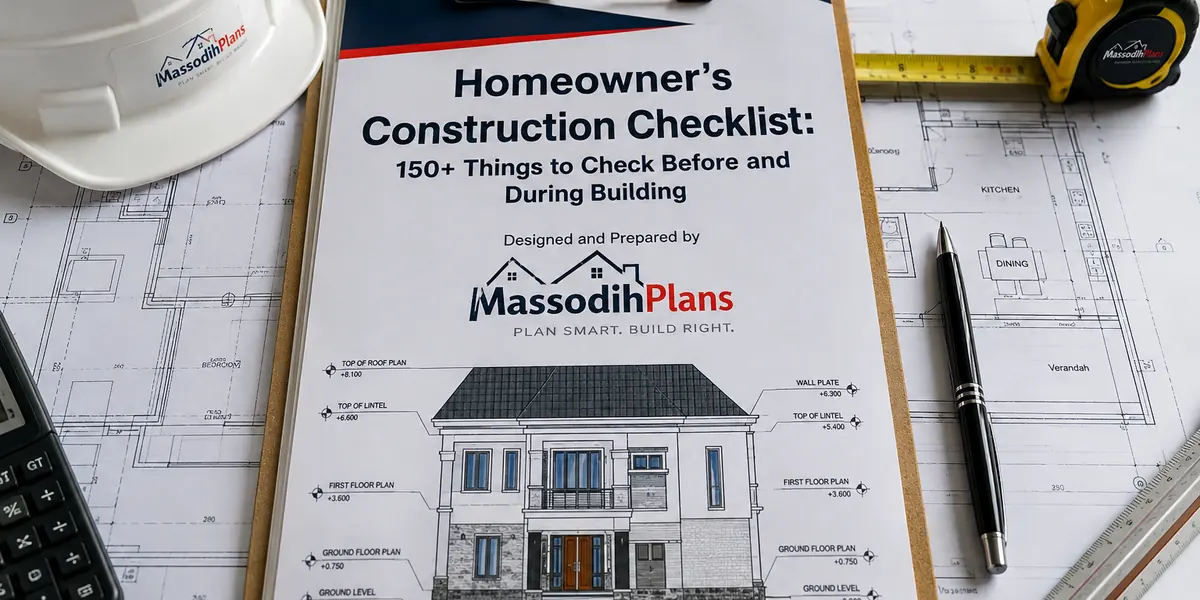
Homeowner’s Construction Checklist: 150+ Things to Check Before and During Building
A homeowner’s construction checklist is essential because it helps you verify the land, documents, design, budget, contractors, materials, workmanship and every major construction stage before costly mistakes become difficult to correct. I have seen how quickly a promising building project can lose direction when decisions are made without a clear system.
A house may begin with a beautiful drawing and a strong budget, yet problems can emerge months later. Funds become difficult to track, materials are purchased without proper planning, contractors interpret drawings differently, work progresses without inspection, or a critical decision is discovered only after money has already been spent.
That is why building a home requires more than choosing a house plan. You need to know whether your land documents are in order, whether the boundaries have been verified, whether the site is suitable, whether the drawings are properly coordinated, and whether the proposed building complies with applicable planning requirements.
You also need a practical way to manage contractors, approve materials, monitor payments, inspect workmanship and confirm that each construction stage is satisfactory before allowing the project to move forward.
This comprehensive 150+ point Homeowner’s Construction Checklist by MassodihPlans brings those responsibilities together in a practical, phase-by-phase format. It covers the important checks to consider before construction begins and throughout the building process, from land and planning to foundation, structural work, roofing, finishes, services and final handover.
The goal is simple: to help you stay organised, ask better questions, document important decisions and identify potential problems early. Whether you are building in Uyo, Port Harcourt or elsewhere in Nigeria, this checklist gives you a clearer framework for staying in control of your project.
Important: This checklist is a practical planning guide built from field experience. It does not replace professional architectural, structural, surveying, quantity-surveying, electrical, plumbing, geotechnical, planning or other specialist advice where required.
How to Use This Homeowner’s Construction Checklist
You do not need to complete everything in one day. Use the checklist according to your project’s stage. You can print it, save it on your phone, turn it into a spreadsheet, discuss it with your professionals, use it during site inspections, track completed tasks, and record outstanding issues.
Use: ☐ Not started · ☑ Completed · ⚠ Requires attention
Field Note: The clients who finish their projects closest to budget and schedule are almost never the ones with the biggest budgets they’re the ones who track things properly from day one. This checklist is worth more as a habit than as a document.
PHASE 1: Before Buying Land
The construction process can go wrong before you even purchase the property I have advised clients to walk away from plots that looked perfect on a Sunday afternoon but told a very different story after asking around.
Land Selection Checklist
☐ Have you clearly identified the location?
☐ Have you visited the property personally?
☐ Have you inspected the surrounding neighbourhood?
☐ Is the property accessible?
☐ Is the road suitable for construction vehicles?
☐ Have you considered drainage?
☐ Is the area prone to flooding?
☐ Have you observed the site during or after rainfall where possible?
☐ Have you checked the topography?
☐ Is the land excessively steep?
☐ Have you considered the soil/ground conditions?
☐ Are there nearby rivers, streams or drainage channels?
☐ Are there high-voltage electricity lines nearby?
☐ Are there environmental concerns?
☐ Are there unpleasant odours or pollution sources nearby?
☐ Is there excessive noise?
☐ Is the neighbourhood compatible with your intended use?
☐ Are essential services reasonably accessible?
☐ Have you considered future development around the site?
PHASE 2: Land Documentation
Before committing your money, verify the property’s documentation through the appropriate channels.
☐ Have you confirmed the seller’s identity?
☐ Have you verified ownership?
☐ Have you checked the relevant title/documentation?
☐ Have you checked for encumbrances where applicable?
☐ Have you checked for disputes?
☐ Have you verified the survey information?
☐ Have the boundaries been properly identified?
☐ Have you checked whether the property is affected by a road reservation or right-of-way?
☐ Have you checked the planning status of the area?
☐ Have you obtained appropriate professional/legal advice where necessary?
☐ Have you retained copies of relevant documents?
Do not rely solely on verbal assurances when purchasing land. In my experience, almost every serious land dispute I’ve encountered traces back to a documentation step that was skipped because “the person seemed trustworthy.”
PHASE 3: Site Survey and Site Analysis
Before designing the house, understand the site this is a step I never let clients skip, even when they’re impatient to see a drawing.
☐ Obtain an appropriate survey
☐ Confirm plot dimensions
☐ Confirm plot area
☐ Identify site boundaries
☐ Establish orientation/north direction
☐ Record significant levels where required
☐ Identify existing structures
☐ Identify trees and important vegetation
☐ Identify drainage
☐ Identify access points
☐ Identify neighbouring buildings
☐ Identify utility infrastructure
☐ Identify potential hazards
☐ Identify attractive views
☐ Identify poor views
☐ Identify noise sources
☐ Identify privacy concerns
☐ Consider sunlight
☐ Consider prevailing wind conditions
☐ Consider flood risk
☐ Consider soil/ground conditions
☐ Prepare a site analysis
For a deeper walkthrough of this stage, our site analysis checklist covers each of these in more detail.
PHASE 4: Define Your Building Needs
Before asking an architect to draw the house, understand what you actually need.
Family Requirements:
☐ Number of bedrooms
☐ Number of bathrooms
☐ Living room
☐ Dining area
☐ Kitchen
☐ Pantry/store
☐ Laundry
☐ Home office
☐ Family lounge
☐ Guest room
☐ Children’s rooms
☐ Maid’s/service area where required
☐ Outdoor space
☐ Parking
☐ Garden
☐ Security considerations
☐ Other special requirements
PHASE 5: Define Your Budget
Do not begin design without understanding your financial limits this is the single most important conversation I have with new clients, and it happens before we discuss a single design idea.
☐ Land budget
☐ Professional fees
☐ Surveying
☐ Planning/approval fees
☐ Site preparation
☐ Foundation
☐ Main structure
☐ Roofing
☐ Doors and windows
☐ Electrical
☐ Plumbing
☐ Finishes
☐ Kitchen
☐ Bathrooms
☐ External works
☐ Water infrastructure
☐ Power/backup system
☐ Landscaping
☐ Contingency
My preliminary project budget: ₦________________________________
For a step-by-step method of arriving at this figure, see our building cost calculator guide.
PHASE 6: Assemble Your Professional Team
Depending on your project, different professionals may be required:
☐ Architect
☐ Town planner
☐ Surveyor
☐ Structural engineer
☐ Quantity surveyor
☐ Geotechnical/soil specialist where required
☐ Electrical professional
☐ Plumbing professional
☐ Landscape professional
☐ Contractor
☐ Other specialists
The exact professional requirements depend on the nature and location of the project.
PHASE 7: House Design
Before approving your design, check:
☐ Does the design fit the site?
☐ Does it comply with applicable planning requirements?
☐ Is the building orientation appropriate?
☐ Are the entrances practical?
☐ Is there adequate parking?
☐ Is there sufficient natural light?
☐ Is natural ventilation considered?
☐ Is privacy adequate?
☐ Are bedrooms appropriately located?
☐ Are bathrooms conveniently located?
☐ Is the kitchen practical?
☐ Is there adequate storage?
☐ Is circulation efficient?
☐ Are stairs safe and practical?
☐ Is there sufficient outdoor space?
☐ Is drainage considered?
☐ Are services coordinated?
☐ Does the design fit your budget?
PHASE 8: Drawing Checklist
Before construction, make sure the required drawings and information are properly coordinated. Depending on the project, these may include:
☐ Architectural drawings
☐ Site plan
☐ Floor plans
☐ Elevations
☐ Sections
☐ Roof plan
☐ Door schedule
☐ Window schedule
☐ Finishes schedule
☐ Structural drawings
☐ Electrical drawings
☐ Plumbing drawings
☐ Drainage information
☐ Other specialist drawings
Check that the drawings are consistent with each other. A window shown on the architectural drawing should correspond appropriately with the relevant schedules and other design information mismatched drawings are one of the most common causes of on-site confusion I encounter.
PHASE 9: Planning and Approvals
Before construction begins:
☐ Confirm the applicable planning requirements
☐ Prepare required documentation
☐ Submit applications where required
☐ Obtain necessary approvals
☐ Keep copies of approvals
☐ Understand any conditions attached to the approval
☐ Confirm any required inspections
☐ Confirm applicable setback requirements
☐ Confirm applicable height requirements
☐ Confirm access requirements
☐ Confirm drainage requirements
Do not assume that approval requirements are identical everywhere they vary by jurisdiction, and treating one town’s rules as universal is a mistake I see often among first-time builders relocating between states.
PHASE 10: Cost Estimation
Before appointing a contractor:
☐ Prepare a preliminary cost estimate
☐ Develop quantities where appropriate
☐ Obtain a detailed cost estimate/BOQ where required
☐ Compare major material costs
☐ Consider labour costs
☐ Consider transportation
☐ Consider professional fees
☐ Consider external works
☐ Include contingency
☐ Review the budget against the design
☐ Identify expensive elements
☐ Decide which items can be phased
PHASE 11: Contractor Selection
Choosing the contractor is one of the most important decisions in the project.
☐ Identify potential contractors
☐ Review previous projects
☐ Check relevant experience
☐ Request references where appropriate
☐ Compare quotations
☐ Confirm what each quotation includes
☐ Ask about project duration
☐ Clarify labour arrangements
☐ Clarify material responsibilities
☐ Clarify supervision
☐ Clarify payment terms
☐ Clarify variation procedures
☐ Clarify defect correction
☐ Clarify completion and handover
☐ Put the agreement in writing
Avoid selecting a contractor based solely on the lowest price. I have been called in to rescue more than one project where the “affordable” contractor turned out to be the most expensive decision of the entire build once rework, delays and disputes were factored in.
PHASE 12: Contract Checklist
Before work starts, make sure the construction agreement clearly addresses:
☐ Scope of work
☐ Drawings/specifications
☐ Contract price
☐ Payment schedule
☐ Project duration
☐ Start date
☐ Completion date
☐ Material responsibility
☐ Labour responsibility
☐ Quality expectations
☐ Variation procedures
☐ Delay procedures
☐ Defects
☐ Site access
☐ Security
☐ Insurance where applicable
☐ Dispute resolution
☐ Termination conditions
☐ Handover
A written contract reduces uncertainty and reduces the “he said, she said” arguments that derail otherwise good working relationships.
PHASE 13: Before Construction Starts
☐ Confirm land ownership/documentation
☐ Confirm applicable approvals
☐ Confirm drawings
☐ Confirm site boundaries
☐ Confirm setting-out information
☐ Confirm contractor
☐ Confirm project budget
☐ Confirm payment arrangements
☐ Confirm material procurement
☐ Establish secure material storage
☐ Establish site security
☐ Establish site-safety arrangements
☐ Establish communication channels
☐ Establish project records
☐ Take photographs of the site before work begins
PHASE 14: Site Setting Out
Before excavation:
☐ Confirm building position
☐ Confirm setbacks
☐ Confirm orientation
☐ Confirm access
☐ Confirm dimensions
☐ Confirm reference points
☐ Check that the setting-out corresponds with the approved design
☐ Resolve discrepancies before excavation
Do not rush this stage. An error in setting out can affect the entire building I have seen a single misread peg shift an entire building line by a metre, a mistake that’s nearly impossible to correct gracefully once blockwork begins.
PHASE 15: Excavation
During excavation:
☐ Confirm excavation positions
☐ Confirm dimensions according to the design
☐ Observe ground conditions
☐ Look for unexpected water
☐ Look for unsuitable material
☐ Look for signs of instability
☐ Record unexpected conditions
☐ Do not alter foundation requirements without appropriate professional advice
PHASE 16: Foundation
Before concrete placement:
☐ Confirm foundation layout
☐ Confirm reinforcement where applicable
☐ Confirm formwork where required
☐ Confirm concrete specification
☐ Confirm levels
☐ Confirm site conditions
☐ Confirm relevant inspections
After foundation work:
☐ Record photographs
☐ Record materials used
☐ Record important measurements
☐ Keep relevant documentation
PHASE 17: Ground Floor
Check:
☐ Fill material
☐ Compaction
☐ Levels
☐ Damp-proofing where specified
☐ Reinforcement where required
☐ Concrete
☐ Floor level
☐ Drainage provisions
☐ Plumbing routes
☐ Electrical provisions
Field Note: Before closing up or covering work, photograph important concealed services. Years later, when a client wants to drill into a wall or dig near the foundation, these photographs are often the only reliable record of what’s actually buried underneath.
PHASE 18: Wall Construction
During blockwork:
☐ Check wall positions
☐ Check dimensions
☐ Check openings
☐ Check door positions
☐ Check window positions
☐ Check alignment
☐ Check verticality
☐ Check lintels
☐ Check service openings
☐ Check wall quality
☐ Confirm changes before implementation
PHASE 19: Structural Work
For reinforced concrete elements:
☐ Confirm reinforcement according to structural drawings
☐ Confirm formwork
☐ Confirm dimensions
☐ Confirm concrete requirements
☐ Confirm cover/spacers where applicable
☐ Confirm embedded services where required
☐ Check levels
☐ Record photographs before concrete covers reinforcement
Structural changes should not be made casually on site this is where I insist clients defer entirely to their structural engineer, no matter how confident the site foreman sounds.
PHASE 20: Roofing
Before roofing:
☐ Confirm roof design
☐ Confirm roof dimensions
☐ Confirm roof structure
☐ Confirm roof material
☐ Confirm roof drainage
☐ Confirm gutters
☐ Confirm downpipes
☐ Confirm flashings
☐ Confirm ventilation where required
☐ Confirm insulation where specified
After installation:
☐ Inspect roof alignment
☐ Inspect visible workmanship
☐ Check drainage paths
☐ Check for obvious leaks after suitable testing/rainfall
PHASE 21: Doors and Windows
Before installation:
☐ Confirm sizes
☐ Confirm materials
☐ Confirm colours/finishes
☐ Confirm opening directions
☐ Confirm security requirements
☐ Confirm glass specifications where applicable
After installation:
☐ Check alignment
☐ Check opening and closing
☐ Check locks
☐ Check handles
☐ Check seals
☐ Check visible damage
☐ Check water penetration concerns
PHASE 22: Electrical Installation
Before walls and ceilings are closed:
☐ Confirm socket positions
☐ Confirm switch positions
☐ Confirm lighting positions
☐ Confirm distribution board location
☐ Confirm dedicated circuits where applicable
☐ Confirm earthing arrangements
☐ Confirm data/communication points
☐ Confirm outdoor lighting
☐ Confirm generator/changeover requirements where applicable
☐ Confirm solar/inverter provisions where applicable
After installation:
☐ Ensure appropriate testing is carried out
☐ Check switches
☐ Check sockets
☐ Check lights
☐ Check protection devices
Electrical work should be handled by appropriately qualified professionals this is not a category to negotiate down on price.
PHASE 23: Plumbing
Before closing walls or floors:
☐ Confirm water supply routes
☐ Confirm waste routes
☐ Confirm bathroom positions
☐ Confirm kitchen plumbing
☐ Confirm tank location
☐ Confirm pump location
☐ Confirm drainage
☐ Test concealed pipework appropriately
After installation:
☐ Check taps
☐ Check toilets
☐ Check showers
☐ Check drains
☐ Check for leaks
☐ Check water flow
PHASE 24: Plastering and Wall Finishes
Before plastering:
☐ Confirm electrical conduits
☐ Confirm plumbing routes
☐ Confirm wall alignment
☐ Confirm openings
☐ Confirm embedded services
After plastering:
☐ Check surface evenness
☐ Check corners
☐ Check cracks
☐ Check around openings
☐ Check moisture problems
☐ Resolve defects before final finishes
PHASE 25: Flooring and Tiling
Before installation:
☐ Confirm tile type
☐ Confirm tile size
☐ Confirm layout
☐ Confirm quantity
☐ Confirm wastage allowance
☐ Confirm floor levels
During installation:
☐ Check alignment
☐ Check joints
☐ Check falls in wet areas
☐ Check tile cuts
☐ Check damaged tiles
☐ Check grout
☐ Check transitions between different floor finishes
PHASE 26: Ceiling
☐ Confirm ceiling type
☐ Confirm ceiling height
☐ Confirm access panels where required
☐ Confirm lighting positions
☐ Confirm ventilation requirements
☐ Check joints
☐ Check alignment
☐ Check cracks
☐ Check visible defects
PHASE 27: Painting
Before painting:
☐ Confirm colour scheme
☐ Confirm paint type
☐ Prepare surfaces
☐ Repair cracks/defects
☐ Apply primer where required
During painting:
☐ Check coverage
☐ Check consistency
☐ Check corners
☐ Check edges
☐ Check stains
☐ Protect finished surfaces
After painting:
☐ Inspect walls in daylight
☐ Inspect ceilings
☐ Inspect doors
☐ Inspect external walls
☐ Record defects for correction
PHASE 28: Kitchen
☐ Confirm cabinet layout
☐ Confirm countertop
☐ Confirm sink
☐ Confirm plumbing
☐ Confirm electrical outlets
☐ Confirm appliance positions
☐ Confirm ventilation/extraction
☐ Check cabinet doors
☐ Check drawers
☐ Check hinges
☐ Check countertop joints
☐ Check plumbing for leaks
PHASE 29: Bathrooms
☐ Check toilet installation
☐ Check basin
☐ Check shower
☐ Check taps
☐ Check drains
☐ Check waterproofing where applicable
☐ Check tile alignment
☐ Check floor falls toward drains
☐ Check mirrors
☐ Check accessories
☐ Check ventilation
☐ Check for leaks
PHASE 30: External Works
Do not forget the area outside the house.
☐ Boundary fence
☐ Gate
☐ Driveway
☐ Parking
☐ Walkways
☐ Drainage
☐ Landscaping
☐ Outdoor lighting
☐ Water tank
☐ Septic/wastewater infrastructure where applicable
☐ External electrical infrastructure
☐ External plumbing
☐ Security features
PHASE 31: Drainage Check
Before considering the project complete:
☐ Roof water has a suitable discharge path
☐ Gutters are connected appropriately
☐ Downpipes discharge safely
☐ Surface water does not accumulate around the building
☐ External drainage is functional
☐ Driveway does not obstruct drainage
☐ Water does not create avoidable problems for neighbouring properties
☐ Drainage infrastructure is accessible for maintenance
PHASE 32: Final Quality Inspection
Walk through the entire building. Do not rush this inspection.
☐ Walls ☐ Floors ☐ Ceilings ☐ Doors ☐ Windows ☐ Roof ☐ Electrical ☐ Plumbing ☐ Bathrooms ☐ Kitchen ☐ Paint ☐ Tiles ☐ External works ☐ Drainage ☐ Landscaping ☐ Security ☐ Water supply ☐ Power supply
PHASE 33: Defects List
Create a written list of everything that needs correction. Do not depend on memory — write defects down.
| Location | Problem | Responsible Person | Date Reported | Corrected? |
|---|---|---|---|---|
| ☐ | ||||
| ☐ | ||||
| ☐ | ||||
| ☐ | ||||
| ☐ |
PHASE 34: Testing and Commissioning
Before occupying the building, ensure appropriate systems are checked.
☐ Electrical system
☐ Plumbing
☐ Water supply
☐ Drainage
☐ Lighting
☐ Doors and locks
☐ Windows
☐ Water heaters where installed
☐ Pumps
☐ Backup power systems
☐ Security systems
☐ Other installed equipment
Specialist systems should be tested by appropriately qualified persons.
PHASE 35: Documentation and Handover
Before final handover:
☐ Obtain relevant completion documentation
☐ Collect warranties where applicable
☐ Collect equipment manuals
☐ Collect receipts for major purchases
☐ Collect relevant certificates/test records
☐ Obtain final drawings where applicable
☐ Record locations of important concealed services where known
☐ Record electrical distribution information
☐ Record plumbing routes where available
☐ Record equipment specifications
☐ Obtain keys
☐ Obtain access controls
☐ Record outstanding defects
☐ Confirm completion arrangements
PHASE 36: Financial Close-Out
Before closing the project:
☐ Calculate total construction cost
☐ Record professional fees
☐ Record material costs
☐ Record labour costs
☐ Record transportation
☐ Record variations
☐ Record external works
☐ Record outstanding payments
☐ Confirm final contractor payment
☐ Keep financial records
Compare:
Original Budget: ₦________________
Final Cost: ₦________________
Difference: ₦________________
Understanding where your money went is valuable for future property decisions and for keeping your next project even tighter.
PHASE 37: Homeowner’s Final Walk-Through
Walk through every room.
Entrance: ☐ Door works properly ☐ Lock works ☐ Floor is satisfactory ☐ Walls are satisfactory ☐ Lighting works
Living Room: ☐ Floor ☐ Walls ☐ Ceiling ☐ Windows ☐ Doors ☐ Lighting ☐ Sockets ☐ Ventilation
Bedrooms: ☐ Doors ☐ Windows ☐ Flooring ☐ Lighting ☐ Sockets ☐ Wardrobes ☐ Ventilation ☐ Privacy
Kitchen: ☐ Cabinets ☐ Countertop ☐ Sink ☐ Tap ☐ Drainage ☐ Electrical outlets ☐ Appliances ☐ Ventilation
Bathrooms: ☐ Toilet ☐ Basin ☐ Shower ☐ Taps ☐ Drainage ☐ Tiles ☐ Waterproofing concerns ☐ Ventilation ☐ Lighting
External Areas: ☐ Fence ☐ Gate ☐ Driveway ☐ Drainage ☐ Parking ☐ Landscaping ☐ External lighting ☐ Water infrastructure
150+ Quick Homeowner Checklist
Before declaring your project complete, confirm:
☐ Land verified ☐ Boundaries confirmed ☐ Survey completed ☐ Site analysed ☐ Budget established ☐ Design brief prepared ☐ Professionals selected ☐ Architectural design completed ☐ Structural design completed where required ☐ Electrical design/information completed where required ☐ Plumbing design/information completed where required ☐ Planning requirements checked ☐ Necessary approvals obtained ☐ Cost estimate prepared ☐ Contractor selected ☐ Contract documented ☐ Site secured ☐ Setting out completed ☐ Excavation completed ☐ Foundation completed ☐ Ground floor completed ☐ Walls completed ☐ Structural elements completed ☐ Roof completed ☐ Gutters installed ☐ Downpipes installed ☐ Doors installed ☐ Windows installed ☐ Electrical first fix completed ☐ Plumbing first fix completed ☐ Plastering completed ☐ Screeding completed ☐ Ceiling completed ☐ Tiling completed ☐ Painting completed ☐ Electrical second fix completed ☐ Plumbing second fix completed ☐ Kitchen installed ☐ Bathrooms installed ☐ External works completed ☐ Drainage completed ☐ Water system completed ☐ Power system completed ☐ Landscaping completed ☐ Security systems completed ☐ Final inspection completed ☐ Defects recorded ☐ Defects corrected ☐ Systems tested ☐ Documentation collected ☐ Warranties collected ☐ Final accounts prepared ☐ Keys received ☐ Building ready for occupation
Homeowner’s Construction Project Record
PROPERTY
Location: ______________________________________
Plot Size: ______________________________________
House Type: ____________________________________
Floor Area: _____________________________________
PROFESSIONALS
Architect: ______________________________________
Surveyor: _______________________________________
Town Planner: ___________________________________
Structural Engineer: _____________________________
Quantity Surveyor: _______________________________
Contractor: _____________________________________
Other: __________________________________________
PROJECT
Start Date: _____________________________________
Expected Completion: _____________________________
Actual Completion: _______________________________
Original Budget: ₦_______________________________
Final Cost: ₦___________________________________
Construction Payment Record
| Date | Paid To | Purpose | Amount | Receipt/Reference |
|---|---|---|---|---|
| ₦ | ||||
| ₦ | ||||
| ₦ | ||||
| ₦ | ||||
| ₦ |
Never depend entirely on verbal records for major financial transactions. I have sat in more than one uncomfortable meeting where a client and contractor genuinely disagreed on what had already been paid a written record would have settled it in seconds.
Material Purchase Record
| Date | Material | Quantity | Supplier | Amount | Receipt |
|---|---|---|---|---|---|
| ₦ | |||||
| ₦ | |||||
| ₦ | |||||
| ₦ |
Construction Progress Record
Every time you visit the site, record:
Date: ______________________________
Work completed: ____________________
Materials delivered: _______________
Problems observed: _________________
Decisions made: ____________________
Outstanding work: __________________
Next action: _______________________
Photographs taken: ☐ Yes ☐ No
This simple habit can become extremely valuable during a long construction project.
Questions to Ask Your Contractor
Before and during construction, ask:
- What work are you currently doing?
- What materials are required next?
- What materials have already been purchased?
- What work is expected to be completed this week?
- Are there any problems with the site?
- Are there any changes required?
- Will the change affect cost?
- Will the change affect the completion date?
- Has the relevant professional approved the change where necessary?
- What is the next construction stage?
Do not be afraid to ask questions about your own project it is, after all, your money and your house.
Questions to Ask Before Approving a Variation
Before agreeing to additional work or cost, ask:
Why is this change necessary? Who requested it? What will it cost? Will it affect the completion date? Does it affect other parts of the building? Has the appropriate professional reviewed it? Is there a cheaper alternative that still meets the required standard?
Document significant changes a variation agreed verbally on site has a way of being remembered differently by everyone involved once the bill arrives.
Common Homeowner Mistakes to Avoid
1. Starting Without a Complete Plan Construction should not become the place where the house is designed for the first time.
2. Choosing the Cheapest Contractor The lowest quotation is not necessarily the lowest final cost.
3. Changing the Design Constantly Frequent changes can increase cost, waste materials and delay construction.
4. Ignoring Site Conditions A house plan that works on one site may not work identically on another.
5. Paying Without Records Keep proper records of significant payments.
6. Buying Materials Without Specifications Know what you are buying before you pay for it.
7. Ignoring Drainage Water problems can become expensive construction problems.
8. Forgetting External Works A house is not finished simply because the roof and walls are complete.
9. Not Inspecting Work Do not assume everything is correct because construction appears to be progressing.
10. Making Structural Changes Without Professional Advice Never casually remove, resize or relocate structural components.
In my own practice, I’d add an eleventh: underestimating how much a poorly analysed site can cost you later. Most of the “surprises” homeowners describe to me were never surprises at all they were visible on day one to anyone who looked.
The Golden Rule for Homeowners
You do not need to become an architect, engineer, quantity surveyor or contractor to manage your own building project responsibly. But you should understand:
What is being built. Why it is being built that way. How much it is expected to cost. Who is responsible for each part. What stage the project has reached. What remains to be done.
Good professionals are there to help you make informed decisions not to prevent you from asking questions.
Frequently Asked Questions
What should I do first before building a house?
Start by understanding the land, your requirements and your budget. Then obtain the appropriate survey/site information and engage the relevant professionals to develop a suitable design. Do not rush directly from purchasing land into construction.
How can I monitor my house construction?
Keep a project record, visit the site regularly where practical, take photographs, track payments and materials, record decisions and communicate with your professionals and contractor. For important technical stages, rely on appropriate professional inspection rather than trying to judge technical matters yourself.
Should I buy building materials myself?
You can, but the arrangement should be clearly defined with the contractor. If you purchase materials yourself, understand the specifications, quantities, storage requirements and delivery arrangements.
How often should a homeowner visit the construction site?
There is no universal number that applies to every project. What matters is having a clear inspection and reporting arrangement with the professionals and contractor responsible for the work. Important stages should receive appropriate supervision and inspection.
What should I check before paying a contractor?
Confirm what work has been completed, whether it matches the agreed scope, materials delivered, outstanding defects, progress against the programme, any approved variations, and relevant supporting documentation. Avoid making major payments simply because the contractor says the money is needed.
How do I prevent construction costs from getting out of control?
Design carefully before construction. Prepare a realistic budget. Develop detailed quantities where appropriate. Use a written contract. Control variations. Track payments. Monitor materials. Avoid unnecessary design changes. Maintain contingency.
My Final submission to You
Building a house should not be treated as simply: buy land → draw plan → hire workers → build.
A successful project requires a chain of decisions. You need to understand the land. You need to understand your needs. You need a realistic budget. You need appropriate professional input. You need coordinated drawings. You need proper construction management. You need financial records. You need quality control. And you need a final inspection before considering the project complete.
The homeowner’s role is not to know everything. It is to ask the right questions, keep the right records and make informed decisions.
Before you build, save this checklist. Return to it throughout your project. Tick each item as it is completed. And remember:
Good construction is rarely the result of luck. It is usually the result of good planning, good design, good supervision and good decisions.
Plan before you build. Check before you pay. Inspect before you approve. Document before you forget. Build for the future not just for today.
Need Help Planning Your Building Project?
MassodihPlans provides practical information and services relating to house planning, architectural design, site analysis, town planning, GIS/mapping and landscape design.
If you are preparing to build, the right planning decisions made before construction can save significant time, money and frustration later.
Browse our Plans Library for house designs to bring to your professional team, learn the fundamentals in Plan School, check Services for site analysis and project planning support, or return to the Homepage for more practical guides.
MassodihPlans: Plan Better. Build Smarter.
- Building Materials Checklist: 100+ Materials You May Need When Building a House
- House Planning Checklist: 50+ Essential Things to Check Before Building a House (Complete Guide)
- Building Approval in Nigeria: Costs, Requirements, Process and How to Get Your House Plan Approved Fast
- House Planning Checklist: 50+ Essential Things to Check Before Building a House (Complete Guide)
- Building Regulations Every Nigerian Property Developer Must Know