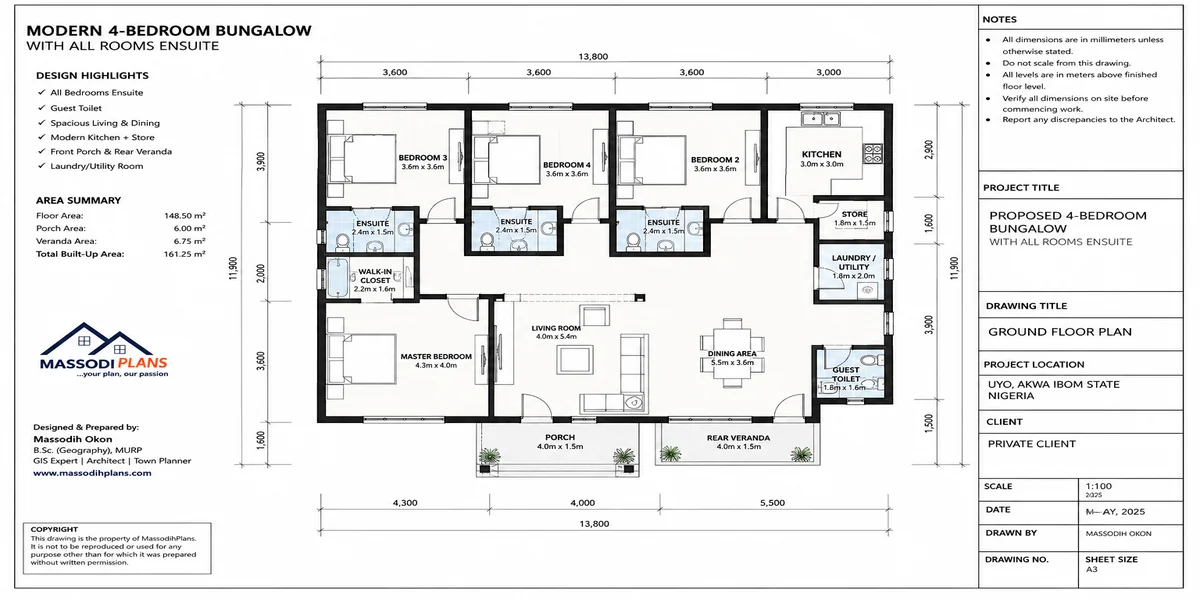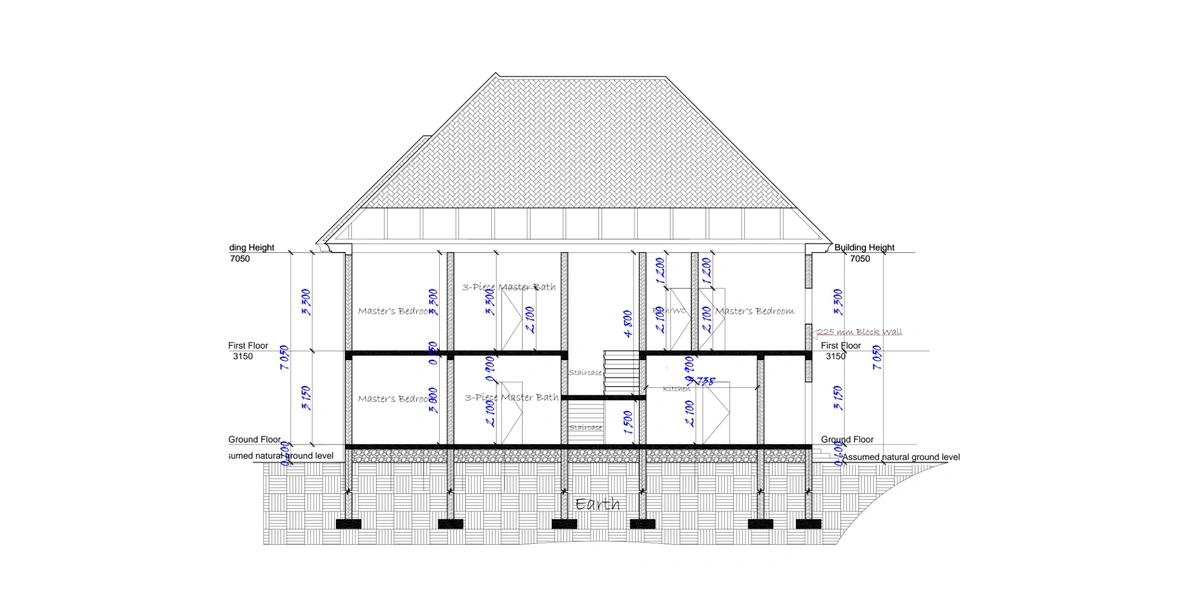
Best Way to Learn AutoCAD for House Plans (8-Week Plan)
The best way to learn AutoCAD for house plans is to draw one real house on one real plot, from the boundary line to a printed PDF, using only about 20 commands, for 45 minutes a day over 8 weeks. That adds up to 30 hours. Do not start by studying the toolbar. Start with a plot that has real dimensions and real setbacks, and learn each command at the moment your drawing demands it.
I’m pushing this method because I have watched the other route fail many times. Someone watches 40 hours of “AutoCAD full course” videos, learns to draw ellipses and splines, and then freezes when asked to draw a simple three-bedroom bungalow on a 50 × 100 ft plot. The software was never the problem. The order of learning was.
Stay with me to the end, because this post gives you three things I have not seen in one place anywhere. The first is a five-minute test that tells you whether your dream house even fits your plot before you spend a kobo on drawings. The second is a unit mistake that can make a whole drawing 1,000 times wrong, and how to catch it in ten seconds. The third is a scorecard at the very end that tells you honestly whether your drawing is ready to show a contractor or an approval office.
I wrote this for the student in Uyo who has a borrowed laptop, and for the Nigerian in Houston, Toronto, Dubai or Singapore who wants to check what an architect back home is drawing for the family land. It is also for the self-builder who is tired of paying for every small change. The plots are Nigerian small plots, and the skill is not tied to any country. Let’s start with why the usual advice fails.
Why “Learn AutoCAD” Is the Wrong Goal
AutoCAD has hundreds of commands. A house plan uses about twenty of them. Most courses teach you the whole toolbar in the order Autodesk lists it, which is like learning to cook by memorising every item in the supermarket.
The better goal is “draw a house plan that a block-layer, a carpenter and an approval officer can read without calling me.” That goal has a finish line you can see. It also tells you what to skip. You can ignore 3D modelling, rendering, parametric constraints and scripting for now. A small-plot house plan is a 2D problem built from rectangles, offsets, trims, blocks and dimensions.
So the method I teach is one loop that repeats for eight weeks:
Plot → Paper sketch → Draw → Check with numbers → Print → Repeat on a smaller plot
Every section below is one part of that loop. Before we draw anything, though, you need three decisions out of the way: which software, which computer, and which units. Skipping them causes about half the beginner misery I see.
Step Zero: Three Decisions Before You Install Anything
Decision 1: Which AutoCAD, and what will it cost you?
Here is the honest option table as of November 2026. Confirm prices on Autodesk’s site for your country, because they change.
| Option | Cost | Good for | The catch |
|---|---|---|---|
| Student/educator licence | Free | Learning, if you qualify | Autodesk gives eligible students and educators free one-year access that renews while you stay eligible. It is for learning, not paid client work |
| Free trial | Free for a limited period | Testing before you commit | When the trial ends you pay for the full version or the cheaper LT edition |
| AutoCAD LT | Lower than full AutoCAD | 2D house plans (all you need here) | No 3D modelling, which you don’t need for floor plans |
| Full AutoCAD subscription | Roughly US$2,000 a year | Professional practice | One university price list shows about $2,095 a year for staff who need it outside teaching |
| DWG-compatible alternatives (BricsCAD, DraftSight, ZWCAD, LibreCAD, QCAD) | Varies, some free | Practising the same commands cheaply | Menus differ slightly. Check which ones open and save DWG properly www.imss.caltech.edu +2 |
A word about cracked copies and very cheap “activation keys” sold online. I will not tell you what to do with your money, but I will tell you what I see. Cracked software carries malware risk, and a drawing file is exactly the kind of thing you do not want a stranger’s code touching. Education licences are also not meant for paid work. If a price looks too good, ask whether it is valid for commercial use.
If you plan to charge for drawings later, work out when the licence pays for itself:
Break-even drawings = annual licence cost ÷ net fee per drawing set
Example with illustrative numbers: licence US$2,000 a year, net fee US$150 per set. 2,000 ÷ 150 = 13.3, so about 14 drawing sets pay for the year. That is a business decision for later. For now, the free student route or a trial is enough to finish this whole plan.
Learn on the full 2D toolset, but do not stress about “LT or full”. Every command in this post exists in both. Pick whichever you can legally access today and start drawing.
Decision 2: Your computer, and the light that will go off
For 2D house plans you do not need a gaming machine. An ordinary modern laptop with an SSD and 8 to 16 GB of RAM handles it, but check Autodesk’s current system requirements page before you install, because they change between releases. The 2027 release is the newest I can find, and the commands in this post have worked the same way for many years across versions.
Power cuts, though, are a Nigerian reality that no international tutorial mentions. Protect yourself in three ways:
- Type SAVETIME and set it to 5, so AutoCAD autosaves every five minutes.
- Use Save As every session and add a version number: PLAN_v01, PLAN_v02. If a file corrupts, you lose one session and not eight weeks.
- Know that AutoCAD keeps a .bak backup beside your drawing and autosave files with the .sv$ extension. After a crash, search your folders for those before you cry.
Decision 3: Units, the decision that decides everything
Type UNITS. Choose Decimal, precision 0, and set the insertion units to Millimeters. From now on, one drawing unit equals one millimetre. A 3.6 m room is 3600. A 15.24 m plot width is 15240. Whole numbers, no decimals to mistype.
If you think in feet, as many people in Nigeria, the US and Canada do, convert once and write it down. 1 ft = 304.8 mm exactly.
| Feet | Millimetres |
|---|---|
| 3 ft (a standard internal door) | 914 (many drawings round to 900) |
| 10 ft | 3,048 |
| 50 ft | 15,240 |
| 100 ft | 30,480 |
The 1,000× mistake: If you copy a furniture block or a door from the internet that was drawn in metres and insert it into your millimetre drawing, it arrives 1,000 times too small and looks like a dot. The reverse arrives 1,000 times too big. Beginners spend an hour hunting for a “missing” sofa. Fix it by checking the block’s units before you insert it, or by drawing your own blocks, which you will do in week four.
Units are settled now. Next comes the step most people skip, and it saves more hours than any shortcut key.
Paper First: The 20-Minute Sketch Rule
Do not open AutoCAD to design. Open it to record a design you have already sketched. Designing on screen is slow, and the screen tempts you to polish lines instead of solving the plan.
Take a sheet of plain paper and draw a bubble diagram. Draw circles for living room, kitchen, three bedrooms, two or three bathrooms and a passage, and join them with lines wherever people walk between them. Then write a target size on every bubble. A quick way to get a bedroom width that works is this:
Minimum bedroom width = bed width + 2 × side clearance
With the common 6 ft × 6 ft bed (1,830 mm) and 600 mm of walking space each side: 1,830 + 1,200 = 3,030 mm, so call it 3.0 m. Add a wardrobe along one wall and you quickly see why 3.3 m wide is far more comfortable than 3.0 m.
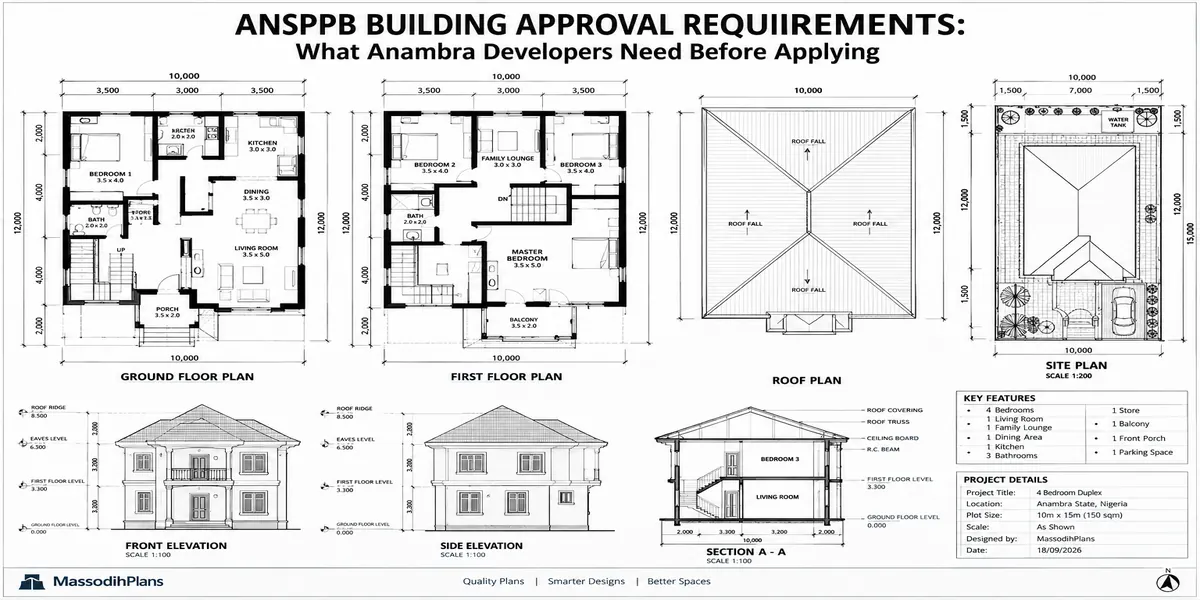
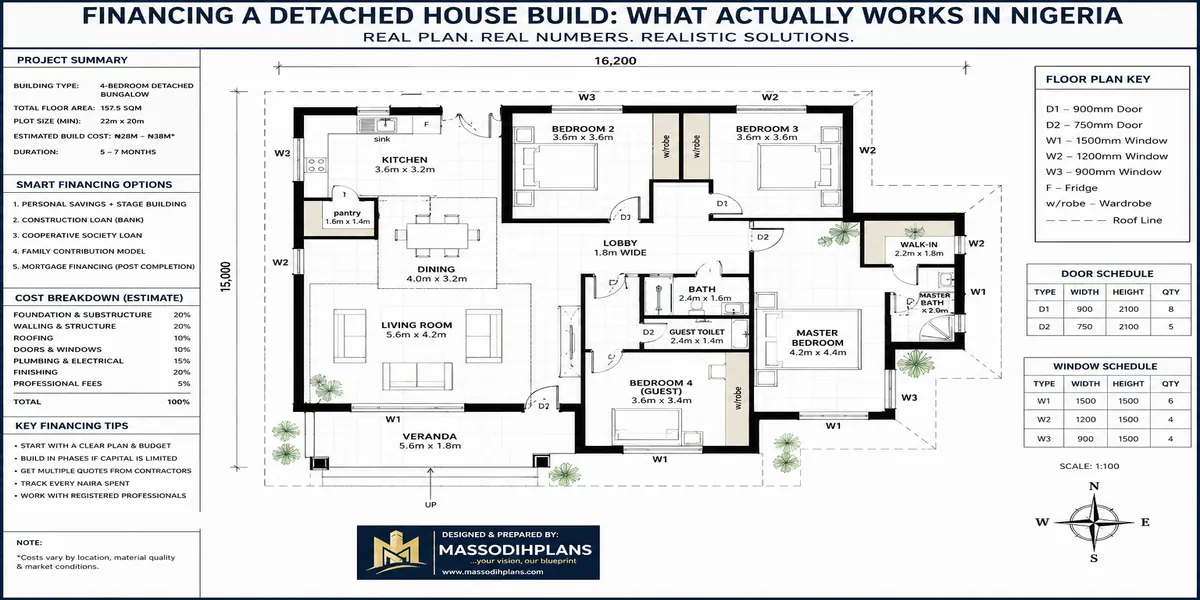
Spend 20 minutes on this. If your bubbles cannot be arranged on paper, AutoCAD will not rescue them. If you want examples to copy from while you sketch, the Plans Library shows complete small-plot layouts you can study and redraw. Redrawing someone else’s plan is excellent practice, and it teaches you how a good plan is organised.
With the sketch done, we need something to draw it on.
Your Practice Plot: 50 × 100 ft and the Five-Minute Fit Test
Every student gets the same practice plot, because one shared example lets me give you exact numbers you can check. The plot is 50 ft × 100 ft, which is 15,240 mm × 30,480 mm. Readers in the US will recognise this as a common city lot size, so the practice transfers directly.
Plot area = 15.24 m × 30.48 m = 464.5 m² (5,000 ft²)
Now apply setbacks. These are practice values only, and your approval authority sets the real ones. Use front 6.0 m, rear 3.0 m, and 1.5 m on each side.
Buildable width = 15.24 − (1.5 + 1.5) = 12.24 m
Buildable depth = 30.48 − (6.0 + 3.0) = 21.48 m
Buildable envelope = 12.24 × 21.48 = 262.9 m²
Plot coverage if you fill the whole envelope = 262.9 ÷ 464.5 = 56.6%
The five-minute test in AutoCAD
Now check your own numbers in AutoCAD itself. This is your first real drawing, and it takes five minutes:
- Type RECTANG. For the first corner type 0,0. For the other corner type @15240,30480. That is your plot boundary.
- Type RECTANG again. First corner: 1500,6000. Other corner: @12240,21480. That is your buildable envelope, sitting inside the plot with the setbacks built in.
- Type AREA, then O for Object, and click the inner rectangle. AutoCAD reports 262,915,200 square millimetres.
- Divide by 1,000,000 to get 262.9 m². It matches the hand calculation.
You have just done what many people pay for and still do not get: you know, with proof, how much room you really have.
The stress test on a half plot
Now shrink the plot to 50 × 50 ft (15,240 × 15,240 mm, area 232.3 m²) and keep the same setbacks:
Buildable depth = 15.24 − 9.0 = 6.24 m
Envelope = 12.24 × 6.24 = 76.4 m²
Say your brief needs about 110 m² of floor space. Here is how the two plots compare:
| Check | 50 × 100 ft plot | 50 × 50 ft plot |
|---|---|---|
| Envelope | 12.24 × 21.48 m = 262.9 m² | 12.24 × 6.24 m = 76.4 m² |
| Bungalow 11.05 × 10.0 m (110.5 m²) | Fits (11.05 ≤ 12.24, 10.0 ≤ 21.48), coverage 23.8% | Fails, because 10.0 m is deeper than 6.24 m |
| Two-storey, 12.0 × 6.0 m per floor (144 m² total) | Fits, not needed | Fits (12.0 ≤ 12.24, 6.0 ≤ 6.24), coverage 31.0% |
The half plot cannot take that bungalow, but a two-storey version works. A tutorial that only draws a lovely house on an unlimited blank screen never teaches you this, and it is the heart of small-plot design. Many authorities also cap plot coverage, so check yours before you fall in love with a footprint.
The setbacks above are practice numbers, not law. Setbacks and coverage limits differ by state, by zone and sometimes by street. Always confirm the real figures with your planning authority before finalising any drawing.
So you now have a plot, an envelope and a sketch. Next you need the commands, and fewer than you think.
The 20 Commands That Draw Most of a House Plan
These twenty do most of the work on a typical small-plot plan. I have listed the week you will first need each one, so you never learn a command before it has a job.
| Command (shortcut) | What it does on a house plan | Week |
|---|---|---|
| UNITS | Sets millimetres once | 1 |
| RECTANG (REC) | Plot boundary, building envelope, rooms | 1 |
| LINE (L) / PLINE (PL) | Walls, setback lines, anything with a path | 1 |
| ZOOM (Z) / PAN | Moving around without getting lost | 1 |
| DIST (DI) / AREA (AA) | Checking lengths and room areas | 1 |
| OFFSET (O) | Makes a wall’s second face parallel to the first | 2 |
| TRIM (TR) / EXTEND (EX) | Cleans wall intersections and closes gaps | 2 |
| FILLET (F, radius 0) | Closes two lines into a clean corner | 2 |
| LAYER (LA) | Separates walls, doors, text so you control the look | 2 |
| MOVE (M) / COPY (CO) | Shifting rooms and repeating windows | 3 |
| ROTATE (RO) / MIRROR (MI) | Flipping door swings, mirrored bathrooms | 3 |
| BLOCK (B) / INSERT (I) | Doors, windows, beds, toilets as reusable objects | 3–4 |
| ARRAY (AR) | Repeating identical items such as steps or columns | 4 |
| HATCH (H) | Floor finishes and cut walls | 4 |
| MTEXT (MT) | Room names and notes | 4 |
| DIMLINEAR (DLI) / DIMCONTINUOUS | Dimension chains | 5 |
| MATCHPROP (MA) | Copies one object’s look onto another | 5 |
| PAGESETUP / MVIEW | Paper size and scaled views | 6 |
| PLOT | Prints to PDF at the right scale | 6 |
| PURGE (PU) | Removes junk before you send the file | 6 |
Notice what is missing: ellipse, spline, 3D, rendering, lighting. They are fun and unnecessary for now.
Commands alone will not give you a correct house, though. You also need the arithmetic of walls, which almost every course skips.
Wall Maths: The Part Courses Skip
A wall in AutoCAD is two parallel lines, and how far apart you put them decides whether your rooms are the size you promised. Here is a typical sandcrete block wall in Nigeria.
| Wall type | Block thickness | Plaster per face | Finished thickness |
|---|---|---|---|
| External wall | 225 mm (9 in) | 12.5 mm | 250 mm |
| Internal partition | 150 mm (6 in) | 12.5 mm | 175 mm |
Finished wall thickness = block thickness + 2 × plaster thickness
Plaster of 12 to 15 mm is common, so use whatever your site actually applies. Block sizes also vary by manufacturer. The block calculator on the Homepage is built on the 450 × 225 mm standard block with 6 or 9 inch thickness, so your drawing and your block count will agree.
Here is the rule most beginners learn the hard way. Rooms are sold by clear internal size, but walls are drawn centre to centre or face to face.
Centre-to-centre distance = clear internal dimension + (t₁ + t₂) ÷ 2
Example: a bedroom 3,600 mm clear between a 250 mm external wall and a 175 mm partition. Centre to centre = 3,600 + (250 + 175) ÷ 2 = 3,600 + 212.5 = 3,812.5 mm.
Now take the width of a whole house with three rooms in a row, clear widths 3,600, 3,300 and 3,300 mm, two 175 mm partitions and two 250 mm external walls:
Building width = Σ clear widths + Σ partitions + 2 × external wall
= (3,600 + 3,300 + 3,300) + (2 × 175) + (2 × 250) = 10,200 + 350 + 500 = 11,050 mm
That is where the 11.05 m bungalow in the plot test came from. It is less than the 12.24 m envelope width, so it fits with 1.19 m to spare. You can draw the plan with OFFSET and TRIM in an afternoon, but you can only trust it because the maths came first.
Draw the clear internal rooms first as rectangles, then OFFSET outward by wall thickness. The rooms keep their promised sizes, and the walls grow around them.
The numbers now work, so here is the schedule that turns them into skill.
The 8-Week Plan: 45 Minutes a Day, Five Days a Week
The 8-30-7 session: 8 minutes watching or reading the one thing you need today, 30 minutes drawing, 7 minutes checking, saving and writing one line about what went wrong. That keeps your time about 80% drawing and 20% learning. Eight weeks × five sessions × 45 minutes = 1,800 minutes = 30 hours.
| Week | Drawing goal | Commands you meet | Check at the end of the week |
|---|---|---|---|
| 1 | Plot, setbacks, buildable envelope | UNITS, RECTANG, LINE, ZOOM, DIST, AREA | AREA reads 262.9 m² |
| 2 | Ground-floor walls, external and internal | OFFSET, TRIM, EXTEND, FILLET, LAYER | Building width = 11,050 mm |
| 3 | Doors and windows | MOVE, COPY, ROTATE, MIRROR, BLOCK, INSERT | No door swings into another door |
| 4 | Furniture, floor finishes, room names | ARRAY, HATCH, MTEXT | Bed fits with 600 mm either side |
| 5 | Three dimension chains | DIMLINEAR, DIMCONTINUOUS, MATCHPROP | Every wall and opening is dimensioned |
| 6 | Title block, scale, printed PDF | PAGESETUP, MVIEW, PLOT, PURGE | 5 m wall measures 50 mm on paper at 1:100 |
| 7 | Elevation and section from your plan | Same tools, plus construction lines | Floor-to-ceiling height matches on both |
| 8 | Redraw on the 50 × 50 ft half plot | Everything | Done in under half the time of week 2 |
Week 8 matters more than it looks. Redrawing the same house idea on a smaller plot forces you to use every command again under pressure, and that is where skill is made.
Two habits keep the 30 hours from being wasted. Keep a one-line log of every error and its fix, because by week four it becomes your personal manual. And never skip the check at the end of the week. A drawing you have not measured is only a picture.
Now that you know what to draw each week, let me show you how to keep the drawing readable.
Layers, Line Weights and Text Height
A plan that is all one colour and thickness is unreadable. Layers fix that. Use names that look the same to any professional anywhere. These follow the common A-WALL pattern used by many offices in the US and Canada, but they follow the pattern and not the letter of any one standard, so use your office’s convention if you have one.
| Layer | Holds | Plotted line weight (mm) |
|---|---|---|
| A-WALL-EXT | External walls | 0.50 |
| A-WALL-INT | Internal partitions | 0.35 |
| A-DOOR | Door leaves and swings | 0.25 |
| A-GLAZ | Windows | 0.25 |
| A-FURN | Beds, sofas, fittings | 0.13 |
| A-ANNO-DIMS | Dimensions | 0.18 |
| A-ANNO-TEXT | Room names and notes | 0.18 |
| A-SITE | Plot line, setbacks (dash-dot) | 0.13 |
These weights are standard pen widths, so they print well on any plotter in any country. Cut walls should be the heaviest line on the sheet, and that single rule makes a plan feel professional.
Text needs one formula, and getting it wrong is why beginners print plans with microscopic labels:
Model-space text height = plotted text height × scale denominator
For readable 2.5 mm text at 1:100, set the text height to 2.5 × 100 = 250 units. For 3.5 mm room names, that is 350 units. At 1:50 the same text would be 125 and 175. If you dimension in model space, set DIMSCALE equal to the scale denominator in the same way.
Which brings us to the printing arithmetic.
Scale and Paper: Will It Actually Fit?
Every drawing is a real-world length shrunk onto paper. The rule is:
Paper length = real length ÷ scale denominator
To choose a scale before you start: divide the real length by the usable paper length (the sheet minus about 40 mm for margins and title block), then round up to the next standard scale. Example: your 30,480 mm plot on A3 (420 mm long, so 380 mm usable) gives 30,480 ÷ 380 = 80.2. Round up to 1:100.
| Drawing | Scale | Size on paper | Smallest sheet that works |
|---|---|---|---|
| Plot 15,240 × 30,480 mm | 1:100 | 152.4 × 304.8 mm | A3 |
| Plot | 1:200 | 76.2 × 152.4 mm | A4 |
| House 11,050 × 10,000 mm | 1:100 | 110.5 × 100 mm | A4 |
| House | 1:50 | 221 × 200 mm | A3 |
| Envelope 12,240 × 21,480 mm | 1:50 | 244.8 × 429.6 mm | A2 |
In a layout viewport, set the scale with ZOOM and then 0.01XP for 1:100, or 0.02XP for 1:50. Then do the check that no software can do for you: print the PDF, pick up a ruler and measure a wall you know. A 5 m wall must measure 50 mm at 1:100. If it does not, your plot scale is wrong, and everything printed from that file is a lie.
Sheet sizes depend on where you live, so here is how this skill travels.
One Skill, Many Countries: What Changes and What Doesn’t
You will work in a different measuring system depending on where you live, but the DWG skill itself is the same everywhere. Only the title block, the sheet size and the local rules change. This table is a general guide, so confirm details with your local authority.
| Country | Everyday units | Sheet habit | Common house-plan scales |
|---|---|---|---|
| United States | Feet and inches | ARCH sheets (24 × 36 in) | ¼” = 1′-0″ (about 1:48) |
| Canada | Metric officially, feet and inches common in housing | ARCH or A-series | ¼” = 1′-0″ or 1:50 |
| United Kingdom | Metric | A-series | 1:50, 1:100 |
| Germany | Metric | A-series | 1:100 commonly for permit drawings |
| Switzerland, Luxembourg | Metric | A-series | 1:100, with 1:50 for detail |
| Iceland | Metric | A-series | 1:100, 1:50 |
| UAE, Qatar | Metric | A-series | 1:100, with authority-specific layer and file rules |
| Australia | Metric (mm) | A-series | 1:100 plans, 1:200 sites |
| Singapore | Metric | A-series | 1:100, usually submitted electronically |
If you are a Nigerian abroad planning to build back home, this table has a practical meaning. Your architect in Uyo will send metric A3 or A1 drawings, and you will think in feet and square feet. Set UNITS to mm, use the feet table from earlier, and you can check any dimension yourself without a second phone call at 2 a.m.
That leads to a question many readers have: do you have to draw at all?
If You Will Never Draw: Audit Your Architect’s File in 10 Minutes
Not everyone reading this wants to become a draftsperson. Some of you are clients, and for you the most valuable skill is checking a drawing someone else made. Six commands are enough:
| Command | What you check |
|---|---|
| DIST | Does the 3.6 m room measure 3,600? |
| AREA | Does each room match the area in the schedule? |
| ID | Where is a point, in coordinates? |
| LIST | Is this object a closed polyline, and how big is it? |
| MEASUREGEOM | Quick distances and areas without typing |
| LAYER (isolate) | Can you hide everything except walls and see what’s under it? |
Then calculate how efficient the plan is:
Efficiency = net room area ÷ gross floor area × 100
Example: gross floor area 140 m², rooms added together 112 m². 112 ÷ 140 × 100 = 80%. In the small compact houses I check, usable room area commonly lands around 75 to 85% of gross. If yours comes in well below 70%, passages and thick walls are eating your money.
You are not accusing your architect of anything by checking. A professional should welcome a client who can read the drawing, and you will ask much better questions.
How to Pick a Tutorial, a Course or a Mentor
Free videos, paid courses and books all work if they pass the same four-question filter:
- Does it end with a complete, printed house plan, not a pile of isolated commands?
- Does it use layers from minute one?
- Does it teach in metric or in the unit system you will actually build in?
- Does it make you check your own numbers, as in the AREA test above?
If the answer to any of these is no, use it as supplementary material and follow the 8-week plan on your own drawing.
| Route | Cost | Speed | Biggest risk |
|---|---|---|---|
| Free video playlists | Free | Medium | Drifts into commands you don’t need |
| Paid structured course | Varies | Fast if it passes the filter | Paying for a toolbar tour |
| Book | Low | Slow | No one checks your work |
| Mentor or class | Varies | Fastest | Depends entirely on the mentor |
| This 8-week plan plus any one of the above | Low | Fast | Quitting in week three |
Week three is where most people quit, because the novelty is gone and the drawing isn’t pretty yet. Put the five sessions on your calendar before you begin, and tell one person you are doing this. It sounds soft, but it works better than any shortcut key.
AutoCAD, Revit or SketchUp: Which First?
| Software | What it is | When to learn it |
|---|---|---|
| AutoCAD | 2D drafting (and some 3D) | First. Most small-plot residential drawing and contractor exchange is still 2D DWG and PDF |
| Revit | Building information modelling | After you understand plans. It builds a 3D model that produces the plans |
| SketchUp | Fast 3D massing | Alongside, for showing a client how the house looks |
My advice: learn AutoCAD first because everything else makes more sense once you can read a plan. If your goal is to work in a large firm abroad, add Revit afterwards.
From Learner to Paid Work: The Honest Part
Learning to draw does not by itself make you the person who can sign a drawing for approval. In Nigeria, drawings submitted for approval are generally signed off by registered professionals: architects registered with ARCON, structural drawings by engineers registered with COREN, and planning work by town planners registered with TOPREC. In other countries the registration bodies differ, but the principle is the same. Your drawing skill is valuable, and it can make you a draftsperson on a professional’s team or a very informed client.
If you want to turn it into income, three legal and practical steps matter. First, move off the education licence once you charge money. Second, work with or under a registered professional for anything that goes to approval. Third, keep your drawings honest: show real dimensions, real setbacks and real areas.
The Scorecard: Are You Ready to Show Your Drawing?
This is the test I promised. Draw the 11,050 mm bungalow on the 50 × 100 ft plot, and score yourself honestly.
| Test | How to check | Points |
|---|---|---|
| Units correct | Total width reads 11,050 not 11.05 or 11,050,000 | 15 |
| Walls closed | Every room is a closed shape, AREA works on each | 15 |
| Layers used | At least 8 layers, nothing on layer 0 | 10 |
| Dimensions complete | Overall, wall-to-wall and openings dimensioned | 15 |
| Areas match | Sum of rooms agrees with your schedule within 0.5% | 10 |
| Scale proven | 5 m wall measures 50 mm on the printed 1:100 PDF | 15 |
| Clean file | Run PURGE, no stray blocks or xrefs | 10 |
| Half-plot redraw | Done in under half your week-2 time | 10 |
Scoring: 90 to 100 means you can show this to a contractor and take smaller drawing jobs under a professional. 75 to 89 means you are close, so fix the lowest score and redraw it. Below 75, repeat weeks 5 and 6, which is where most scores are lost. Whatever your score, you now know exactly what to fix, and that is more than most learners ever find out.
Mistakes That Waste the Most Time
| What you see | Likely cause | Fix |
|---|---|---|
| Sofa the size of a dot | Block drawn in metres, inserted into mm | Check block units, redraw in mm |
| HATCH won’t fill a room | Gap in the walls | Close with FILLET radius 0 or PEDIT Join |
| Text unreadable on print | Text height ignored scale | Text × scale denominator |
| Print not to scale | “Fit to paper” was on | Set an exact scale and verify with a ruler |
| Everything the same line weight | All on layer 0 | Use layers and assign line weights |
| Dimension doesn’t match reality | Someone typed over the number | Never overwrite dimension text |
| File is slow and huge | Junk blocks copied from the internet | PURGE and AUDIT |
| Lost an afternoon to a power cut | Autosave off | SAVETIME 5 and versioned file names |
Frequently Asked Questions
How long does it take to learn AutoCAD for house plans?
With 45 minutes a day, five days a week, expect about 8 weeks and 30 hours to draw a complete three-bedroom plan. Getting fast takes a few months of drawing different houses.
Can I learn AutoCAD on my own?
Yes, if you follow a project and check your own numbers. The danger is not difficulty, it is drifting through random commands with nobody verifying your work.
Is AutoCAD free?
Not generally, but eligible students and educators can get a free renewable one-year licence, and there is a free trial. The education licence is for learning, not paid work. caltech
Do I need to be good at drawing by hand?
No. You need to sketch boxes with sizes written on them. AutoCAD does the neat lines.
Do I need full AutoCAD or is LT enough?
For 2D house plans, LT is enough, because house plans do not need 3D modelling.
Can my own drawing be used for building approval?
Usually the drawing must be signed by a registered professional, so use your own as a clear brief and a way to check theirs.
What laptop do I need?
An ordinary modern laptop with an SSD and 8 to 16 GB of RAM works for 2D, but check Autodesk’s current requirements.
Should I use feet or metres?
Use whichever your builder and approval office use. Many people draw in millimetres and convert from feet, which keeps the numbers whole.
Can I learn on my phone?
Phones are fine for viewing drawings, but not for learning. The web version that used to be free is now behind a paid subscription, so plan on a laptop.
Where to Go From Here
Learning AutoCAD for house plans is not about memorising a toolbar. It is about knowing your plot, checking your numbers and drawing one house until a stranger can read it. If you do the 8 weeks, you will not only draw faster, you will see problems in a plan before they become blocks and cement.
Start with the plot test tonight: five minutes, two rectangles and one AREA command. Then browse the Plans Library for a house to redraw, and read more learning guides in Plan School. If you want a professional to draw, check or sign off on your project, the Services page explains how that works. The free plot size and block calculators are on the Homepage, so you can test your own plot numbers right now. Please read these also:
- How to Calculate Room Sizes Correctly (Formulas + Examples)
- Smart Nigerian Duplex Plans That Maximize Small Land (50×50, 50×75, 50×100 ft)
- 3 Bedroom House Plan With Dimensions in Meters
- Modern Flat Roof Bungalow Designs for Nigerian Homes: Plans, Design & Costs
- Will My Building Plan Be Approved in Nigeria? Check Your Score
Author
Massodih Okon is a Nigerian built-environment professional with academic and professional experience in urban and regional planning, geography, architectural design, Landscape Design, GIS and land development.
He holds a Master’s degree in Urban and Regional Planning from the University of Uyo and a first degree in Geography and Regional Planning.
Through MassodihPlans, he publishes practical guides on Nigerian house plans, building design, physical planning, site planning, development approval and residential construction. Read the full author profile →