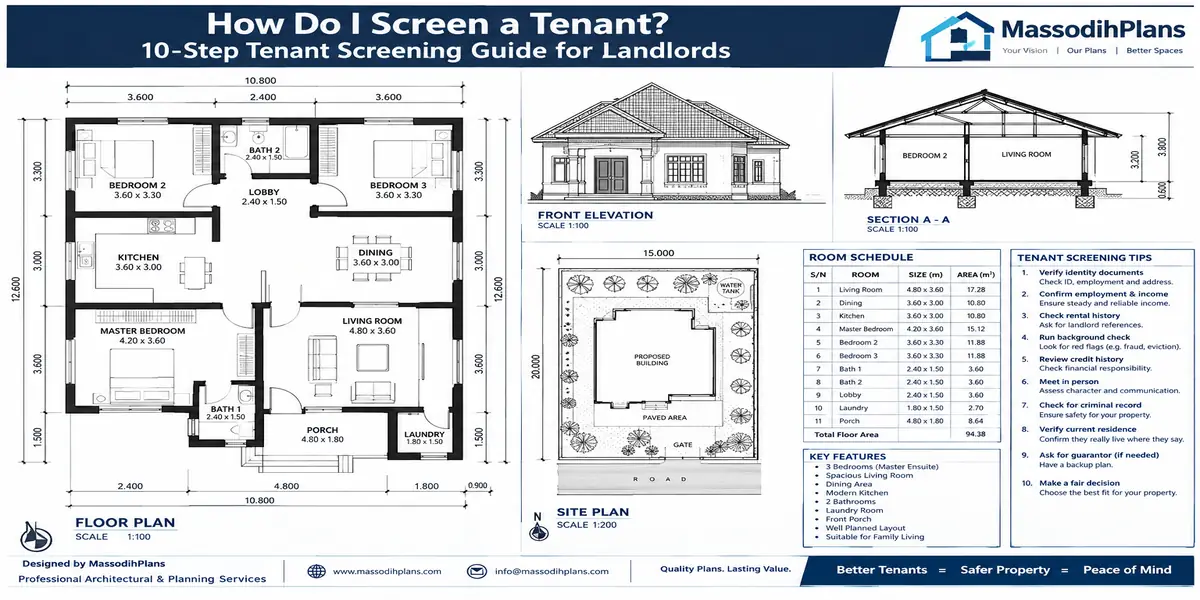
How Do I Screen a Tenant? 10-Step Tenant Screening and Verification Guide
Introduction to How Do I Screen a Tenant? 10-Step Tenant Screening and Verification Guide for Landlords
Let me tell you what actually happens when a landlord skips this step. Someone shows up with cash in hand, seems polite, pays the first year upfront, and everyone breathes a sigh of relief because the vacancy is finally filled. Eight months later, that same tenant hasn’t paid a service charge, has sublet two rooms without telling anyone, and the “employer” on their reference letter doesn’t pick up calls anymore. I’ve sat across the table from landlords in exactly that mess more times than I can count, and almost every single time, the warning signs were there from day one nobody just checked.
That’s what this guide is for. Not a checklist you skim and forget, but the actual process question by question, document by document that tells you who you’re really about to hand your keys to.
What Tenant Screening Actually Is (In Plain Language)
Tenant screening is the process of verifying that the person applying to rent your property is who they say they are, can genuinely afford the rent, has a track record of paying and behaving responsibly in past tenancies, and isn’t hiding something that will cost you money or peace of mind later. It’s not one action it’s a sequence of checks: application, identity verification, income and employment verification, credit history, background/criminal history where applicable, and reference calls, all cross-checked against each other for consistency.
The word “screening” matters here. You’re not trying to catch someone lying most applicants are honest. You’re building a consistent filter so the small number who aren’t don’t slip through because you were in a hurry to fill the vacancy.
Decide your screening criteria before you ever list the property, not after the first application lands on your desk. If you screen your first applicant one way and your fifth applicant a different way because you’re now desperate to fill the vacancy, you’ve already lost the consistency that makes screening useful and, in jurisdictions with fair housing protections, inconsistent screening is exactly what gets landlords into legal trouble.
Why This Step Costs You More to Skip Than to Do
A bad tenant doesn’t just cost you unpaid rent. It costs you legal fees, eviction proceedings that can take months, property damage repair, and often the most painful part the emotional and time cost of a dispute that follows you for the entire duration you’re trying to get your property back. Industry cost estimates place the damage from a single bad tenant between several thousand dollars in unpaid rent, legal fees, and repairs in developed rental markets and the equivalent disruption in a Nigerian context, measured in months of unpaid rent plus the cost and stress of recovering your property, is often just as severe relative to the income involved.
Compare that to what proper screening actually costs you: a few days of extra waiting, some phone calls, and where you use paid background/credit check services a modest fee that’s often passed to the applicant as part of the application process. The asymmetry is enormous. This is the section most people skip past to get to “the steps,” but understanding it is what makes you actually follow through on step 6 when you’re tired and just want to hand over the keys.
Step-by-Step: How to Screen a Tenant Properly
Step 1: Set Your Written Rental Criteria Before You Advertise
Decide, in writing, before you list the property: minimum income relative to rent (commonly 2.5–3 times the monthly rent in markets where this ratio is tracked), acceptable rental history (no unresolved disputes or evictions within a defined recent period), whether pets are allowed, and your minimum documentation requirements. Writing this down before you see a single applicant protects you from two things: making an unfair snap judgment about one applicant, and being accused of applying different standards to different applicants.
Step 2: Use a Complete Rental Application (Not a Verbal Agreement)
This is the foundation everything else is checked against. A proper rental application should collect:
- Full legal name and government-issued ID number
- Current and previous address history (at least 2–3 years)
- Current and previous landlord contact details
- Employer name, position, and length of employment
- Monthly income and proof source
- Number of intended occupants
- Emergency contact and next of kin
- Consent to verify the information provided, including credit and background checks where applicable
A signed, dated application isn’t paperwork for its own sake it’s the document you’ll be cross-checking every other verification step against, and it’s your proof of what the applicant actually told you if a dispute arises later.
Step 3: Verify Identity First, Before Anything Else
Before you even get to credit or employment, confirm the applicant is who their documents say they are. Match the photo ID to the person in front of you. Where formal identity verification systems are available (national ID databases, verified digital ID checks), use them. This single step catches more fraud than any other it’s shockingly common for rental fraud to start with a borrowed or fake identity document, and it’s the cheapest check to do properly.
Step 4: Run the Tenant Background Check
A tenant background check typically covers criminal history, prior eviction records, and sometimes civil court records. What you’re looking for isn’t a perfectly clean record on principle it’s patterns relevant to tenancy: repeated eviction filings, property-related disputes, or fraud-related offenses. In jurisdictions with “fair chance” housing protections, landlords are increasingly required to look at the nature, recency, and relevance of any criminal record individually rather than applying a blanket exclusion, so apply this check thoughtfully and consistently, not reflexively.
Step 5: Run the Tenant Credit Check
A credit check shows how an applicant has handled financial obligations historically missed payments, existing debt load, and overall financial reliability. In markets with an established credit bureau system, a minimum score threshold (commonly in the low-to-mid 600s as a baseline, higher for a stronger applicant pool) is a reasonable starting filter, but never the only factor someone with a thin credit file isn’t automatically a risk, especially younger renters or those newer to formal financial systems.
A credit check only tells you how someone handles debt, not whether they’ll respect your property or follow your house rules. Treat it as one input among several, never the single deciding factor a rejection based solely on a credit report can also trigger specific legal notice requirements in jurisdictions that regulate this, so know your local rules before you lean on this check alone.
Step 6: Verify Employment — Properly, Not Just by Reading the Letter
This is where most landlords get lazy, and it’s exactly where fraud concentrates. Don’t just accept an employment letter at face value:
- Call the employer directly, using a number you find independently (the company’s official switchboard or website), never a number written on the letter itself
- Confirm the applicant’s actual job title, length of employment, and whether the stated salary is plausible for that role
- Ask a general confirmation question rather than reading the applicant’s exact claimed figures back to the employer this catches coached or rehearsed answers
- For self-employed applicants, request recent bank statements or evidence of consistent income over several months rather than a single invoice or letter, which is easy to fabricate
Step 7: Verify Income Against Documents, Not Just Claims
Cross-check the stated income against pay slips, bank statement deposits, or tax records. Watch for round, suspiciously clean numbers on a bank statement that don’t match the transaction pattern of an actual salary account real salary deposits are rarely a perfectly round figure landing on exactly the same date with no other transaction history around it.
Step 8: Call Previous Landlords — the Real Ones
Ask for at least two previous landlord contacts, and specifically ask about payment punctuality, property condition at move-out, and whether they’d rent to this person again. Here’s the check almost nobody does: verify that the “landlord” you’re calling actually owns or manages the property in question, rather than being a friend recruited to give a good reference. A quick way to do this is asking a detail only the real property owner or manager would know or independently checking the property’s ownership or management records where available.
Step 9: Have an Actual Conversation
Beyond paperwork, talk to the applicant directly in person or by call. This isn’t about grilling them; it’s about giving them a chance to explain anything unusual in their file (a past eviction with a reasonable explanation, a gap in employment) and giving you a feel for whether their answers stay consistent with what’s on paper.
Step 10: Document Your Decision and Communicate It Properly
Whether you approve or decline, keep a written record of the decision and the reasoning behind it, applied consistently to every applicant. In jurisdictions where a decision is based on a credit or background report, a formal written notice of the basis for denial may be a legal requirement know this before you verbally reject someone over the phone.
Tenant Verification: The Cross-Checking Habit That Catches Almost Everything
Here’s the layer most screening guides mention in passing but never actually teach: verification isn’t a single step, it’s a habit of cross-referencing every document against every other document and every phone call. A fabricated application rarely survives three independent cross-checks, even if it survives one.
- Does the employer’s confirmed job title match what’s on the application?
- Does the income the employer confirms match the bank statement deposits?
- Does the previous landlord’s description of the tenancy match the applicant’s own account?
- Does the address history on the application match the address on the ID document and the bank statement?
Any single mismatch isn’t automatically disqualifying people genuinely have moved, changed jobs, or made an honest error filling out a form. But two or three mismatches in the same application is a pattern, and patterns are what you’re actually screening for.
Screening Tenants in Nigeria
Almost everything written about tenant screening online including everything you’ll find ranking at the top of search results right now assumes a market with formal credit bureaus, standardized background check companies, and a legal system built around Fair Housing statutes and FCRA-style consumer reporting law. That’s not the rental market most Nigerian landlords, or diaspora landlords renting out property back home, are actually operating in. Here’s what actually applies.
The Guarantor System Is Your Real Credit Check
In most Nigerian rental markets, a formal credit bureau check on an individual tenant is rarely part of the process most people simply don’t have a meaningful credit file in the way US or UK systems track one. What functions as the credit check here is the guarantor system: a guarantor, typically someone gainfully employed with a verifiable address and job, formally agrees to be responsible if the tenant defaults. Screening the guarantor is just as important as screening the tenant verify the guarantor’s employment and address exactly as you would the tenant’s, and confirm they understand they’re financially on the hook, not just providing a character reference.
NIN and BVN as Practical Identity Verification Tools
Where available, request the applicant’s National Identification Number (NIN) and, where appropriate, Bank Verification Number (BVN) details as part of identity verification these are far more reliable identity anchors in the Nigerian context than a photocopied ID card alone, since they’re tied to biometric data at the point of registration.
Before accepting a tenant, verify the applicant’s identity and carefully compare the details provided with a valid identification document. In Nigeria, landlords should understand what the National Identification Number (NIN) is and how it is used for identity verification.
Agent-Mediated Applications Need Their Own Layer of Scrutiny
A large share of Nigerian rentals are mediated through agents, and this introduces a risk almost no international guide addresses: an agent motivated by commission has an incentive to rush a weak application through rather than flag it. If you’re using an agent, insist on seeing the original documents yourself the applicant’s ID, the guarantor’s employment letter, the actual bank statements rather than relying solely on the agent’s summary or verbal assurance that “the person is okay.”
Watch for the “Full Year Upfront, No Questions” Trap
Nigeria’s dominant rent-payment culture (one to two years paid upfront) creates a specific screening blind spot: a large upfront payment feels like proof of reliability, but it tells you nothing about how the tenant will behave for the following 11 months, whether they’ll maintain the property, or whether they’re planning to sublet rooms without your knowledge. Screen exactly as thoroughly for a tenant paying two years upfront as you would for one paying monthly the upfront cash is not a substitute for verification.
Verify Land and Occupancy Intentions, Not Just the Tenant
For landlords renting out a duplex, flat, or self-contained unit built specifically for rental income, confirm during screening how many people will actually occupy the unit and whether the tenant intends to run a business (a shop, a small studio, a short-let arrangement) from a residential space this affects your service charge calculations, your utility planning, and in some cases your compliance with your property’s approved use under local planning regulations.
Written Tenancy Agreements Are Non-Negotiable, Not a Formality
A verbal agreement, common in informal rentals, leaves you with almost no recourse if a tenant defaults or damages the property. Insist on a written tenancy agreement stating rent amount, payment schedule, notice period, and responsibilities for repairs and maintenance signed by both the tenant and guarantor before handover, regardless of how trustworthy the applicant seems.
If you’re a diaspora landlord managing this from abroad through an agent, request the actual scanned documents ID, guarantor’s letter, bank statements sent directly to you, not just a verbal “all clear” from the agent. You can spot most red flags yourself in five minutes with the actual paperwork in front of you.
Red Flags Checklist: What Should Make You Slow Down
- Employer’s phone number only works when written exactly as given on the letter, and the person answering sounds unusually prepared for your call
- Bank statement deposits are suspiciously round numbers with no other transaction activity around them
- Applicant is unusually eager to skip reference checks or pay a large deposit “to speed things up”
- Previous landlord reference can’t describe specific details about the property or tenancy when asked
- Application details (address history, employment dates) don’t match across different documents
- Applicant pressures you to finalize before you’ve completed your standard checks, citing urgency
- Guarantor is reluctant to speak directly with you or hesitates when asked if they understand their financial responsibility
- Multiple people show up during viewing but only one name appears on the application
None of these alone is proof of a problem. Two or more together is when you slow down and dig deeper.
Screening Tools and Technology
In markets with formal credit infrastructure, digital screening platforms can pull a credit report, criminal background check, and eviction history in minutes through services connected to major credit bureaus, cutting a process that used to take days down to a same-day turnaround. If you’re managing multiple units, standardizing your application through a digital form also keeps your criteria consistent across every applicant automatically.
In the Nigerian context, where this infrastructure is thinner, the equivalent “technology” is a disciplined manual process: a standard application template you reuse for every applicant, a simple spreadsheet tracking verification calls made and documents received, and where you can access it identity verification through NIN lookup services. Consistency of process matters more than the sophistication of the tool.
Landlords should also handle applicants’ personal information responsibly and only collect information that is relevant to the screening process. For more information about personal-data processing in Nigeria, see the Nigeria Data Protection Act 2023 published by the Nigeria Data Protection Commission.
A Simple Scorecard to Make Your Decision Objective
Score each verified category from 0–2 (0 = failed/unverifiable, 1 = acceptable, 2 = strong) rather than making a single gut-feel decision:
- Identity verification: __
- Income-to-rent ratio met: __
- Employment verified directly: __
- Previous landlord reference (verified as genuine): __
- Guarantor employment and address verified: __
- Application consistency across documents: __
- Credit/background check (where applicable): __
A total score in the lower range signals you should either decline or request additional documentation before proceeding and having this on paper protects you if an applicant later questions why they weren’t approved.
Common Mistakes Landlords Make When Screening Tenants
- Skipping verification because the applicant “seems nice” or came recommended by someone you trust
- Accepting a large upfront payment as a substitute for proper checks
- Calling the number written on a reference letter instead of an independently sourced number
- Applying stricter scrutiny to some applicants than others without a written, consistent standard
- Not documenting the reasoning behind approval or denial decisions
- Treating the guarantor as a formality instead of screening them with the same rigor as the tenant
Frequently Asked Questions
What is the difference between a tenant background check and a tenant credit check?
A background check typically covers criminal history, prior evictions, and identity verification. A credit check specifically looks at financial history debt load, payment reliability, and credit score where a formal credit system exists. They answer different questions and both matter.
How do I verify a tenant’s employment without seeming intrusive?
Ask for consent on the application form itself, then call the employer through an independently sourced number to confirm job title, tenure, and general salary range a direct, professional confirmation call is standard practice, not an intrusion, and most legitimate employers are used to fielding these calls.
What if a tenant doesn’t have formal payslips or a credit file?
Request bank statements showing consistent income deposits over several months, and for self-employed or informally employed applicants, rely more heavily on a strong guarantor with verifiable formal employment as the financial backstop.
How long should tenant screening take?
A thorough process typically takes a few days to about a week, allowing time for reference calls and document verification. Rushing this to fill a vacancy faster is almost always where the mistakes that cost the most happen.
Is it okay to reject a tenant based on a bad feeling alone?
No base decisions on your written, consistent screening criteria and documented findings, not an unverifiable impression. This protects both you and the applicant, and in jurisdictions with fair housing protections, it’s often a legal requirement, not just good practice.
Finally
Screening a tenant properly isn’t about being suspicious of everyone who applies it’s about giving yourself the information to make a decision you can actually stand behind, whether that decision is yes or no. Most of the landlords I’ve watched go through a bad tenancy didn’t lack the ability to screen properly; they skipped a step because they were in a hurry, and the one step they skipped was always the one that would have caught the problem.
Do the calls. Check the guarantor as hard as the tenant. Get it in writing. That combination solves more rental disasters before they start than any amount of regret afterward ever fixes.
If you’re building or managing rental property and want the design itself to support easier, more reliable tenancies clear unit separation, service metering, defined common areas our Plans Library has layouts designed with rental management in mind, and our Services page covers how we support landlords beyond just design. Visit Plan School if you’re planning a purpose-built rental property and want to understand the layout decisions that make screening and managing tenants easier down the line. You can also explore more property and building guides on our Homepage.
- How Do I Find Good Tenants? Complete Tenant Screening for Property Owners
- What Do I Do When My Tenant Doesn’t Pay Rent? Landlord Rent Recovery Tips
- How Do I Collect Rent From Tenants? Complete Guide for Property Owners
- How Much Does a Property Manager Charge? Property Management Fees Explained
- How Do I Find a Good Property Manager? Guide for Rental Properties
- How Do I Manage My Property? Complete Property Management Guide for Owners
- House and Home: Types of Houses, Homes, House Styles, Home Designs, and Modern House Designs
Author
Massodih Okon is a Nigerian built-environment professional with academic and professional experience in urban and regional planning, geography, architectural design, Landscape Design, GIS and land development.
He holds a Master’s degree in Urban and Regional Planning from the University of Uyo and a first degree in Geography and Regional Planning.
Through MassodihPlans, he publishes practical guides on Nigerian house plans, building design, physical planning, site planning, development approval and residential construction. Read the full author profile →