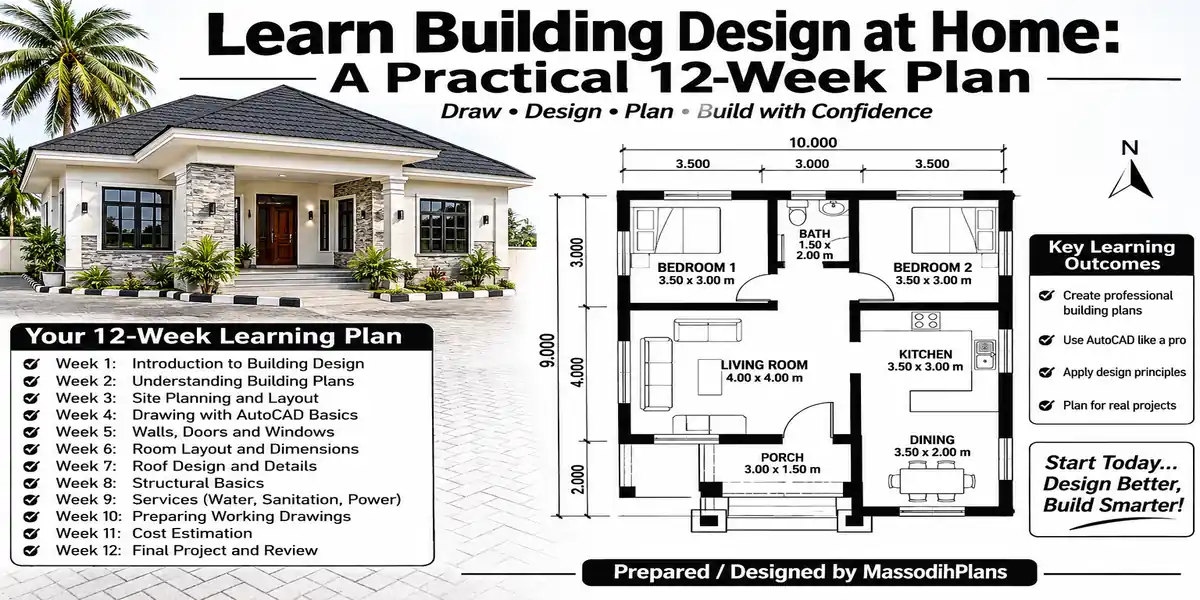
Easy Way to Learn Building Design From Home (12-Week Plan)
The easy way to learn building design from home is to learn it in a fixed order. First measure and draw a room you already live in. Then learn scale and room sizes on graph paper. And then move to free drawing software. Then design one small house on a real plot with real setbacks. Finally, have a registered professional check your work. At about 8 hours a week, that is 12 weeks, and at the end you can draw a complete small-plot house plan that a builder or an architect can read without asking you “what does this mean?”
Now the part that matters more than the order. Most people who try this quit around week three, and it is almost never because the work is hard. It is because somebody told them to open software on day one. In this post I will show you exactly where that trap is, what to do instead, and how to test yourself at the end so you know whether you have learned the skill or only watched videos. Stay until the last section. That is where I explain what you are legally and safely allowed to do with this skill, and it will change how you use everything before it.
The Five Steps at a Glance
Here is the whole plan on one table, so you can see where you are going before we walk it.
| Step | Weeks | What you learn | Tools | Hours | Proof you are done |
|---|---|---|---|---|---|
| 1. Measure | 1–2 | Taking true measurements, checking a room is square | Tape, notebook | 16 | A correct drawing of one room |
| 2. Scale | 3–4 | Reading and drawing to scale | Graph paper, ruler | 16 | Your whole home drawn at 1:50 |
| 3. Room sizes | 5–6 | Areas, circulation, layout logic | Graph paper | 16 | A 3-bedroom layout on paper |
| 4. Software | 7–9 | Drawing at real size on screen | Free 2D CAD | 24 | Your layout redrawn digitally |
| 5. Real plot | 10–12 | Setbacks, plot coverage, a full plan | Everything above | 24 | A complete plan for a 12 m × 24 m plot |
| Total | 12 | 96 |
The hours come from simple arithmetic: 16 + 16 + 16 + 24 + 24 = 96. Your own pace changes the calendar, not the content.
| Hours per week | Weeks needed (96 ÷ hours) |
|---|---|
| 4 | 24 |
| 6 | 16 |
| 8 | 12 |
| 12 | 8 |
If you can only give 4 hours a week, you are not slower or weaker. You just need about half a year instead of three months. Keep going, because the order matters far more than the speed.
First, Know What You Are Learning (and What You Are Not)
Before the steps, let us agree on words, because this topic confuses people. Building design in this guide means deciding what rooms a building has, how big they are, how they connect, where the doors and windows go, and how the whole building sits on its plot. That is what you can learn at home.
It is not structural engineering, which decides the size of foundations, beams and columns. It is also not the legal title “architect,” which in most countries is protected and needs formal training and registration. I will come back to this line at the end, because it decides how you can use your new skill. For now, just hold this thought: learning to design is one thing, and signing off a building for approval is another.
And why small plots? Because a 12 m × 24 m plot is the best classroom there is. On a big piece of land you can hide your mistakes behind empty space. On a small plot every 0.5 m counts, so every decision you learn to make is a real one. That is also why everything on this site is built around small-plot house plans.
What You Need at Home
You need less than you think. Here is the starter kit:
- A 5 m tape measure
- Graph paper (A3 if you can find it; A4 works for rooms)
- A sharp pencil, an eraser and a 30 cm ruler
- A notebook for measurements
- A phone or laptop, but not until week 7
For software, start with a free 2D CAD program. Open-source options like LibreCAD and FreeCAD cost nothing, and Sweet Home 3D is a gentle free option for visualising layouts. Autodesk has historically offered free student licences for AutoCAD and Revit, but offers and terms change, so check the current rules before you rely on one. Whichever you pick, stay with it for the full 12 weeks. Switching programs every time a new video appears is one of the quietest ways to lose a month.
TRY THIS: For the first six weeks you need paper only. That means no data bundle and no electricity problem. You can learn the thinking skill, which is the hard part, even during a power cut.
Step 1 (Weeks 1–2): Measure a Room You Already Know
Pick the room you know best, perhaps your bedroom or your living room. Measure it as if you were going to explain it to a stranger over the phone. And Measure each wall twice and write the numbers down. Measure from the inside faces of the walls, and note door widths, window widths, and how far each window sits from the nearest corner.
Take a sample living room. Say you get 4.50 m by 5.10 m.
- Area = length × width = 4.50 × 5.10 = 22.95 m²
- Perimeter = 2 × (4.50 + 5.10) = 19.20 m
So far, easy. Now comes the trick most beginners never learn, and it solves the most common complaint I hear: “my measurements don’t add up.” Check whether the room is truly square by measuring both diagonals. For a perfect rectangle, the diagonal is:
Diagonal = √(length² + width²)
= √(4.50² + 5.10²) = √(20.25 + 26.01) = √46.26 ≈ 6.80 m
Now measure the two real diagonals with your tape. If both read about 6.80 m, the room is square. If one reads 6.80 m and the other 6.86 m, the room is out of square by about 6 cm. That is normal in real buildings, since walls are rarely perfect. Draw it with the average, write a note, and move on. The point is that you now know why your numbers disagree, instead of thinking you measured wrongly.
Do this for three rooms. By the end of week 2 you should have a notebook page per room and a feel for how big 3.6 m or 4.5 m actually is when you stand in it. That feeling is the foundation of everything that follows.
Where Most People Quit (Week 3), and How to Step Over It
Week 3 is when you start drawing to scale, and this is where the quiet quitting begins. Nothing feels finished. You draw lines, erase lines, and the page looks like homework. After two weeks of effort, you have nothing to show anyone.
Here is the fix, and it is simple: end every session with one finished page. A finished page has a title, a scale written on it, dimensions on it, and your name. It does not need to be beautiful. It needs to be complete enough that you could hand it to a friend and they would understand the room. Finished pages are proof of progress, and proof is what keeps you going when motivation drops.
Now let us do the scale, because it is the skill that makes the pages possible.
Step 2 (Weeks 3–4): Learn Scale on Graph Paper
A scale is only a promise: one unit on paper stands for a fixed number of units in real life. The formula you need is:
Drawing length = real length ÷ scale number
Using our living room (4.50 m × 5.10 m, which is 4,500 mm × 5,100 mm):
| Scale | Drawing width | Drawing depth |
|---|---|---|
| 1:50 | 4,500 ÷ 50 = 90 mm | 5,100 ÷ 50 = 102 mm |
| 1:100 | 4,500 ÷ 100 = 45 mm | 5,100 ÷ 100 = 51 mm |
For house plans, 1:50 is the friendliest scale to learn on, and 1:100 is common for whole-plot drawings. A 12 m × 24 m plot at 1:100 is only 120 mm × 240 mm, so it fits easily on A4.
Next, graph paper makes scale easy, because each little square already has a fixed size. The formula is:
Metres per square = square size (mm) × scale number ÷ 1,000
| Grid square | Scale | Each square equals |
|---|---|---|
| 5 mm | 1:50 | 5 × 50 ÷ 1,000 = 0.25 m |
| 10 mm | 1:50 | 10 × 50 ÷ 1,000 = 0.50 m |
| 5 mm | 1:100 | 5 × 100 ÷ 1,000 = 0.50 m |
My favourite beginner setup is a 5 mm grid at 1:50. Every square is 0.25 m, so you can count your way across a room. Even better, a 225 mm (9-inch) block wall is almost exactly one square thick (0.225 m against 0.25 m), so you can draw walls without thinking about it.
By the end of week 4, redraw your whole home at 1:50. Label every room, add door and window openings, and put overall dimensions on the outside. This is your first real floor plan, and it is of a building you already understand, which makes mistakes easy to spot.
WATCH OUT: Never “eyeball” a dimension on a plan. If a number is not written on the drawing, a builder will guess it, and a guess on site is how a 3.6 m bedroom becomes a 3.2 m one.
Step 3 (Weeks 5–6): Learn Room Sizes and Layout
Now that you can measure and draw to scale, you are ready to start designing instead of copying. Let us design a simple 3-bedroom bungalow, and let the numbers guide us.
First, choose sensible starting sizes for each room.
| Room | Size (m) | Area (m²) |
|---|---|---|
| Living and dining | 5.0 × 4.5 | 22.50 |
| Kitchen | 3.0 × 3.3 | 9.90 |
| Master bedroom | 3.6 × 4.2 | 15.12 |
| Master en-suite | 1.8 × 2.4 | 4.32 |
| Bedroom 2 | 3.3 × 3.6 | 11.88 |
| Bedroom 3 | 3.3 × 3.6 | 11.88 |
| Common bathroom | 1.8 × 2.4 | 4.32 |
| Net room area | 79.92 |
But rooms are not the whole building. You also pay for walls and corridors, so you need a gross footprint:
Gross footprint = net room area ÷ efficiency
Efficiency is the share of the building that ends up as usable rooms. In compact, simple plans I usually start with a guess between 0.75 and 0.85. Taking 0.80:
79.92 ÷ 0.80 = 99.9 m², so plan for about 100 m².
That 0.80 is a starting guess, not a law. Once you draw the plan, you will measure the real efficiency and replace the guess, and over time you will learn to design plans that hit 0.85 without feeling tight.
Here are two checks that save you from classic mistakes:
Bed check. A king bed is about 1.8 m wide. Add 0.9 m of walking space on each side: 1.8 + 0.9 + 0.9 = 3.6 m, which is exactly why our master bedroom is 3.6 m wide. A double bed of 1.5 m in a 3.3 m room works the same way: 1.5 + 0.9 + 0.9 = 3.3 m.
Wet-wall check. Put the kitchen, en-suite and common bathroom so they share plumbing walls where possible. It shortens pipes, lowers cost, and reduces the number of places that can leak.
Also check your local rules for minimum habitable room sizes, since some authorities set them. If you want the full logic of laying out rooms in a tight space, [Plan School] covers it in depth, and the principles carry over to every country.
By the end of week 6, you should have a full 3-bedroom layout on graph paper, with every room labelled, every dimension written, and every door swing drawn. Stand back and look at it. If you can walk from the front door to every room in your head without hitting a wall or a wardrobe, you are ready for the screen.
Step 4 (Weeks 7–9): Move to Free Drawing Software
At last, the software. Because you have spent six weeks on paper, you will find it far easier than the people who started here. You already know what you are trying to draw.
There is one concept that confuses almost every beginner, so let us settle it now. In CAD, you draw at real size (1:1) and apply the scale only when you print. If the room is 4.5 m, you draw a line 4,500 units long. The software does the shrinking later. This is the opposite of paper, and it is the reason scale felt hard before.
Next comes the second trap, and I call it the week-eight wall. You open the software, see two hundred buttons, and feel lost. The cure is to refuse to learn them all. You need about twelve commands:
- Line / Polyline
- Offset (this draws wall thickness quickly)
- Trim
- Extend
- Move
- Copy
- Rotate
- Mirror
- Layers
- Dimension
- Text
- Print / Plot with scale
With only those, you can draw a complete house plan. Everything else is a shortcut you can pick up later.
Your exercise for these three weeks is to redraw your week-6 layout digitally. Put walls on one layer, doors and windows on another, dimensions on a third, and text on a fourth. Print it at 1:50 and compare it with your paper version. If a printed 4.5 m room measures 90 mm with a ruler, you have understood scale.
TRY THIS: Draw your wall centre lines first, then use Offset to give them thickness. A 225 mm wall is an offset of 112.5 mm on each side of the centre line. Beginners who draw each wall line by hand end up with gaps and overlaps.
Step 5 (Weeks 10–12): Design a House for a Real Small Plot
This is where the learning becomes real. A plot has edges, and the rules at those edges decide what you can build. Let us work with a 12 m × 24 m plot, which is common in many Nigerian layouts and similar to small suburban lots in many other countries.
Plot area = 12 × 24 = 288 m²
Next, apply setbacks, which are the minimum distances between your building and the boundaries. These numbers are for teaching only. Your own planning authority sets the real ones, and you must check them. Let us say front 6 m, rear 3 m, and each side 1.5 m.
- Buildable width = 12 − 1.5 − 1.5 = 9 m
- Buildable depth = 24 − 6 − 3 = 15 m
- Buildable envelope = 9 × 15 = 135 m²
Many places also cap how much of the plot a building may cover. Suppose the cap is 50%:
- Coverage cap = 288 × 0.50 = 144 m²
Now here is the part that surprises people. You must satisfy both rules, so:
Maximum footprint = the smaller of (envelope, coverage cap) = min(135, 144) = 135 m²
The setbacks, not the coverage cap, are the limit here. Many beginners only check the percentage and are shocked later.
Does our 100 m² bungalow fit? Yes, and by a good margin.
- Footprint 100 m² is less than 135 m² ✔
- Coverage = 100 ÷ 288 = 34.7%, under the 50% cap ✔
- A rectangle of 8.0 m × 12.5 m = 100 m² fits inside the 9 m × 15 m envelope ✔
That leaves about 1 m of width and 2.5 m of depth for a porch, steps, or a gap that makes construction easier. For now, finish these sheets:
- Site plan: plot boundary, setbacks, building outline and gate
- Floor plan: all rooms, walls, doors, windows and dimensions
- Front elevation: the building seen from the street
- One section: a cut through the house showing floor-to-ceiling height
- Door and window schedule: a list of every opening with its size
When all five are done, you have what most beginners never produce: a complete, consistent set. If you want to see how a professional set for a small plot is organised, our [Plans Library] has examples you can compare against your own.
How to Test Yourself Honestly
Watching videos feels like learning. Drawing something that holds together is learning. So let us check which one you did. Try these eight tests on your week-12 plan:
- Do the room dimensions add up to the overall building dimensions, with wall thicknesses included?
- Is every room labelled with its size and area?
- Does every bedroom pass the bed check (bed width + walking space on both sides)?
- Can every door open fully without hitting a wall, a bed, or another door?
- Does the building sit inside the buildable envelope with every setback visible on the site plan?
- Is the scale written on every sheet, and do the printed lengths match it?
- Is there a path from the gate to the front door that does not cross the building?
- Could a stranger understand the plan without your help?
If you can say yes to at least seven of eight, you have learned the skill. If not, do not feel bad. Go back to the step where the failed test belongs, repeat it once, and test again. This is the honest part of learning, and it is where real ability shows up.
How to Choose Free Lessons Without Wasting Weeks
The internet is full of free building design lessons, and that is both a gift and a problem. Free online resources, such as video tutorials, give beginners a no-cost way to pick up the basics before they commit to formal training. The catch is choosing well. Use this filter: nobledesktop
- Does the teacher draw a complete plan from start to finish, or only show tools?
- Do they write dimensions on every drawing?
- Do they use metres (or a unit you can convert) and say which scale they are using?
- Is the lesson about a small, realistic building, instead of a mansion that cannot exist on your plot?
- Can you copy the exercise on paper first?
If a lesson never mentions scale or dimensions, skip it. Three finished lessons from a good teacher beat thirty half-watched ones from a famous one.
Learning When Power and Data Are Unreliable
Here is a real problem that almost no guide mentions. In many parts of Nigeria, and in plenty of other countries, electricity cuts and data costs can wreck a study plan. So plan for them instead of fighting them.
| Task | Needs power? | Needs internet? | When to do it |
|---|---|---|---|
| Measuring rooms | No | No | Daylight, any time |
| Graph paper drawing | No | No | Any time, even during a power cut |
| Watching a lesson | Yes (battery) | Yes | Download on Wi-Fi or a cheap data window, watch offline |
| CAD practice | Yes | No | Charge the laptop first and work in 90-minute blocks |
| Printing and checking | Yes | No | Batch it once a week |
The idea is simple: schedule your paper weeks (1–6) for the times you cannot count on power, and keep the electrical weeks (7–12) to hours you control. Save your drawing every few minutes. A lost hour of CAD work on a laptop that died is the fastest way to hate this subject.
If You Are Reading From Outside Nigeria
Everything above works anywhere, because rooms, scale and plot rules are universal ideas. Only the units and the paperwork change.
Quick conversions: 1 m = 3.281 ft and 1 m² = 10.764 ft². So our 79.92 m² of rooms is about 860 ft², and the 100 m² footprint is about 1,076 ft².
| Where | Units you will meet | Common drawing scales | Who usually submits plans for approval |
|---|---|---|---|
| Nigeria | Metres (feet in speech) | 1:50, 1:100 | A registered professional |
| USA | Feet and inches | ¼” = 1′-0″ (≈ 1:48) | Often a licensed designer or architect, varies by state |
| UK | Metres | 1:50, 1:100 | Often anyone for planning drawings; building regulations add rules |
| Canada | Metres, with feet common | 1:50, 1:100 | Varies by province |
| Germany | Metres | 1:100 typical | Usually an authorised designer |
| Australia | Metres | 1:100 | Often a registered designer or architect |
| UAE | Metres | 1:100 | Registered consultants via the authority |
| Singapore | Metres | 1:100 | A qualified person |
Please treat the last column as a pointer, not as legal advice. Rules change, and they differ by city and by building type, so confirm with your local authority before you rely on any of it.
What You Can and Cannot Do With This Skill
Now we reach the part I promised you at the start.
After 12 weeks, you can draw your own concept plans, test whether an idea fits a plot, read a professional’s drawings, and spot obvious errors before money is spent. You can also talk to an architect as a client who understands the page, and that alone saves many people thousands.
What you cannot do is replace the professionals the law and common sense require. Foundations, beams and columns must be designed by a qualified structural engineer. In most places, plans submitted for approval must come from someone registered to do so. In Nigeria, that means a registered professional, and architects are registered by their professional council. So your self-taught plan is a strong starting point, but it is not a substitute for a professional’s review and signature.
| You can do at home | Needs a registered professional |
|---|---|
| Measure and draw existing buildings | Structural design of foundations, beams, slabs |
| Design a concept layout for a plot | Signing and stamping drawings for approval |
| Check room sizes, setbacks and coverage | Using the title “architect” |
| Understand and question professional drawings | Safety-critical decisions (fire, load, soil) |
Does that mean the skill is worth less? No. It means the skill is aimed at the right target. Use it to arrive at the architect’s office with a clear brief, a plan that already fits your plot, and the confidence to ask good questions. If you want a professional to take your concept further, our [Services] page explains how we do that. And if you are thinking about a drawing career, remember that three finished, well-checked plans in a portfolio say more than thirty certificates.
WATCH OUT: Never build from your own drawing alone. Before anything is built, a qualified structural engineer must design the structure, and your local authority must approve the plan. It protects your money, your family and your neighbours.
Seven Mistakes That Slow Learners Down
- Opening software on day one. Paper first. Software is only a faster pencil.
- Skipping the measuring step. If you cannot measure a real room, you will not trust numbers on a drawing.
- Drawing without dimensions. A plan without numbers is a picture.
- Copying beautiful plans without checking sizes. A pretty layout with 2.4 m bedrooms is not pretty to live in.
- Ignoring setbacks until the end. Start with the boundary, not the rooms.
- Changing software every week. Pick one and stay.
- Learning alone with no feedback. Show your plan to someone who understands buildings, at least once a month.
Frequently Asked Questions
Can I learn building design with no experience?
Yes. This plan assumes none. You only need to be able to add, multiply, divide, and use one square root, and every formula you need is in this post.
How long does it really take?
About 12 weeks at 8 hours a week gets you to your first complete small-plot plan. Confidence takes longer, usually several months of drawing more plans.
Do I need a laptop to start?
No. The first six weeks are paper only. Buy or borrow a laptop when you reach week 7.
What is the best software for beginners?
Any free 2D CAD program is enough to learn the thinking. Pick one, learn the twelve commands, and stay with it.
Can I become an architect by learning at home?
You can learn the design skill at home. The title “architect” is normally protected and needs formal education and registration, so check the rules in your country.
Can I submit my own drawings for building approval?
It depends on where you live and the type of building. In many places, including Nigeria, approval drawings usually need to come from a registered professional, so confirm with your local authority.
Is this useful for small plots specifically?
Very. Small plots punish waste, so every habit in this plan (measuring, checking setbacks, testing room sizes) pays off fastest there.
Finally
Learning building design from home is not about talent or fancy software. It is about doing the steps in the right order: measure what you know, draw it to scale, design rooms with real numbers, move to the screen, and finally test your thinking on a real plot. Do that, and in 12 weeks you will look at any house plan and understand it, and that is a skill you will carry for life, whichever country you build in.
Start this week. Grab a tape measure and measure one room. Then, when you want to compare your plan with professional work, browse our Plans Library for small-plot house plans, learn the next layer of room planning in Plan School, or get help with your own project through our Services. You can also find more building design and planning guides on our Homepage.
Massodih Okon is a Nigerian built-environment professional with academic and professional experience in urban and regional planning, geography, architectural design, Landscape Design, GIS and land development.
He holds a Master’s degree in Urban and Regional Planning from the University of Uyo and a first degree in Geography and Regional Planning.
Through MassodihPlans, he publishes practical guides on Nigerian house plans, building design, physical planning, site planning, development approval and residential construction. Read the full author profile →